
The Underrated North Carolina Herb You Need To Cut And Dry Before Summer’s Heat Fades This Fall
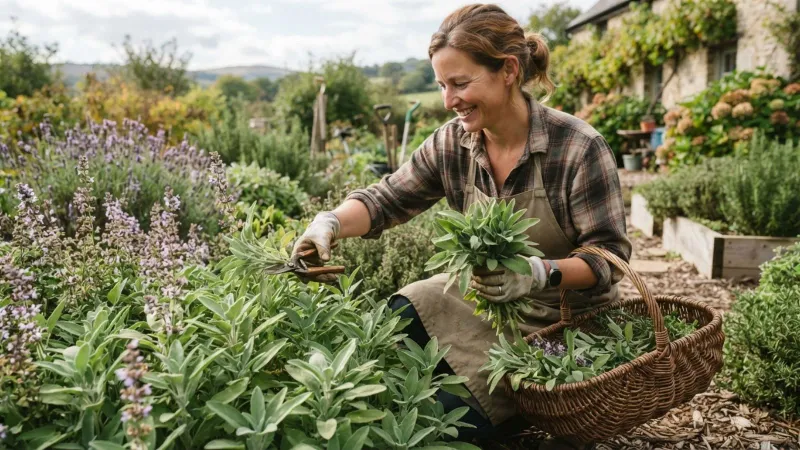
Tucked into herb gardens across North Carolina, common sage is one of those plants that quietly earns its keep all season long, then gets overlooked right when it matters most. As temperatures start to ease and the growing season winds down, there is a narrow window to take a selective harvest and hang those gray-green leaves to dry before cold weather arrives.
Miss it, and your kitchen goes without a homegrown seasoning that makes fall and winter cooking noticeably better. Getting the timing right, though, depends less on the calendar and more on where you garden in North Carolina.
Identify the herb as common sage before you harvest
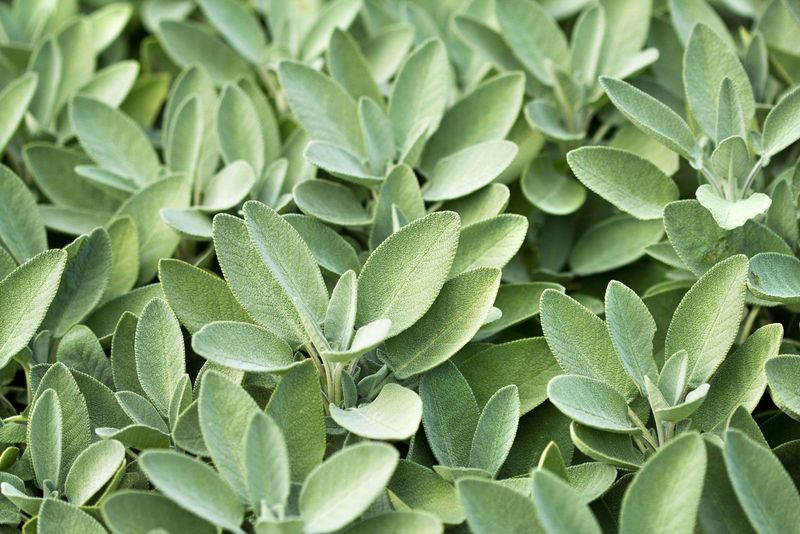
Not every plant called “sage” in a garden center is the same thing. The herb worth harvesting for your kitchen is common or garden sage, known botanically as Salvia officinalis.
Its leaves are the giveaway: oval, slightly wrinkled, covered in fine hairs that give them a soft, fuzzy texture, and a gray-green color that stands out from most other herbs in the garden. When it blooms, the flower spikes run from bluish-lavender to pinkish-lavender, depending on the cultivar.
Salvia is a large genus, and that matters for North Carolina gardeners who may have ornamental salvias growing nearby. Some of those ornamental varieties have inferior culinary flavor, and not every Salvia species is suited to the kitchen.
Before you cut anything to dry, confirm you are working with common sage as described in the NC State Extension Gardener Plant Toolbox, not an ornamental relative that happens to share the common name.
Common sage grows well across North Carolina, including the Coastal Plain, Piedmont, and Mountains, when given a spot with full sun and soil that drains freely. It is a semi-woody perennial, so established plants come back each year and build up a woody base over time.
One thing worth knowing: despite its comfort in North Carolina gardens, common sage is native to the Mediterranean region and was introduced to the United States. Framing it as a native plant would be inaccurate.
For the purposes of this article, think of common sage as a culinary seasoning plant, not a home medicine or a native wildlife habitat plant. Harvest only from established plants that have enough healthy, leafy growth to continue developing after you cut.
First-year plants are still finding their footing and need only a light harvest so they can build strength before winter.
Use your local freeze window instead of a statewide deadline
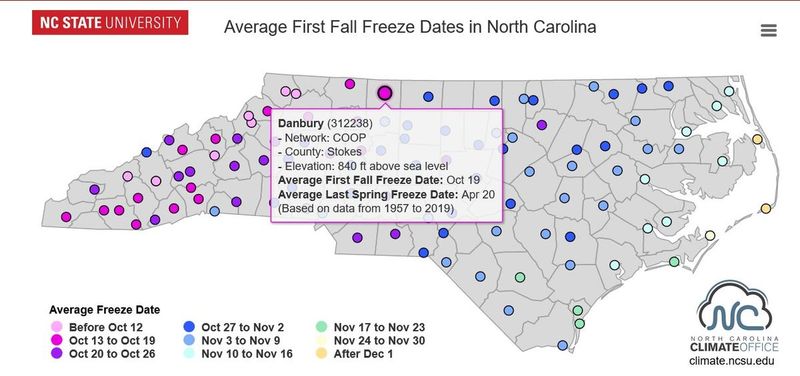
One of the most common mistakes with late-season herb harvesting is treating a single calendar date as though it applies to every garden in the state. North Carolina stretches from sea-level coastal areas to mountain elevations above 6,000 feet, and first fall freeze dates vary widely across that range.
A date that works as a rough guide in Asheville could be weeks off for a gardener in Wilmington or Raleigh.
NC State’s winterizing guidance for herb gardens explains that late heavy pruning can push tender new growth that simply does not have enough time to harden before cold weather arrives. That is the core risk.
When you cut sage hard late in the season, the plant responds by sending out soft, fresh shoots. Those shoots are far more vulnerable to frost damage than the mature growth they replaced.
As a general rule of thumb, NC State recommends stopping substantial herb cutting about one month before your local frost date. Treating four to six weeks as a cautious working interval is reasonable, but it is a guideline, not a precise biological rule that applies equally to every plant, location, or weather pattern.
A mild fall could give you more flexibility; an early cold snap could make even four weeks feel tight.
For western North Carolina specifically, NC State’s harvesting and preserving guidance points to early September as the time to finish any severe sage cutting in that region. That is a regional example based on earlier freeze risk at higher elevations, not a statewide instruction.
Gardeners in the Piedmont and Coastal Plain face later and more variable first-freeze dates and should plan their final substantial harvest accordingly.
The best tool for this is the NC State Climate Office Freeze Date Explorer, which lets you look up freeze probabilities for your specific location. Use it to find your local first-freeze window, then count back four to six weeks as a conservative starting point for your final harvest.
Keep in mind that a light frost and a hard freeze are different events, and sage can sometimes tolerate a brief light frost while severe cold is another matter entirely.
The goal of this timing is not to lock in a specific date but to avoid the situation where you prune heavily and the plant pushes new growth it cannot protect before winter sets in. A selective, moderate cut well before your local freeze window is a safer approach than waiting for a single calendar deadline.
Make a conservative cut while the foliage remains healthy
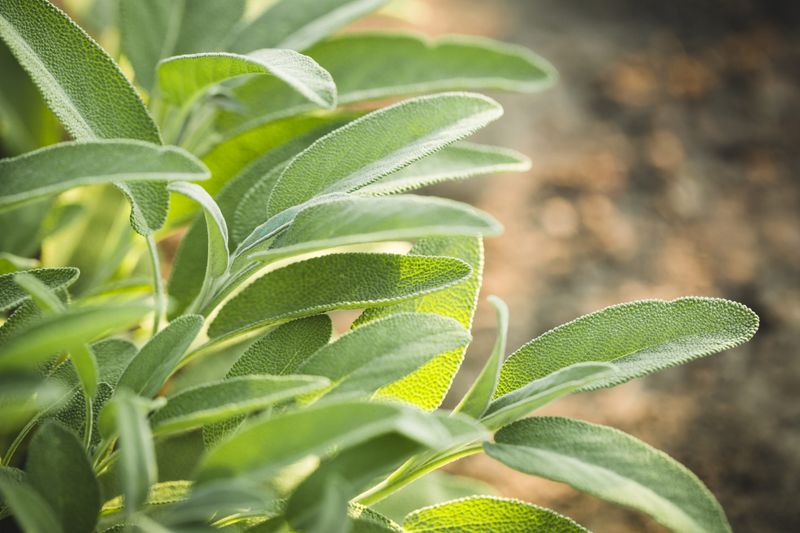
Practical harvesting of sage starts with choosing the right material. Look for stems that carry healthy, undamaged leaves with good color and no signs of disease, wilting, or insect damage.
Those are the stems worth cutting. Anything that looks stressed, yellowed, or damaged can be removed and discarded, but it is not worth drying.
Morning is the preferred time to cut, and the reason is straightforward. NC State’s harvesting and preserving guidance recommends working after the dew has dried but before the day’s heat builds.
Foliage cut in the cool of the morning starts the drying process in better condition than stems cut during the heat of the afternoon.
Harvesting before the plant flowers is often cited as a culinary-quality preference, and there is good reason for it. Flowering can affect leaf quality or shift the flavor profile.
That said, it is not an absolute rule that renders post-flowering leaves useless. Sage leaves remain usable after flowering; the before-flowering guidance is about getting foliage at its best, not about a hard cutoff point.
If your sage has already flowered this season, the leaves are still worth harvesting and drying.
For late-season cuts, the amount you take matters as much as the timing. NC State’s general herb harvesting guidance notes that up to 75 percent of current-season growth may be taken at one time, but that figure does not make it a sensible target for sage heading into fall.
The winterizing guidance supports a more conservative approach for late-season cuts. Heavy or repeated cutting late in the season is what you want to avoid, because it is the combination of significant pruning and close proximity to cold weather that creates the most risk for the plant.
First-year sage plants need extra restraint. A plant that went into the ground this spring is still establishing its root system, and an aggressive late-summer cut can set it back significantly.
Take only a small amount from first-year plants and leave the bulk of the growth in place. For older, established plants, NC State notes that you should avoid cutting into the mature woody base of the stems, because those woody sections rarely produce new growth.
Keep your cuts on the current season’s leafy growth and leave the woody structure alone.
Remove dirt without trapping moisture in the leaves
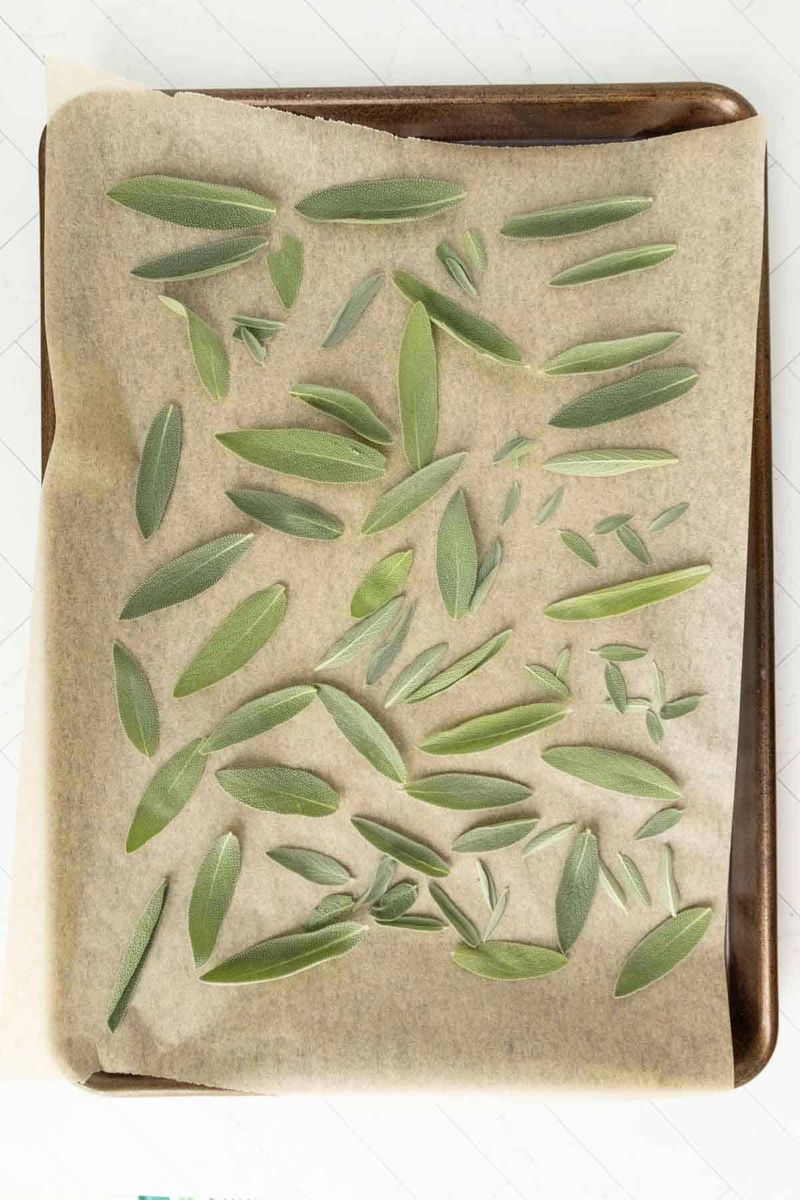
Once you bring the cuttings inside, take a few minutes to look them over before you do anything else. Spread them on a clean surface and go through the stems one by one.
Remove any leaves that look damaged, discolored, or obviously past their prime. Those will not improve during drying and can introduce problems into an otherwise clean batch.
If the foliage looks clean and was harvested from a spot that does not collect a lot of dust or soil splash, you may not need to wash it at all. NC State’s harvesting and preserving guidance is clear on this point: if the herbs are already clean, skip the rinse.
Washing introduces moisture, and moisture is the main enemy of a good drying outcome.
When the stems genuinely need cleaning, a brief rinse under cool running water is the right move. The key word is brief.
You are trying to remove surface dirt, not soak the leaves. After rinsing, shake off the excess water and then blot the stems gently with a clean towel or lay them on an absorbent cloth to air-dry the surface before you begin the actual drying process.
Surface moisture left on the leaves when you bundle them up creates exactly the conditions that favor mold. Even in a warm, well-ventilated space, thick bundles of damp sage can develop quality problems before they fully dry.
Starting with clean, genuinely dry foliage gives the drying process the best possible beginning. If you harvested in the morning after the dew dried, the stems are likely already in good shape and may need only a quick inspection rather than any washing at all.
Air-dry sage in small bundles with plenty of circulation
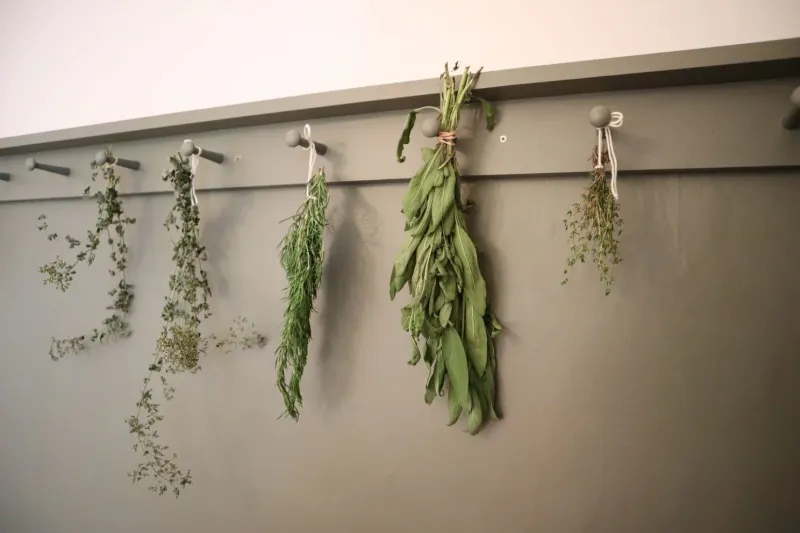
Air-drying works well for sage, and the process is straightforward once you understand what the herb actually needs. Gather the prepared stems into small, loose bundles, secure each one near the cut ends with a rubber band or piece of twine, and hang them upside down.
The upside-down position keeps the leaves from curling in on themselves and allows the essential oils to remain distributed through the foliage as it dries.
NC State’s harvesting and preserving guidance recommends a warm, dry, well-ventilated indoor location away from direct sunlight. A spare bedroom, a dry basement with good airflow, or a covered porch that stays dry and warm are all reasonable options.
What you want to avoid is direct sun, which can degrade the leaves and their flavor faster than gentle indoor air. Also keep the bundles well away from the kitchen sink, the stove, the dishwasher, and any location that generates steam or collects condensation.
Bundle size is where many people go wrong. Larger bundles look appealing hanging in a kitchen or pantry, but they dry unevenly.
The leaves on the outside of a thick bundle dry relatively quickly while the interior stays damp longer, and that moisture in the center creates conditions where mold can develop before drying completes. Smaller, looser bundles with space between individual stems give air the room it needs to move through evenly.
Outdoor dew and frost are additional hazards if you hang bundles near a window or on a covered porch. Both can reintroduce moisture to leaves that were already partially dried, which sets the process back and increases the risk of quality loss.
Keep the bundles in a consistently dry indoor space for the duration of drying.
Sage is considered one of the easier herbs to air-dry, and the tactile endpoint is reliable. When the leaves have become brittle and crumble easily between your fingers, they are ready.
There is no fixed timeline that works for every location and season, particularly in a state as humid as North Carolina, so check the bundles by touch rather than by a set number of days.
Use a dehydrator when North Carolina humidity slows air-drying
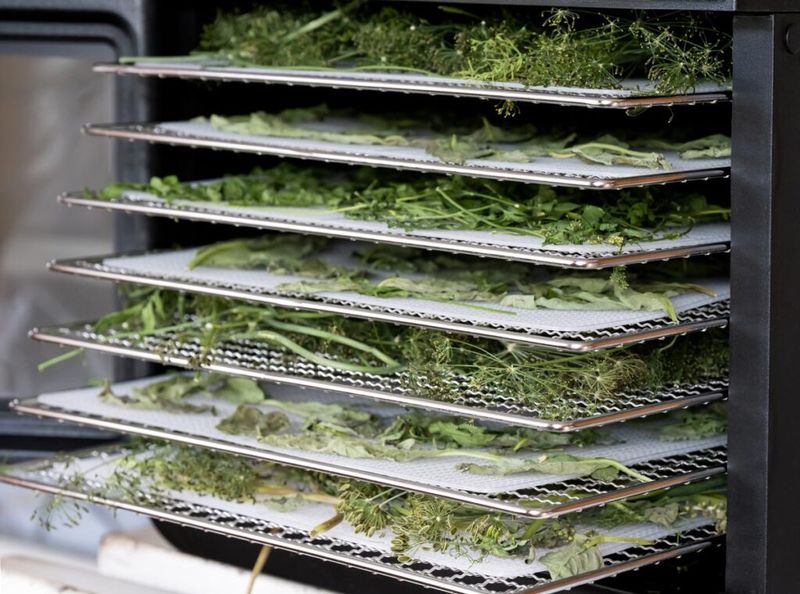
North Carolina’s humidity, especially in the Coastal Plain and during humid stretches in the Piedmont, can slow air-drying enough to become a real problem. When the air around your hanging bundles holds a lot of moisture, the leaves dry more slowly, which extends the window during which mold and quality loss can develop.
A food dehydrator sidesteps this issue by creating a controlled, warm, moving-air environment that does not depend on outdoor or indoor humidity levels.
A dehydrator is not required equipment for drying sage, but it is a practical alternative worth considering if you have one or are thinking about getting one. The most important starting point is to read and follow your specific appliance’s instructions.
Dehydrators vary in airflow design, tray configuration, and thermostat accuracy, so the manufacturer’s guidance for your machine is more reliable than any general recommendation.
For a sense of the temperature range that extension sources point to: Penn State Extension’s herb-drying guidance references approximately 95 to 110 degrees Fahrenheit as an appropriate range for herbs. NC State’s general commercial herb-drying guidance suggests roughly 95 to 100 degrees Fahrenheit as a starting point, while noting that higher temperatures are sometimes necessary in high-humidity conditions.
Treat those figures as a practical reference range, not as a guarantee that a specific setting will produce a specific result in your machine.
Spread the sage leaves or short stem sections in a single layer on the dehydrator trays so air can circulate around each piece. Crowding the trays works against the whole point of using a dehydrator.
Drying time will vary based on your machine, the thickness of the leaves, and the ambient humidity in your kitchen. Check the leaves periodically and use the same tactile test as with air-drying: they are ready when they feel brittle and crumble easily.
Prioritize thorough, complete drying over speed, because leaves that feel dry on the outside but retain moisture at the stem can still develop problems in storage.
Store brittle leaves for winter seasoning
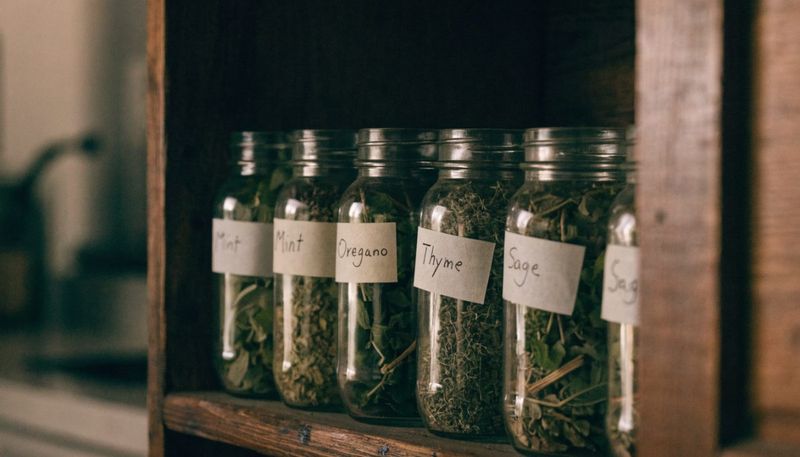
Before anything goes into a storage container, do a final check. Press a few leaves between your fingers.
If they crumble cleanly and feel brittle all the way through, they are ready. If they still feel pliable or leathery in any spot, give the batch more time.
Storing leaves that have not fully dried is the most common reason that home-dried herbs develop off flavors or mold in the jar.
Once the leaves pass the crumble test, strip them from the stems. NC State’s harvesting and preserving guidance recommends avoiding crushing or grinding the dried leaves until you are ready to use them.
Crushing breaks open the leaf cells and begins releasing the aromatic compounds that give sage its flavor. Whole or roughly broken dried leaves hold their character longer in storage than pre-crumbled herb.
Airtight containers are the right choice for storage. Glass jars with tight-fitting lids work well.
Keep them in a cool, dry, dark location, such as a pantry shelf or a cabinet away from the stove. Heat, light, and humidity are all gradual enemies of dried herb quality, which is why storing jars on an open kitchen shelf near the cooking area, while convenient, is not ideal for long-term quality.
NC State’s plant profile for common sage lists supported culinary uses that include seasoning meat, poultry stuffing, vegetables, eggs, and culinary tea. About a year is a reasonable general period for useful quality in properly stored dried herbs, though flavor does fade gradually over time rather than stopping abruptly at a fixed date.
One boundary worth stating clearly: dried culinary sage belongs in the kitchen, used in the amounts you would use any cooking herb. Large or prolonged amounts, sage supplements, sage tinctures, and concentrated sage essential oil are a different category with different safety considerations.
The National Center for Complementary and Integrative Health notes that common sage contains thujone, which can be toxic in large amounts or with extended use, and that sage essential oil carries greater risk because it is highly concentrated. Culinary use in ordinary cooking quantities is a different matter from concentrated or medicinal preparations, and the two should not be treated as interchangeable.
Turn the regional timing into a simple harvest checklist
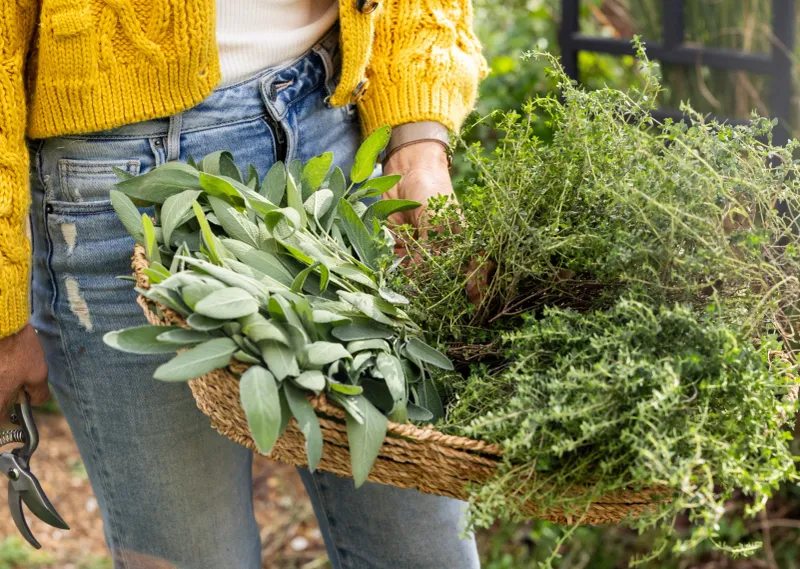
Pulling the guidance together into a working sequence makes it easier to act on. Start by confirming the plant in your garden is common sage, Salvia officinalis, with those distinctive gray-green fuzzy leaves.
If you have any doubt, the NC State Extension Gardener Plant Toolbox is a reliable reference before you cut anything.
Next, look up your local freeze information. The NC State Climate Office Freeze Date Explorer gives you freeze probability data for your specific location.
Count back four to six weeks from your expected first-freeze window as a conservative guide for when to make your final substantial cut. Western NC gardeners should note that NC State’s winterizing guidance points to early September as the cutoff for severe cutting at higher elevations, while Piedmont and Coastal Plain gardeners work from their own local dates.
Make a selective harvest of healthy leafy stems, avoid heavy or repeated cutting as cold weather approaches, and leave first-year plants mostly intact. Dry the foliage in small loose bundles with good airflow, or use a dehydrator if humidity is a factor.
NC State’s harvesting guidance confirms the leaves are ready when they crumble easily. Store them airtight, in the dark, and use them through the winter as a straightforward culinary seasoning.
A jar of home-dried sage on the shelf is a small but satisfying result from one careful afternoon in the garden.