
Why North Carolina Gardeners Bury Clay Ollas To Water Deep Roots Through The Late-Summer Heat
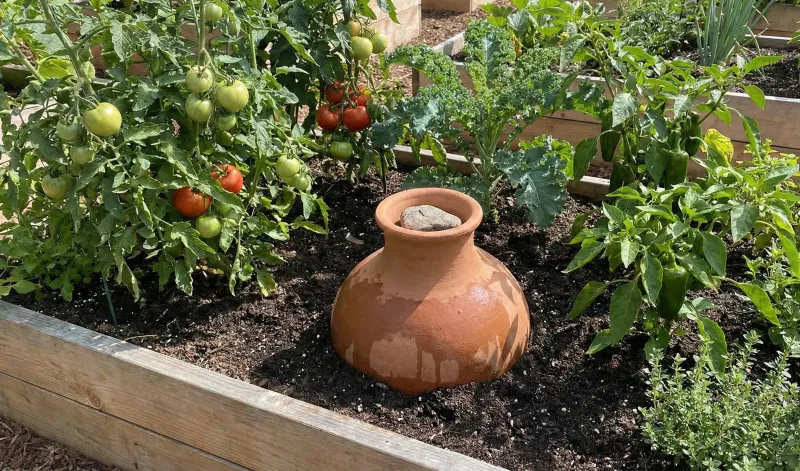
Gardeners across North Carolina know that late summer can turn a thriving vegetable bed into a wilting mess almost overnight. When rain disappears for weeks and temperatures climb, keeping roots adequately moist without wasting water becomes a real challenge.
Buried clay ollas, an old method borrowed from arid regions, offer one practical way to deliver moisture directly near plant roots during locally hot, dry spells. They are not a cure-all, but for the right garden and the right conditions, they can make a meaningful difference.
Use an olla only when local conditions call for targeted watering
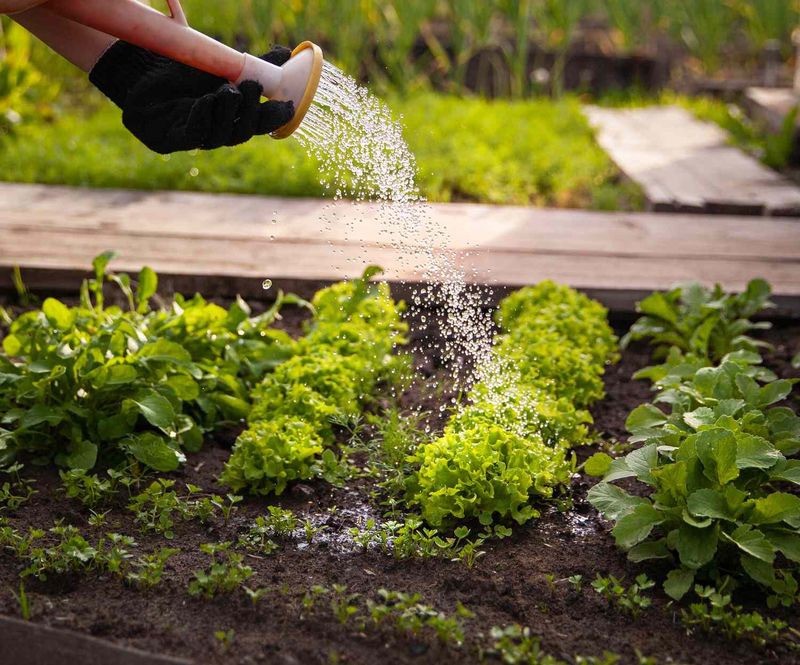
Reaching for any irrigation tool before checking whether your garden actually needs it is a common mistake. North Carolina’s climate varies considerably across its three broad regions, and dry conditions that stress a Piedmont vegetable bed in late July may not match what a mountain gardener sees that same week, or what a Coastal Plain grower experienced the summer before.
The NC State Climate Office’s drought monitor tracks these regional differences in near real time, and checking it before adjusting your watering routine is a practical first step.
Late-summer heat is a plausible trigger for using a buried olla, but it is not a fixed statewide schedule. Drought can develop over weeks to months and does not arrive on the same date every year or affect every county equally.
A gardener in the Sandhills may be managing sandy soil that dries out after just a few rainless days, while someone in the western mountains might have received meaningful rainfall that same week.
When dry conditions do take hold locally, NC State Extension recommends targeting water at the root zone rather than broadcasting it broadly across the soil surface, especially during drought periods for small-scale vegetable production. The goal is to wet soil to an adequate depth without encouraging surface-level root habits or wasting water to evaporation.
Organic mulch, applied after the soil already holds adequate moisture, further reduces water loss between watering events.
Before installing an olla or changing your irrigation approach, probe your soil with a finger or a simple moisture meter, observe whether plants show stress signs like wilting in the morning or evening, and compare your rainfall total against what your crops typically need. NC State’s vegetable gardening guidance uses roughly one inch of water per week as an average benchmark, adjusted for soil, crop, and actual weather.
An olla makes sense as a response to verified local dryness, not as a routine installation every August regardless of conditions.
Porous clay releases water beside the plant roots
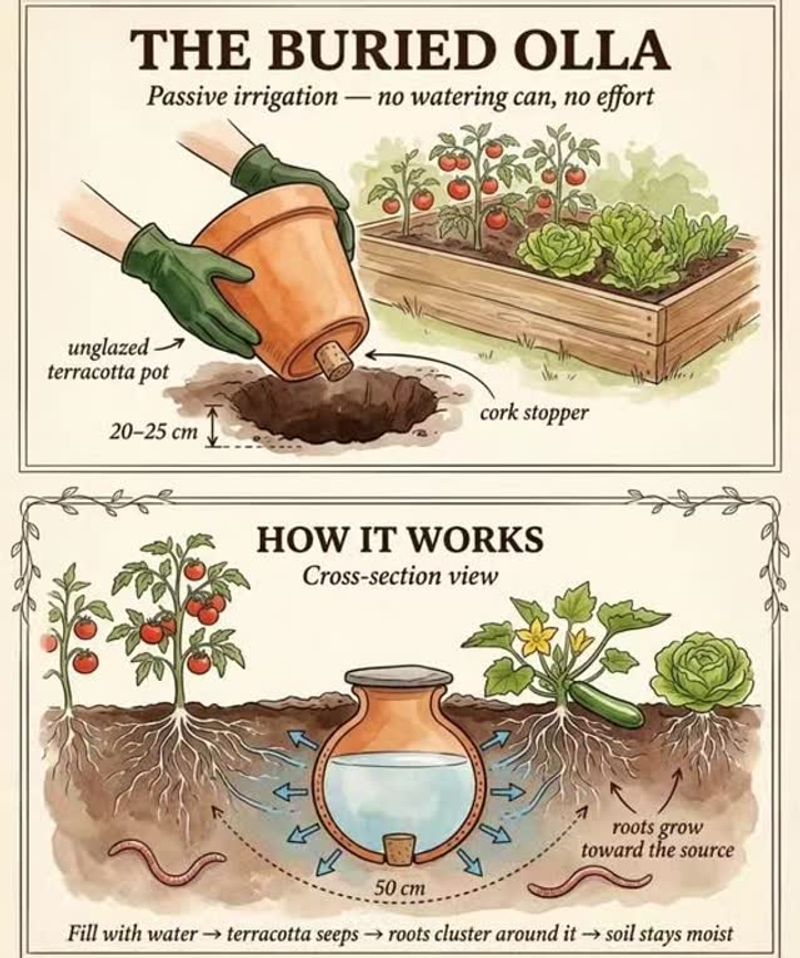
Water does not pour out of a buried olla the way it does from a hose or drip emitter. Instead, moisture moves gradually through the unglazed clay wall in response to the dryness of the surrounding soil.
When the soil is relatively dry and plants are actively drawing water from it, the pressure difference pulls moisture outward through the tiny pores in the clay. As the soil near the pot becomes wetter, that pull slows down.
Research on the auto-regulative behavior of pitcher irrigation describes this as a self-moderating release tied to soil moisture conditions rather than a fixed flow rate.
Because delivery happens below the soil surface, less water is exposed to direct sun and wind than with overhead or surface watering. That can reduce some evaporation and limit the runoff that sometimes carries water away before it reaches roots.
However, calling an olla nearly lossless overstates the case. Water can still move past the active root zone, especially in sandy or loosely structured soils, and some loss occurs from the open top of the vessel if it is not covered.
Peer-reviewed work on buried clay-pot irrigation identifies the method as highly efficient under certain conditions, but efficiency figures vary with soil texture, pot porosity, crop water demand, spacing, and weather. A savings estimate drawn from one region or crop type does not automatically translate to a North Carolina backyard with different soil and rainfall patterns.
Roots may grow toward the moist zone around the olla over time, which can be useful in a compact vegetable bed. That movement is a possibility, not a promise.
Root depth depends on the plant species, soil compaction, drainage, fertility, and the full history of how the bed has been watered. An olla delivers moisture near the root zone; it does not guarantee that roots will run deep or that every plant will be perfectly watered by one vessel.
Match the vessel to an established, compact planting
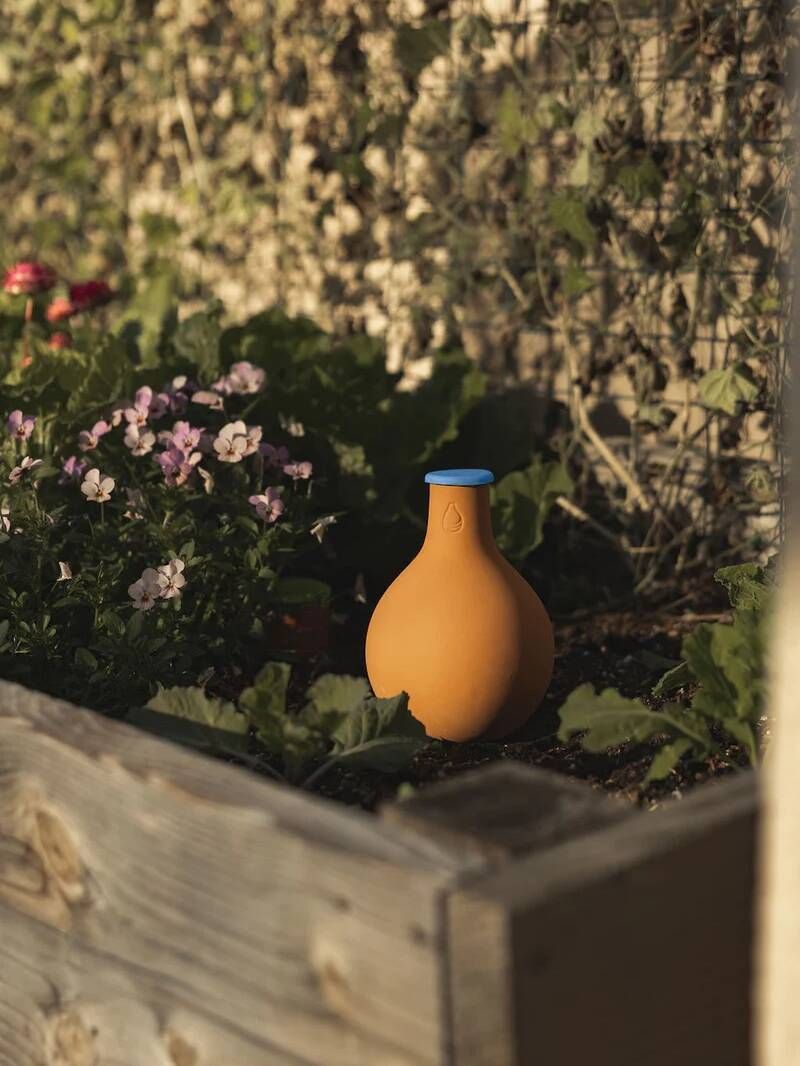
Not every clay pot you find at a garden center or home improvement store will work as an olla. The vessel must be unglazed and genuinely porous so that water can seep through the wall.
Glazed pots, painted containers, sealed terracotta, or decorative pieces treated with any coating will not allow the same slow seepage, and some surface treatments raise reasonable concerns around edible crops. University of Arizona Cooperative Extension’s olla guide recommends a purpose-made olla or a clearly identified unglazed terracotta vessel intended for garden use, not just any pot that happens to be clay-colored.
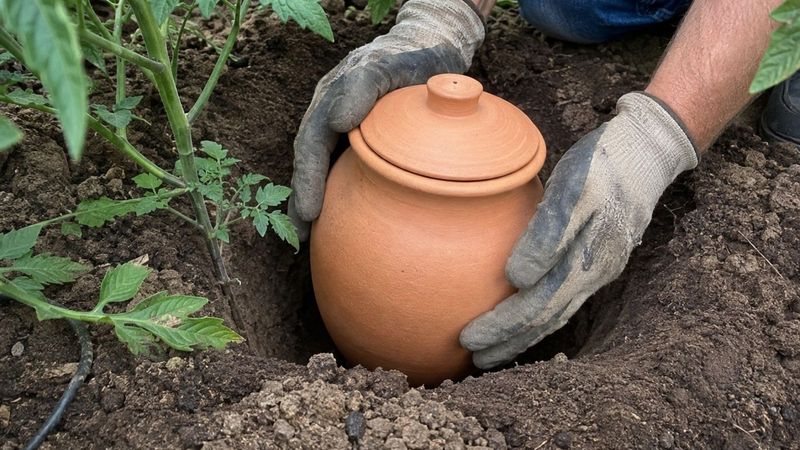
The opening at the top of the vessel needs to stay accessible above the soil so you can refill it without digging. A lid, saucer, flat stone, or other barrier placed over that opening limits evaporation from the exposed water surface and keeps debris, insects, and soil from falling in.
The cover should be easy to lift and replace so that refilling remains a quick, routine task rather than a chore you skip.
Ollas work best alongside established vegetables, annuals, and other compact herbaceous plants whose roots are already developed and concentrated within a garden bed. A small vessel wets a limited area of soil, which suits closely planted crops like tomatoes, peppers, cucumbers, beans, or herbs far better than it suits widely spaced plants.
For large trees or mature shrubs, expanding roots can crack or break a buried pot, and a single small vessel cannot wet the broad root zone those plants require.
Newly seeded beds and fresh transplants present a different challenge. Their roots have not yet spread far enough to reach the moist zone around the olla, so those plants still need normal surface watering until they establish.
Matching vessel size and type to the actual planting is the first step toward getting reliable results from the method.
Install the olla near roots without relying on a fixed spacing rule
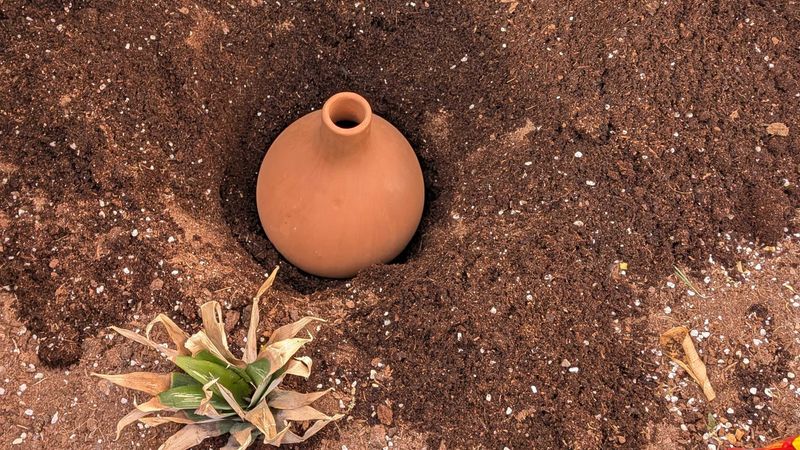
Getting the olla into the ground correctly takes a bit of planning, but the process itself is straightforward. Dig a hole near the plants you want to serve, deep enough to bury most of the vessel while leaving the opening above the soil line.
Set the olla in place, backfill the soil around it firmly to eliminate air gaps, fill the vessel with water, and cover the opening. The goal is snug contact between the clay wall and the surrounding soil, because gaps or loose fill will slow or interrupt the seepage that makes the method work.
Placement distance from the plant stem matters, but there is no single measurement that applies across all gardens. Arizona Extension notes that research on ideal olla spacing is limited and cites one maize study using 20 to 30 centimeters, along with an anecdotal guideline of roughly twice the olla’s diameter as a possible wetted planting diameter.
Soil texture, crop type, climate, pot size, and the porosity of the clay all shift where that moist zone actually reaches. Using those numbers as a rough starting point and then checking actual soil moisture around the plant is more reliable than copying a formula.
One olla rarely serves an entire bed. In a closely planted vegetable row, you may need several vessels spaced to overlap their wetted zones.
Think about the layout of your planting before you dig, and position each olla where it can serve the densest cluster of roots. Burying the pot at an angle or too far from the main root mass reduces how effectively it delivers moisture where it is needed.
Seeds and new transplants need conventional surface watering until their roots grow close enough to benefit from the olla’s moist zone. Arizona Extension notes that this establishment period can last a month or more under some conditions.
Skipping surface watering too early, assuming the olla will handle it, is one of the more common reasons young plants struggle after installation.
Refill the vessel and verify moisture in the root zone
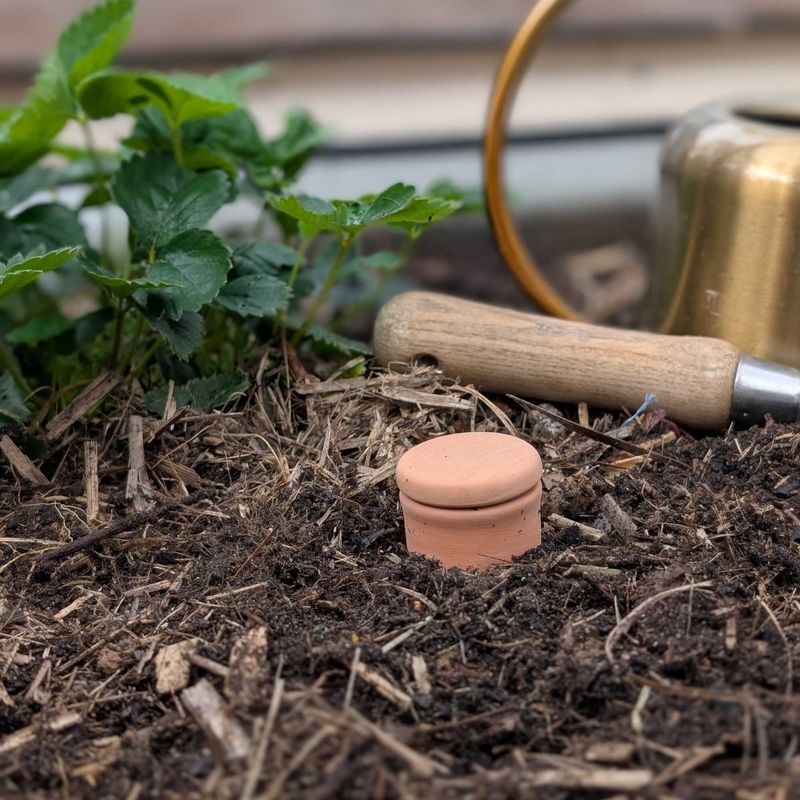
An olla left empty is just a clay pot in the ground. The method only works while water is actually inside the vessel, so checking and refilling it on a regular schedule is the central management task.
How often you need to refill depends on several factors working together: air temperature, wind speed, the size and water demand of your plants, how porous your particular vessel is, and whether recent rainfall has added moisture to the surrounding soil. During a hot, dry week in the Piedmont, a small olla serving a large tomato plant may need refilling every day or two.
A cooler week with some rain might stretch that to four or five days.
Arizona Extension is direct on this point: an olla is not a set-and-forget system. Treating it like one is a reliable way to stress your plants without realizing it until wilting is already visible.
Build refilling into your regular garden walk so it becomes habit rather than an afterthought.
Organic mulch applied around the bed can stretch the time between refills by slowing evaporation from the soil surface. NC State’s vegetable gardening handbook recommends mulching when the soil already holds adequate moisture, not as a way to compensate for a dry start.
Two to three inches of straw, wood chips, or shredded leaves over the bed keeps the soil cooler and reduces surface moisture loss between watering events.
Do not rely solely on the water level inside the olla to judge whether your plants have enough moisture. Probe the soil several inches deep near the plant’s root zone with a finger, a wooden dowel, or a simple moisture meter.
NC State’s beginner vegetable gardening guide recommends observing plants for stress signs like morning or evening wilting, which can indicate that roots are not getting enough water even when the olla appears full. Poor placement, an undersized pot, or soil that restricts water movement can all leave plants thirsty despite a vessel that looks topped off.
Adjust expectations for sand, clay, and compacted soil
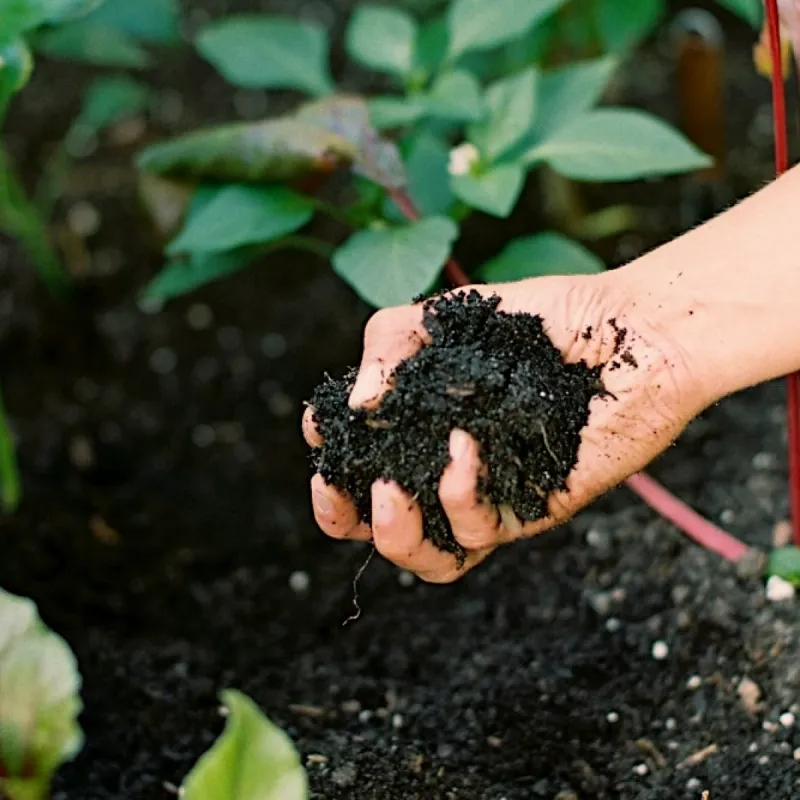
Soil texture is one of the biggest variables in how well an olla performs, and North Carolina’s three broad regions present genuinely different conditions. Sandy soils common in the Coastal Plain drain quickly and hold less water between irrigation events, which means an olla in that setting may need more frequent refilling and may wet a smaller effective zone than the same pot would in a heavier soil.
NC State’s vegetable gardening handbook notes that sandy soils generally require more frequent watering than soils with higher clay content.
Dense clay soils, more common in the Piedmont, present a different challenge. Water moves through clay slowly, which can restrict how far moisture spreads outward from the olla wall.
A pot that wets a generous radius in a loamy raised bed might wet a much smaller area in compacted red clay, leaving some roots dry even when the vessel is full. A 2024 systematic review of clay-based irrigation technologies specifically flags dense soils as a factor that limits the wetted area and cautions against applying water-use results from one soil context to another.
Compaction adds another layer of complexity. Subsoils in parts of North Carolina can present physical barriers that roots cannot easily penetrate regardless of how moisture is delivered.
NC State’s irrigation scheduling guidance addresses how soil structure and water-holding capacity affect how deeply moisture moves and where roots can realistically grow.
Rather than copying a spacing rule from another region, assess your own soil’s response. After filling the olla, wait 24 hours and then probe the soil at several distances from the vessel to see where it feels moist.
Arizona Extension acknowledges that the wetted area varies with soil, climate, and pot properties, so direct observation beats any formula. Roots may grow toward the moist zone over time, but whether they run deep depends on the plant species, soil conditions, and the full history of your watering and bed preparation.
Catch clogging, breakage, and overwatering before plants suffer
Several things can go wrong with a buried olla, and most problems are easier to fix early than after plants show visible stress. Mineral deposits are one of the most common issues.
When irrigation water contains dissolved salts or minerals, repeated filling gradually leaves residue that clogs the tiny pores in the clay wall and slows or stops seepage. The 2024 systematic review of clay-based irrigation technologies identifies mineral buildup as a documented limitation, particularly where water quality is poor.
Soaking a clogged pot in clean water or gently scrubbing the exterior can restore some flow, but a heavily fouled vessel may need replacing.
Physical breakage is another real risk. Roots pressing against the clay from outside, accidental contact with a trowel during planting, or freezing temperatures during winter can crack or shatter the pot.
Arizona Extension cautions that woody tree and shrub roots are particularly likely to break buried vessels over time, which is another reason to limit ollas to herbaceous beds. At the end of the growing season, remove and store pots indoors to protect them from freeze damage.
Poor drainage creates a different failure mode. If water from the olla has nowhere to go because the surrounding soil stays saturated, roots can suffocate.
Utah State Extension’s irrigation guidance notes that plant roots require oxygen and that waterlogged soil damages root function. Before installing an olla in a low-lying or slow-draining spot, confirm that the bed drains adequately after a normal rain.
The exposed opening of the vessel needs attention as well. Standing water inside an uncovered pot can become a mosquito breeding site.
EPA guidance on stormwater and mosquitoes recommends covering any container that holds water outdoors. If you fill the olla with collected rainwater, keep the storage container covered or screened to limit both debris and mosquito access.
EPA’s rainwater harvesting guidance also warns against spraying collected stormwater directly onto edible leaves, because runoff can carry bacteria. Pour collected rainwater into the olla rather than using it overhead on your crops.
Choose the method that fits the garden’s scale and routine
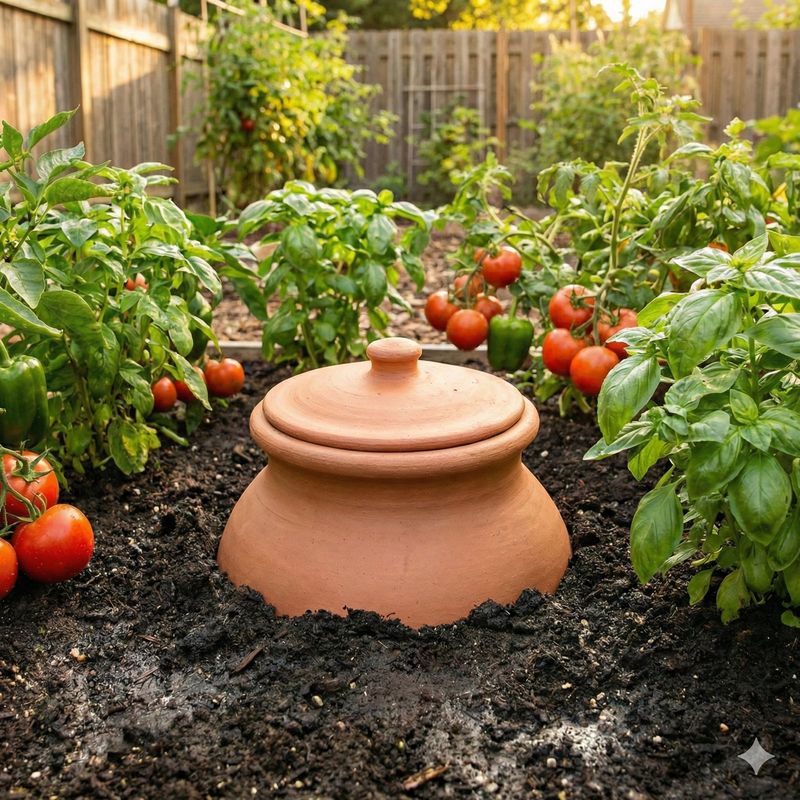
Picking an irrigation method comes down to what your garden actually looks like and what you will realistically maintain. A buried olla suits a small, established, closely planted bed where manual filling fits naturally into your regular garden routine.
If you visit the garden daily anyway, topping off a vessel takes less than a minute and keeps moisture moving steadily near the roots of your tomatoes, peppers, or herbs during a dry stretch.
For larger or more spread-out plantings, drip, trickle, and soaker irrigation systems are well-established options that NC State Extension recommends for efficient root-zone delivery. NC State’s drought guidance for small-scale vegetable production identifies these low-volume systems as practical tools for conserving water during dry periods.
A drip system can cover more plants more consistently once it is set up, and it does not require daily manual refilling the way an olla does. Whether it outperforms an olla in your specific backyard depends on installation quality, emitter spacing, pressure, and how well you maintain it.
Arizona Extension positions ollas as a low-pressure, manually filled option that may suit small beds, not as a universally superior system. That framing fits North Carolina conditions well.
An olla is a sensible addition to a compact vegetable garden when you want a simple, low-tech way to direct moisture near roots during locally hot, dry periods, and when you are willing to check and refill it regularly.
NC State’s vegetable handbook grounds success in observation: healthy plants and adequately moist soil at root depth are the real measures of whether your watering approach is working. An olla that keeps your established tomato bed productive through a two-week dry spell in August has done its job, even if it never promised anything more dramatic than that.