
Why Your Peace Lily Leaves Are Turning Black – And The Hidden Stress Making It Worse
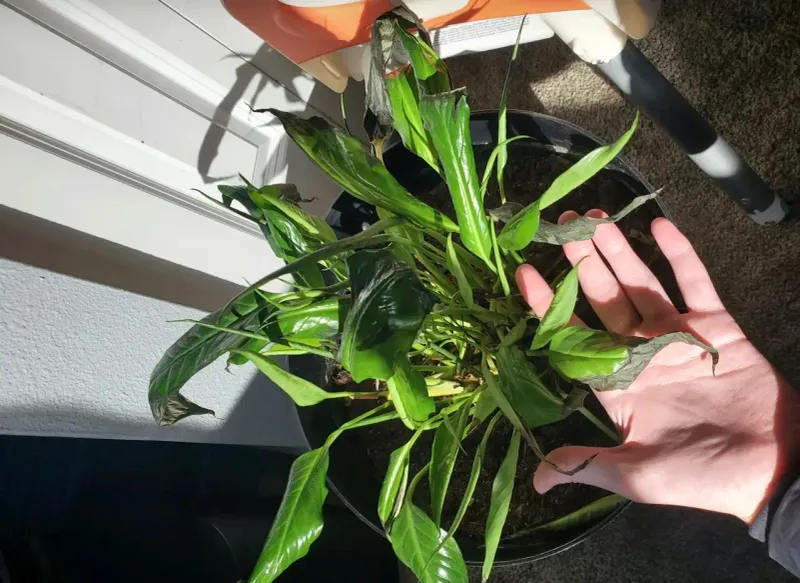
Black leaves on a peace lily can feel alarming, especially when the plant looked perfectly healthy just days before. The damage might be creeping in from the edges, spreading across whole leaves, or showing up as soft, collapsing tissue, and each pattern points somewhere different.
Getting to the right answer means reading those clues carefully rather than jumping straight to a fix that might not match the problem.
Black edges are a clue, not a diagnosis
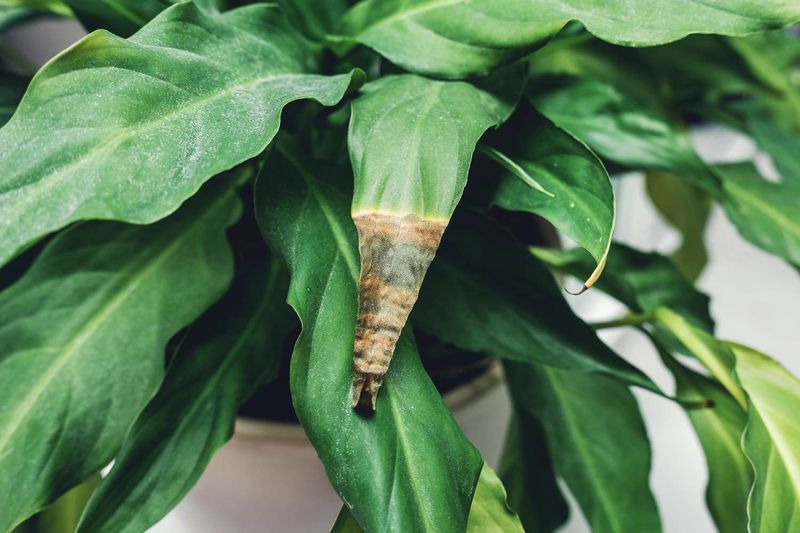
Seeing black along the edges of your peace lily’s leaves is unsettling, but those margins are telling you something rather than proving a specific cause. North Carolina State University Extension lists several distinct stresses that can produce brown or black leaf tips and margins on peace lilies, including excess direct sunlight, underwatering, low humidity, fertilizer salts, and fluoride sensitivity.
That range matters, because reaching for a single explanation too quickly can lead you to fix the wrong thing.
The texture and pattern of the blackening offer your first real diagnostic clue. Dry, crispy edges that feel papery suggest water stress, cold injury, salt or fluoride damage, or sun exposure.
Soft, water-soaked tissue that feels mushy or slimy is a different signal entirely, and so is blackening that appears alongside a wilting or collapsing plant whose soil is still wet.
That last combination deserves immediate attention. University of Maryland Extension guidance on root rots notes that wilting while the medium stays wet is a key warning sign of root or crown rot, where damaged roots can no longer move water into the plant even though moisture is present.
A third pattern to watch for is large, expanding, roughly circular lesions that look water-soaked or blighted rather than edge-limited. University of Hawaii CTAHR research on Spathiphyllum foliar blight identifies Phytophthora as a pathogen capable of producing exactly that kind of damage.
Leaf appearance alone cannot identify the cause. A useful sequence is to note the damage pattern first, then check the soil moisture and drainage, then examine the roots if wet conditions are present, and finally review recent growing conditions such as temperature, light, fertilizer, and watering history.
Each step narrows the possibilities before any corrective action is taken.
The hidden stress starts below the soil line
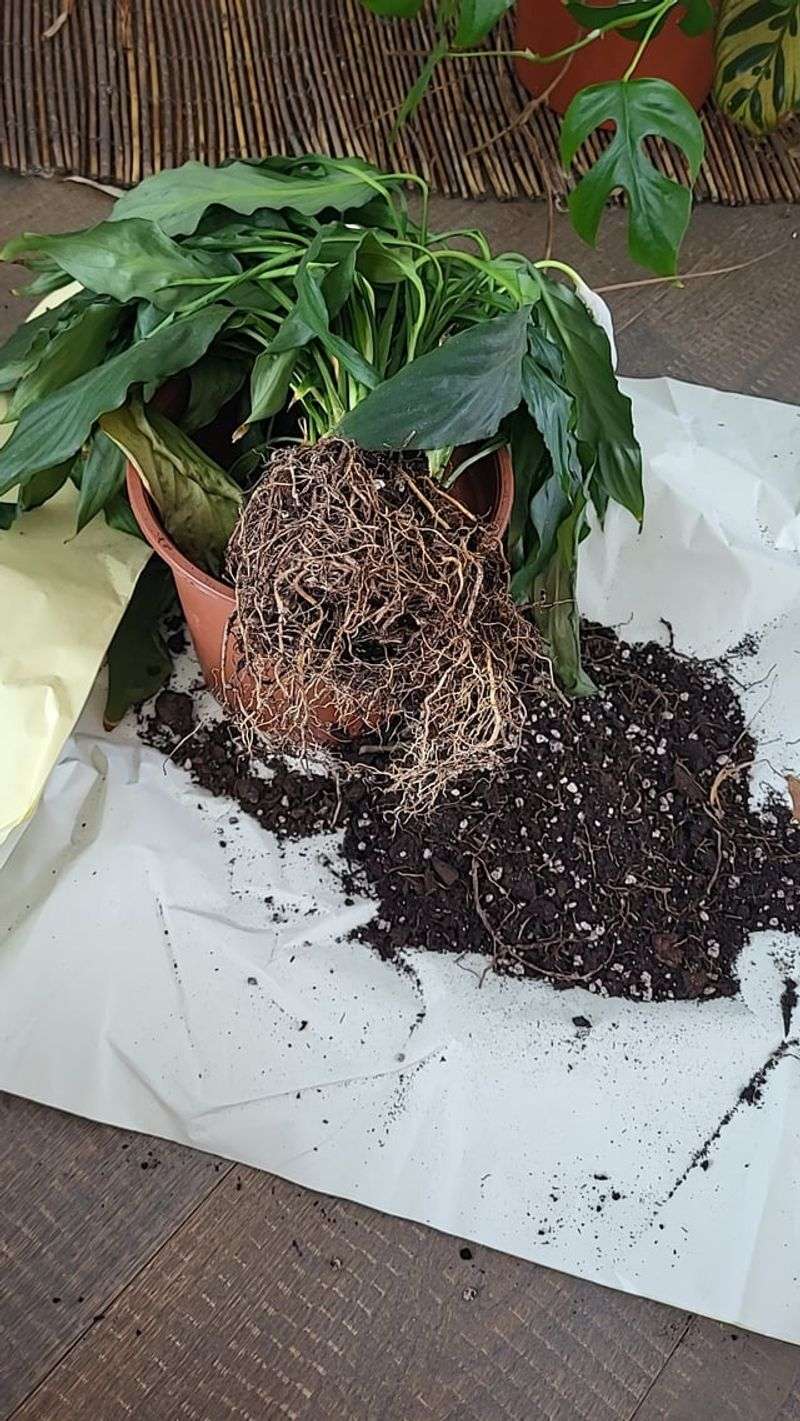
Root trouble is easy to miss precisely because it happens out of sight. When potting mix stays saturated for too long, the spaces between soil particles that normally hold oxygen fill with water instead.
Roots deprived of oxygen weaken, and that weakened state creates an opening for soil-dwelling pathogens.
UC Statewide IPM’s profile of Pythium root rot explains that Pythium species thrive in wet, poorly aerated media and can spread rapidly through a root system, causing roots to become soft, brown, and water-soaked. Phytophthora, a related pathogen, can move from the roots upward into the crown and lower stem.
The University of Massachusetts Amherst documentation of Phytophthora root rot in Spathiphyllum shows plants with blackened crowns and collapsed lower stems, damage that can look from above like a watering problem or a temperature issue.
The plant’s above-ground symptoms often seem contradictory. A peace lily with root rot may wilt even while its soil is wet, because the rotted roots can no longer absorb or transport water.
Leaves may yellow, decline, and develop black areas at the margins or across the blade. University of Maryland Extension identifies wet soil paired with wilting and black or mushy root tissue as the cluster of signs that points toward root or crown rot rather than toward a surface-level cause.
Light level is worth factoring in here, though carefully. Peace lilies use less water in low light, so a plant kept in a dim corner may sit in wet soil longer after each watering than one in brighter filtered light.
That relationship is a reasonable inference from the plant’s known care requirements rather than a universal diagnosis, but it does mean that low light and frequent watering can combine to keep the root zone wetter than the roots can tolerate. NC State Extension recommends bright or medium indirect light as the appropriate range for peace lilies, which supports adequate water use without the risks of direct sun exposure.
Inspect the roots before changing the watering routine
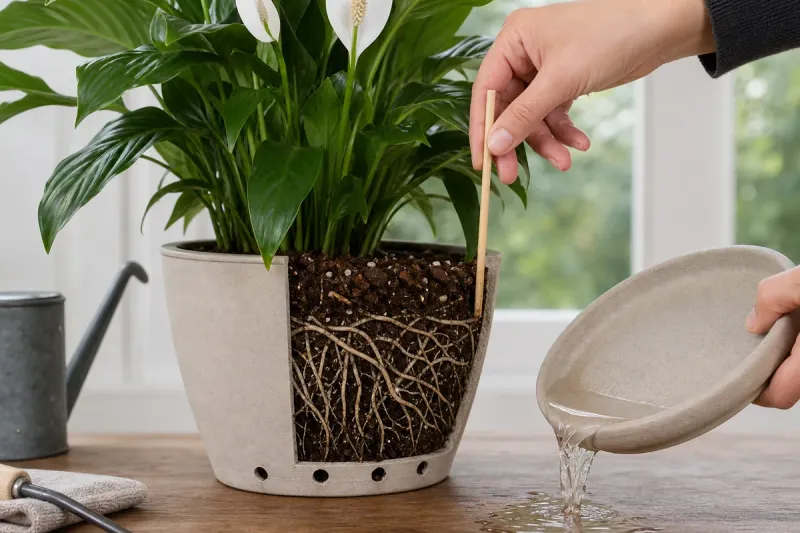
Before adjusting how often or how much you water, spend a few minutes checking what is actually happening at the root level. Press a finger an inch or two into the potting mix.
If the medium feels wet and has been that way for several days, and especially if the plant is also wilting or showing blackening at the base, removing the plant from its pot for a closer look is a reasonable next step.
Ease the root ball out gently and look at the roots, crown, and lower stem. Healthy roots are typically firm and light-colored, often white or pale tan.
Roots affected by rot tend to be soft, dark brown to black, and may smell foul or feel slimy. Blackening at the crown, the point where the stem meets the root mass, or along the lower stem is a more serious finding and supports a root or crown rot diagnosis.
University of Maryland Extension describes these physical signs as the key indicators to look for when root rot is suspected, and UC IPM’s houseplant problem guide similarly points to soft, discolored roots as the primary diagnostic finding.
These findings support the diagnosis but do not make it absolute. Some discoloration in older roots is normal, and a single dark root tip does not confirm rot throughout the system.
What you are looking for is a pattern: multiple soft, dark, or foul-smelling roots, combined with the wet-soil and wilting picture described above.
One important safety note before you begin: peace lilies contain insoluble calcium oxalate crystals throughout their tissue. ASPCA toxicology information on peace lilies and Poison Control guidance on peace lily exposure both note that chewing or ingesting the plant can cause oral irritation, drooling, vomiting, and difficulty swallowing in children and pets.
Keep the plant out of reach during any inspection or pruning, and wash your hands after handling it.
Fix the root zone before treating the leaves
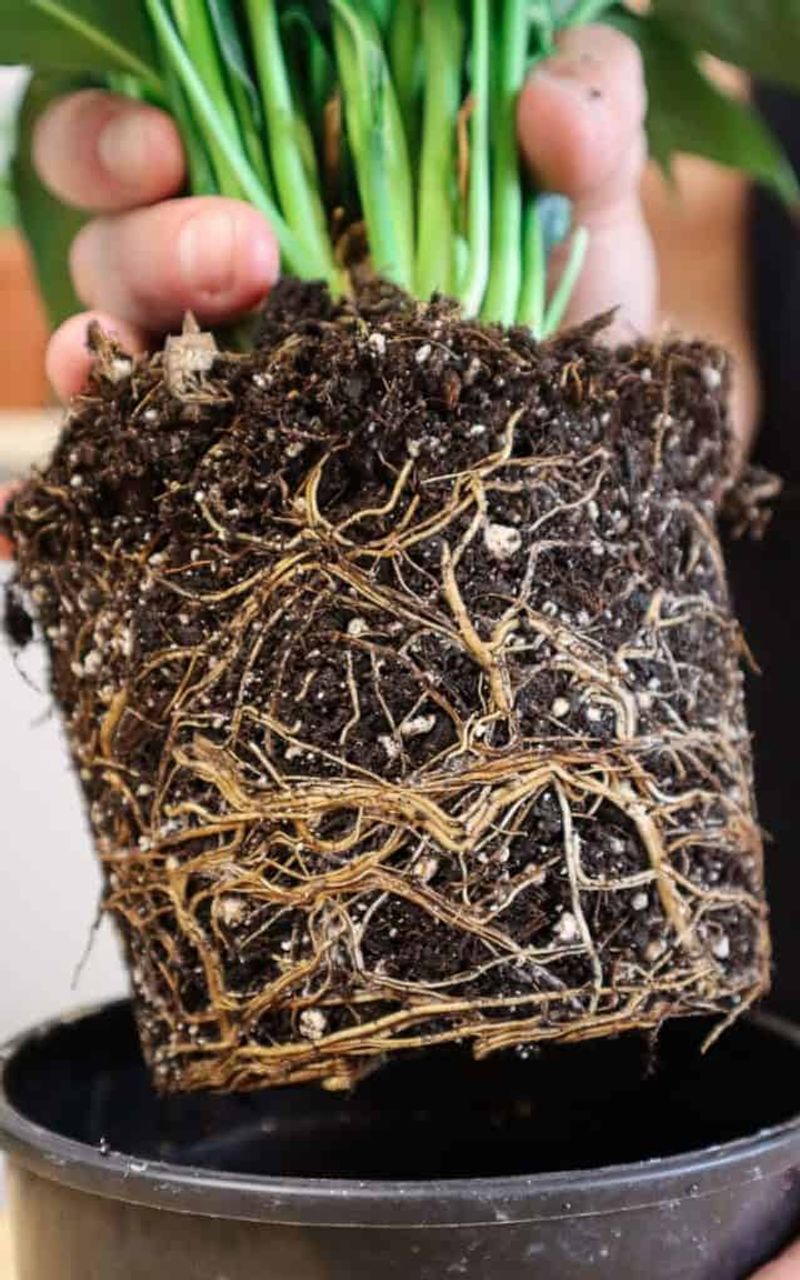
When root inspection confirms or strongly suggests rot, the response focuses on the root zone rather than the leaves. Treating the foliage while leaving damaged roots in saturated, potentially contaminated media is unlikely to stop the decline.
The sequence below is practical and conservative.
Start by removing as much of the old potting mix as possible from the roots. Trim away roots that are clearly soft, dark, and mushy, cutting back to tissue that appears firm and lighter in color.
University of Maryland Extension recommends discarding badly decayed roots and contaminated media rather than reusing them, since pathogens like Pythium and Phytophthora can persist in old soil. UMass Amherst’s documentation of Phytophthora in Spathiphyllum reinforces this, showing how crown and root infections can spread when conditions are not corrected.
Choose a clean container with drainage holes and fill it with fresh, well-draining potting mix. A general indoor potting mix that does not compact easily and allows excess water to move through freely is appropriate.
After repotting, water thoroughly until water runs freely from the drainage holes, then stop. Empty any saucer or cachepot within an hour so the roots are not sitting in collected water.
University of Florida IFAS peace lily care guidance specifically recommends allowing excess water to drain and not leaving the plant standing in water.
Resist the impulse to apply a fungicide without a confirmed diagnosis. UC IPM’s houseplant problem guidance and NC State Extension both caution that several different pathogens and noninfectious stresses can produce similar symptoms, and applying the wrong product can add stress without addressing the cause.
If the plant continues to decline rapidly after drainage and media are corrected, contact a university plant diagnostic clinic or cooperative extension service for a more precise identification before adding any treatment.
Dry, crispy margins point to other stresses
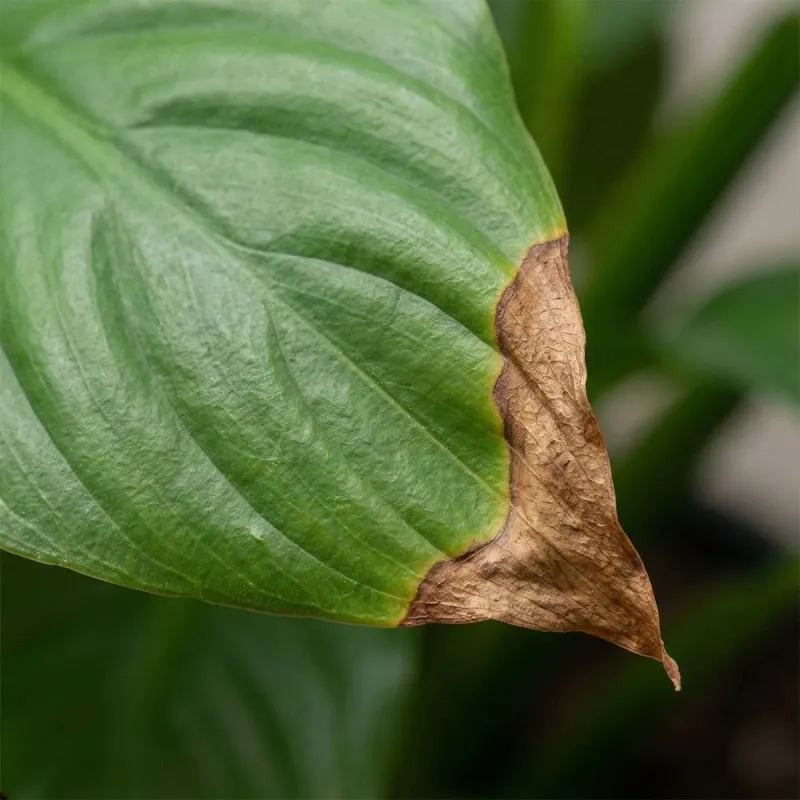
Not every case of blackened peace lily margins involves wet roots or disease. A different group of stresses produces damage that stays dry, papery, and limited to the leaf tips and edges rather than spreading inward or involving soft tissue.
Sorting out which category fits your plant can save you from fixing the wrong problem.
Cold exposure is one of the more overlooked causes. University of Florida IFAS research on chilling injury in Spathiphyllum found that damage can begin at the leaf tips and margins and progress inward, eventually turning necrotic areas black.
The same research observed injury following exposure to 38 degrees Fahrenheit, though cultivar sensitivity varies and some varieties may be affected at higher temperatures. If your plant was recently delivered in cold weather, moved near a drafty exterior door, or placed against a cold window during winter, temperature exposure deserves a look before anything else changes.
Direct sunlight is another common contributor. NC State Extension identifies excessive direct sun as a cause of brown tips and margins in peace lilies.
The fix is straightforward: move the plant to a spot with bright or medium filtered light rather than direct rays. University of Florida IFAS similarly recommends indirect light for healthy growth.
Fertilizer salts and fluoride are worth checking when the damage pattern is recurring and limited to edges. University of Illinois Extension specifically flags peace lilies as sensitive to fluoride and recommends leaching the growing medium to reduce buildup.
NC State Extension suggests using fertilizer at one-quarter of the label rate and flushing the soil periodically. Soluble-salt buildup from either fertilizer or water chemistry can burn root tips and leaf margins in a pattern that looks similar to cold or sun damage.
Not every municipal water supply causes problems, and water chemistry varies by location, so treat fluoride and salt accumulation as a plausible explanation rather than a universal one.
Low humidity and underwatering can also produce dry, dark edges. West Virginia University Extension guidance on houseplant care notes that indoor plants often suffer from dry air, particularly in winter when heating systems reduce humidity.
Grouping plants, using a humidity tray, or placing a small humidifier nearby are more reliable approaches than misting, which does not repair damaged tissue and can promote disease if leaves stay wet.
Spreading black spots require a disease check
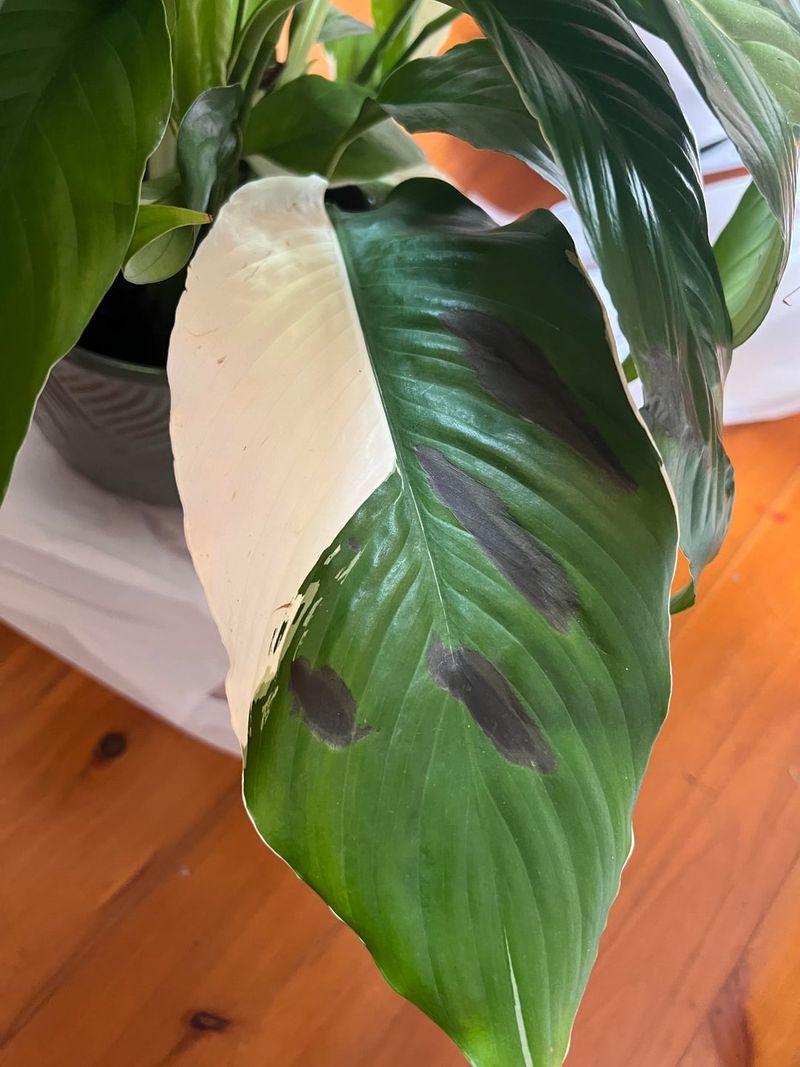
A pattern of large, expanding, water-soaked, or roughly circular black lesions is distinct from the uniform crispy margins discussed in the previous section and warrants a different response. This kind of damage does not usually stay neatly at the leaf edge; instead, it spreads across the blade, may involve multiple leaves at once, and the affected tissue often feels soft or collapsed rather than dry.
University of Hawaii CTAHR research on Spathiphyllum foliar blight identifies Phytophthora as a pathogen capable of causing exactly this kind of damage, producing large black spots and blighted leaves. Other fungal and bacterial pathogens can also produce leaf spots on indoor plants.
University of Maryland Extension’s resource on fungal leaf spots on indoor plants notes that disease is more likely to spread when foliage stays wet, which is why misting or overhead watering can make matters worse when disease is already present.
The practical steps at this stage are sanitary rather than chemical. Move the affected plant away from other houseplants to reduce the chance of spread.
Remove visibly diseased leaves using clean scissors or pruners, and sanitize the cutting tool between cuts and again before using it on any other plant. Avoid getting water on the foliage going forward.
Do not apply a fungicide without knowing what you are dealing with. UC IPM’s houseplant problem guidance cautions that different pathogens respond to different products, and an incorrect application adds chemical stress without resolving the infection.
If lesions continue spreading despite sanitation and isolation, contact a university plant diagnostic lab or cooperative extension plant clinic for identification before choosing any treatment product.
Build a steadier care routine
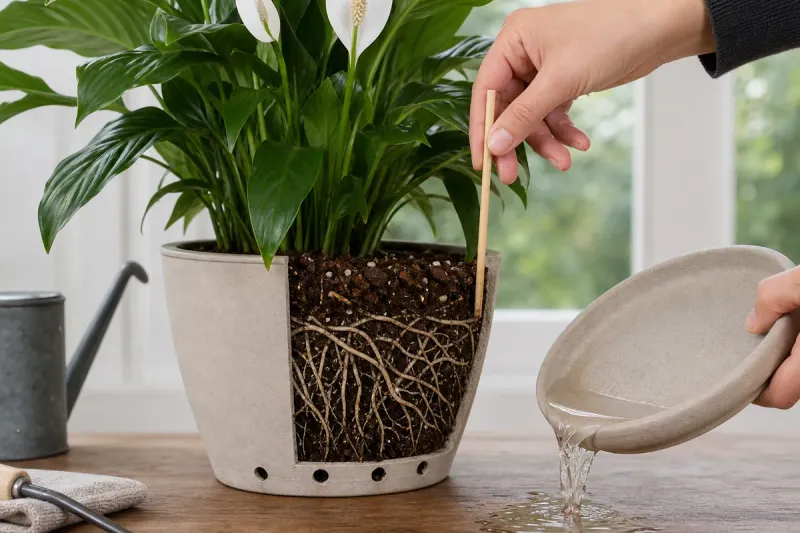
Once you have addressed the immediate problem, the goal shifts to creating conditions that keep roots healthy and reduce the chance of a repeat. For a peace lily, that comes down to a handful of consistent habits rather than a complicated regimen.
Check the root zone before watering rather than following a fixed schedule. Push a finger an inch or two into the potting mix.
If it still feels moist, wait. If it feels barely damp or dry at that depth, water thoroughly until excess flows freely from the drainage holes, then empty the saucer or cachepot promptly.
University of Florida IFAS peace lily care guidance and West Virginia University Extension both recommend keeping the medium moist but not soggy and ensuring the plant never stands in collected water.
Light placement matters more than many owners realize. NC State Extension recommends bright or medium indirect light for peace lilies, away from direct sun and cold drafts.
A spot near a window with a sheer curtain or set back from direct rays is generally a good fit. Avoid placing the plant against a cold exterior wall or near an air-conditioning or heating vent.
Fertilize sparingly, using a balanced fertilizer at one-quarter of the label rate, and flush the soil periodically to prevent salt buildup. University of Illinois Extension recommends leaching the growing medium to reduce fluoride and soluble-salt accumulation, particularly if tip burn recurs without another clear explanation.
One final point worth keeping in mind: damaged tissue will not turn green again. Removing fully blackened or dead leaves improves the plant’s appearance and, when disease is suspected, can reduce the reservoir of infectious material.
University of Maryland Extension recommends sanitizing cutting tools between plants when foliar disease is a concern. Pruning serves appearance and sanitation; corrected care is what protects the new leaves coming in.
Use the symptom pattern to choose your next check
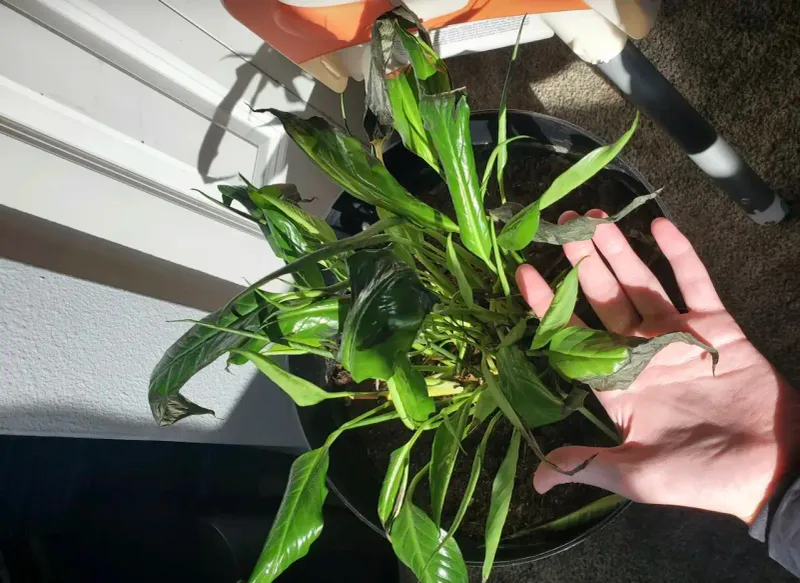
The symptom pattern your plant is showing is the most useful starting point for deciding what to check first. Widespread blackening paired with persistently wet soil, wilting despite moisture, yellowing, or soft mushy tissue at the base points toward the root zone.
Remove the plant from its pot and inspect the roots and crown as described earlier. University of Maryland Extension identifies that combination of signs as the key cluster associated with root or crown rot.
Damage that stays dry, papery, and confined to the leaf tips and edges without any of those accompanying signs calls for a different investigation. Review recent temperature exposure, light placement, watering history, fertilizer use, and water quality before changing the root zone.
NC State Extension lists cold, direct sun, underwatering, low humidity, and fertilizer salts as distinct causes of tip and margin damage, each requiring its own correction.
Large, expanding, water-soaked, or roughly circular lesions that spread across the blade rather than staying at the edges are the signal to isolate the plant, remove affected material with clean tools, and seek a diagnostic confirmation before adding any product. CTAHR research on Spathiphyllum foliar blight and UMD Extension guidance on fungal leaf spots both emphasize sanitation and diagnosis over immediate chemical treatment.
Pruning away blackened leaves can tidy the plant and remove dead or diseased material, but it does not reverse the underlying stress. Matching the corrective action to the actual cause is what gives new growth a real chance.