
Your Yellowing Cucumber Leaves Are The First Warning Something In Your Routine Is Off
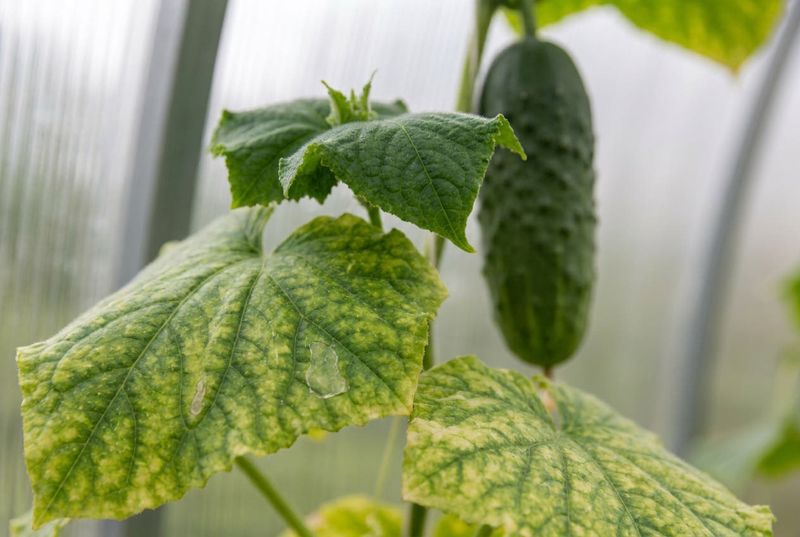
Spotting yellow leaves on your cucumber plants can stop you mid-stride in the garden, and for good reason – something worth paying attention to is happening. But yellow leaves alone do not point to one single mistake, and they are not always the plant’s first signal that something is wrong. Before you grab the hose or reach for fertilizer, a closer look at the pattern, the soil, and the plant itself will tell you far more than the color alone ever could.
Yellow leaves signal stress, not a single mistake
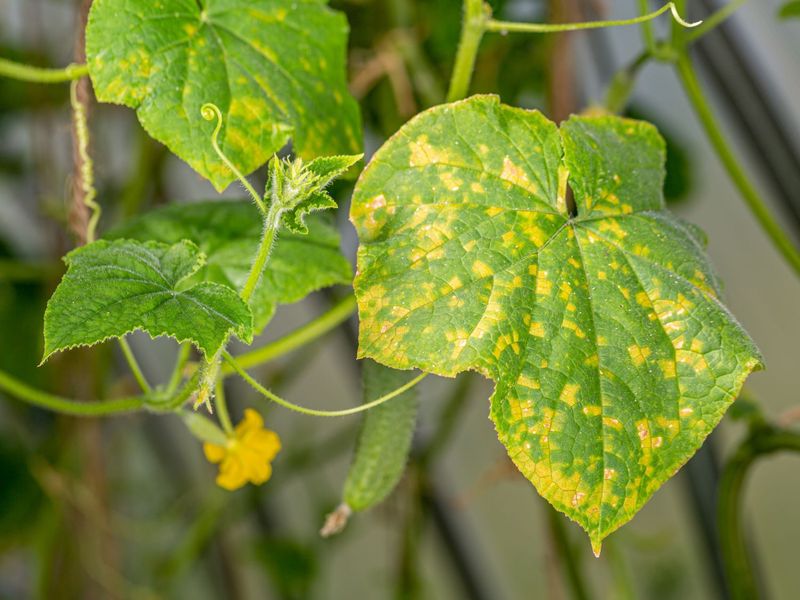
Walking up to a cucumber vine and finding yellow leaves is genuinely worth paying attention to, but the color alone cannot tell you what went wrong. University of Maryland Extension guidance on yellowing vegetable leaves describes the symptom as nonspecific, meaning it can result from normal leaf aging, waterlogged or drought-stressed soil, nutrient deficiency, insect feeding, herbicide injury, viral disease, bacterial wilt, or fungal-like diseases such as downy mildew. Attributing yellow leaves automatically to one care mistake skips the inspection that actually identifies the problem.
One of the most common misreads is treating a single aging lower leaf as a crisis. Cucumber plants naturally shed their oldest, lowest leaves as the vine matures and puts energy into fruiting. A handful of yellowing leaves at the base of an otherwise vigorous, flowering plant with healthy new growth is a very different situation from leaves yellowing rapidly across multiple parts of the plant or spreading from plant to plant in the bed.
That distinction matters because the response differs completely depending on what is actually happening. Colorado State University Extension guidance on diagnosing plant disorders recommends examining the pattern and distribution of symptoms before drawing conclusions, because the location and spread of yellowing carry more diagnostic weight than the color alone. The sections that follow walk through that inspection in a practical order, covering moisture, pests, disease, and the situations that call for outside help.
Read the yellowing pattern before choosing a cause
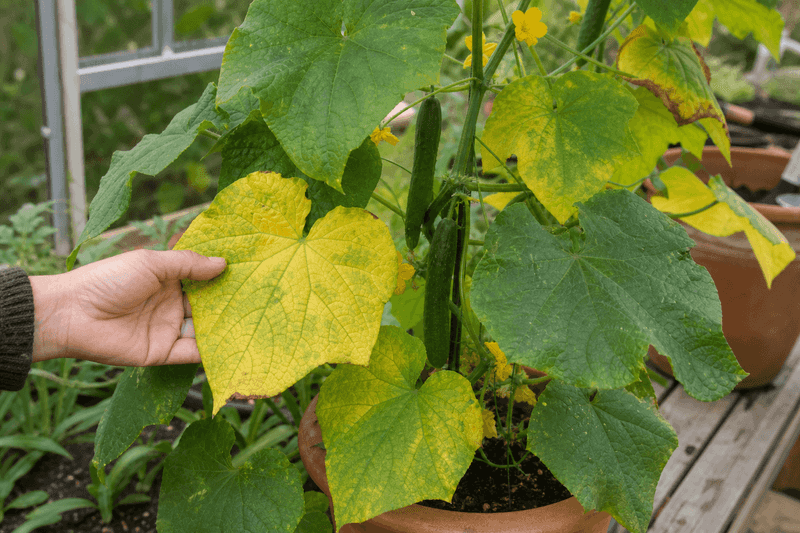
Where the yellowing shows up on the plant is the first clue worth recording. Old lower leaves turning yellow on a plant that is otherwise growing well and setting fruit can reflect natural senescence, but the same location pattern also shows up with nitrogen deficiency, which tends to begin with uniform yellowing of the oldest, lowest leaves. Leaf position alone cannot separate the two, so it needs to be weighed alongside plant vigor and how long the condition has been present.
Yellowing that appears between the veins while the veins themselves stay green is a different pattern entirely. Interveinal chlorosis can occur with certain nutrient problems or with some viral infections, though as UC IPM’s overview of cucurbit yellow stunting disorder makes clear, the pattern alone is not enough for a confident diagnosis. Matching it with other clues, such as whether new growth looks normal or distorted, is necessary before drawing a conclusion.
Whole-leaf yellowing that appears on new growth near the top of the vine is a more urgent signal than yellowing confined to the oldest leaves. When yellowing is spreading quickly across the plant, affecting multiple leaves at different ages, or appearing alongside wilting, curling, stunting, or distorted new growth, the plant is telling you something more serious may be underway. Maryland Extension’s leaf-yellowing resource reinforces that the distribution and speed of spread carry real diagnostic value.
Before moving on to any specific cause, do a quick whole-plant scan. Note whether growth looks vigorous or stunted, whether the vine tips look healthy, and whether fruit development seems on track. That overall picture, combined with the pattern of yellowing, sets up every inspection step that follows.
Check soil moisture before changing the watering routine
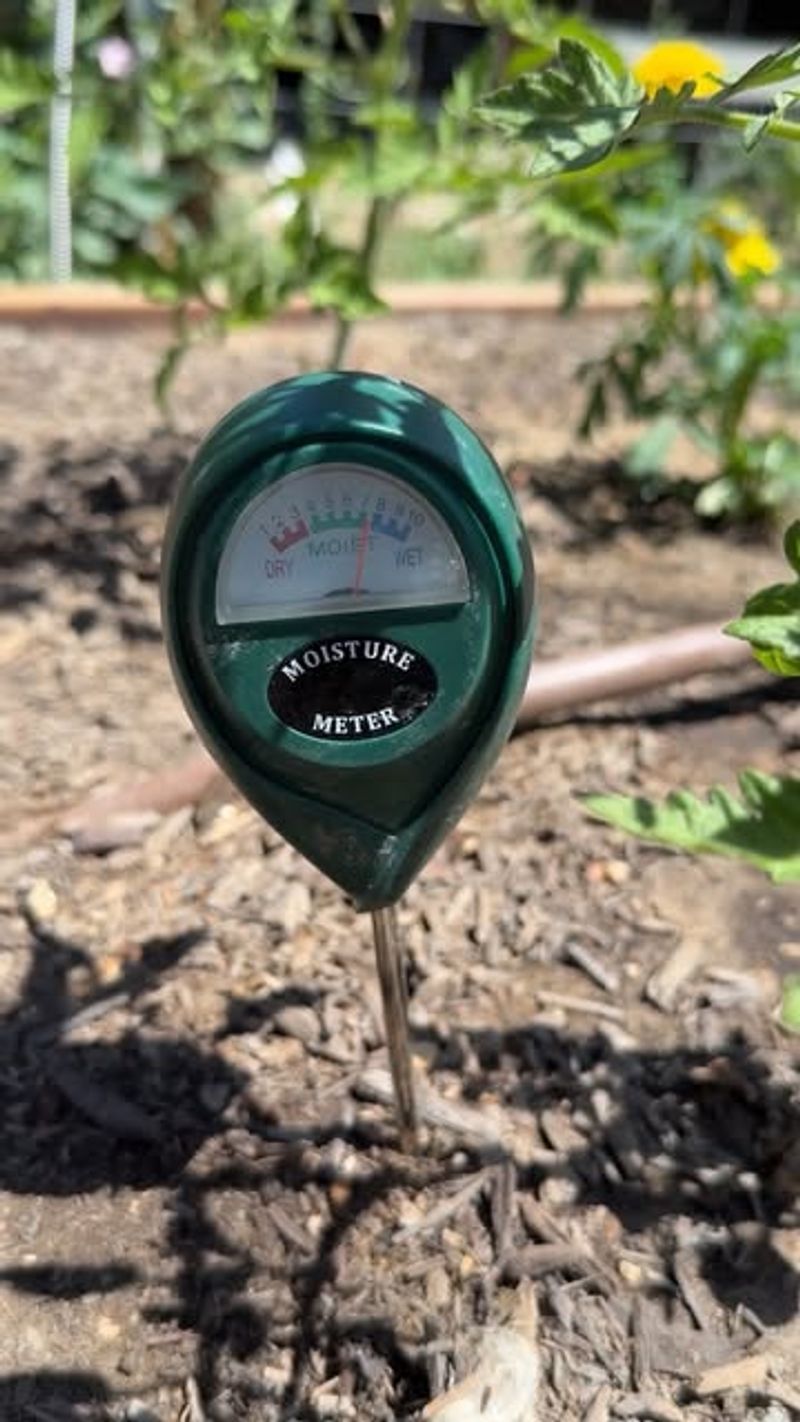
Soil moisture is one of the first things to verify when cucumber leaves turn yellow, but the check needs to be hands-on rather than visual. Push your finger or a thin probe several inches into the soil near the plant’s root zone. Soil that feels wet or cold well below the surface, even when the top looks dry, points toward a drainage or overwatering situation. Soil that feels dry and crumbly several inches down, especially when the plant is also wilting during the day, points toward insufficient water reaching the roots.
Both conditions can produce yellow leaves, and they call for opposite responses. Persistently wet soil can damage roots over time, reducing their ability to take up water and nutrients even when plenty of both are available, and that root stress shows up as yellowing. Dry soil combined with daytime wilt points toward the plant running short on water. OSU Extension’s watering basics guidance emphasizes matching water supply to actual plant need rather than following a fixed schedule, because soil type, weather, and container versus in-ground conditions all affect how quickly moisture is used or lost.
Cucumbers are thirsty plants, but more water is not always the answer. OSU Extension’s cucumber growing guide recommends keeping soil moisture consistently available rather than alternating between dry and saturated. When you do water, directing it to the soil near the plant base rather than overhead reduces the time foliage stays wet, which can matter when disease is a concern.
For container growers, drainage holes and pot size make a significant difference. A container that holds water without draining can saturate roots even when the gardener is watering lightly. Check that containers drain freely and that the potting mix has not compacted to the point where water pools at the surface rather than moving through.
Inspect the undersides of leaves for pests
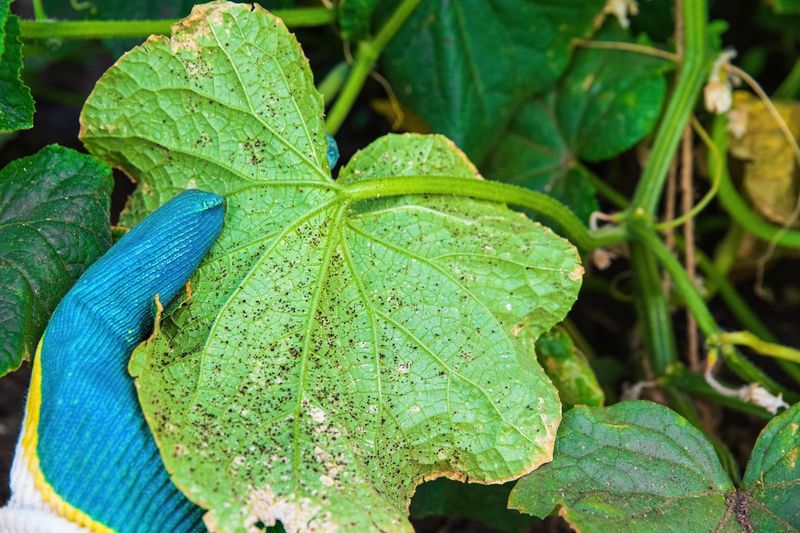
Turning a leaf over is one of the most useful things you can do when cucumber leaves start yellowing, because several common pests spend most of their time on the underside where they are easy to miss from above. Spider mites are a classic example. They produce fine pale or yellow stippling across the leaf surface, and in heavier infestations they leave behind thin webbing on the undersides and in leaf joints. Hot, dry summer conditions favor spider mite populations, so a stretch of heat with low humidity is a reason to look more carefully.
University of Minnesota Extension’s cucumber leaf discoloration diagnostic tool lists aphids as another pest associated with yellowing. Aphids cluster on new growth and leaf undersides, and beyond their direct feeding damage they can transmit viruses from plant to plant, which makes early detection more important than the insects’ small size might suggest. A sticky, shiny residue on leaves or nearby surfaces can indicate aphid activity even before you spot the insects themselves.
Cucumber beetles and squash bugs cause a different type of damage. University of Maryland Extension’s key problems guide for cucumbers connects cucumber beetles with both direct leaf damage and a more serious concern covered in a later section. Squash bugs tend to cluster near the base of the plant and can cause wilting and yellowing by disrupting the plant’s ability to move water through its stems.
Observation should come before any treatment decision. Many insects found on cucumber plants are either harmless or beneficial, and applying a spray without a clear identification of the pest can harm pollinators and other garden allies. UMN Extension’s cucumber growing resource supports monitoring as the foundation of any pest response. Count what you see, note where the insects are concentrated, and take a photograph before deciding whether action is needed.
Angular spots and powder change the disease question
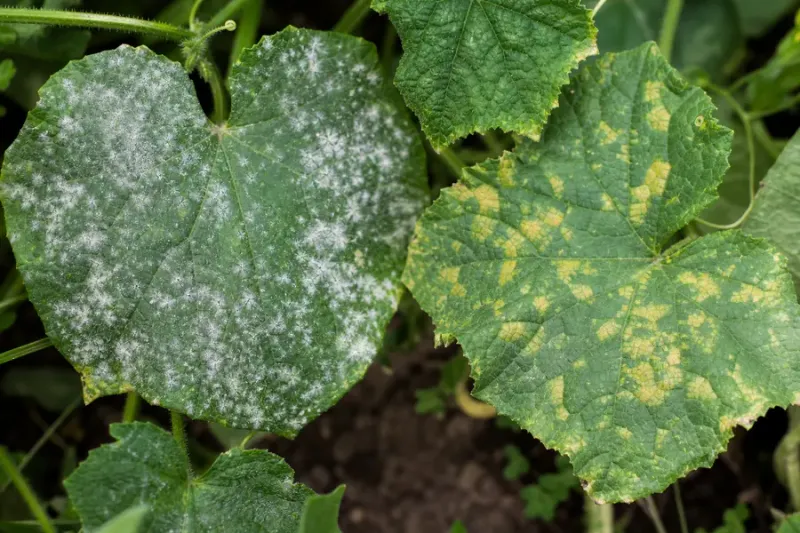
Not all yellow spots on cucumber leaves point to moisture or pests. The shape and texture of those spots carry real information, and two common diseases produce markedly different visual clues that call for different responses.
Pale green or yellow spots that are bounded by the leaf veins, giving them a blocky or angular appearance, are a recognizable feature of downy mildew on cucurbits. As the disease progresses, those spots often turn brown, and under humid conditions a gray to purplish fuzzy growth may appear on the underside of the affected areas. UMN Extension’s downy mildew guide for cucurbits describes this progression and notes that the pathogen responsible is favored by cool nights, high humidity, and leaf wetness. Avoiding overhead irrigation and improving airflow around plants are relevant practices for reducing downy mildew pressure, because the pathogen that causes it does require moisture on the leaf surface to establish infection.
Resistant varieties, where available, offer a longer-term preventive option.
White or gray powdery growth on leaf surfaces, sometimes preceded by yellow spotting, points toward powdery mildew rather than downy mildew. UC IPM’s powdery mildew overview makes an important distinction: unlike downy mildew, powdery mildew does not require free water on the leaf surface to infect. Keeping foliage dry will not reliably prevent or control powdery mildew, so treating both diseases as a single generic fungus problem leads to management steps that may not match the actual situation. UC IPM’s pest notes on powdery mildew in vegetables detail how the disease spreads through airborne spores under dry, warm conditions.
General airflow and sanitation measures, such as removing heavily infected leaves, spacing plants to reduce crowding, and avoiding working in wet foliage, can help limit the spread of both diseases. But these are prevention-oriented steps. UC IPM’s home and landscape downy mildew resource is clear that established infections may not respond to cultural changes alone, and that regional pressure varies considerably across the United States. A gardener in the humid Southeast faces different downy mildew risk than one in the dry Southwest, so local extension advice is worth consulting when these symptoms appear.
Mosaic growth or sudden wilt needs a different response
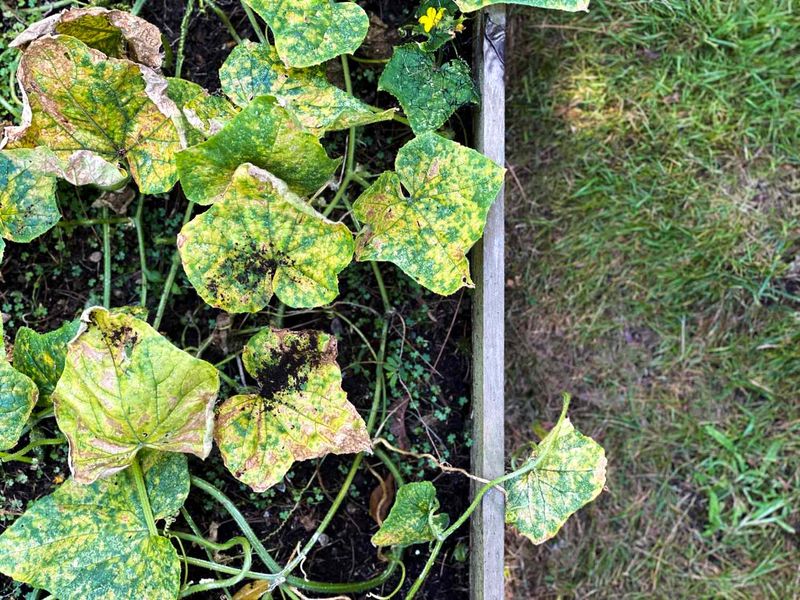
Some symptoms on cucumber plants fall outside the range of what adjusted watering or feeding can fix, and recognizing them early prevents wasted effort and potential spread to neighboring plants. A mosaic pattern, where leaves show irregular patches of yellow and green rather than uniform color, combined with distorted or puckered leaf texture, curling, or overall stunting, raises concern about a viral infection. Penn State Extension’s cucumber mosaic virus resource notes that visual symptoms alone cannot confirm the virus because similar patterns can result from heat stress, herbicide exposure, certain insect damage, or mineral problems. Submitting a sample to a plant diagnostic clinic or your local extension office is the most reliable way to find out what you are actually dealing with.
Plants suspected of viral infection should not be treated as a standard care problem. Repeated watering, fertilizing, or spraying will not address the underlying cause and may give the disease more time to spread. UMN Extension’s cucumber leaf discoloration tool supports careful documentation and professional diagnosis before any intervention.
Sudden daytime wilting that moves progressively down the vine is a different kind of urgent signal. This pattern is associated with bacterial wilt, a disease commonly linked to cucumber beetle feeding. Unlike moisture-related wilt that recovers overnight or after watering, bacterial wilt can advance quickly and affected plants may not recover. Penn State Extension’s vegetable garden problem diagnostic guide recommends considering removal of severely affected plants to limit further spread rather than continuing to water and fertilize in hopes of recovery.
Photograph the whole plant and any close-up symptoms before removing anything, so you have a record for a diagnostic consultation. Isolation or removal, where appropriate, is a more measured response than assuming the wilt is a watering shortfall and adding more water to an already stressed plant.
Follow a low-risk inspection sequence before treating
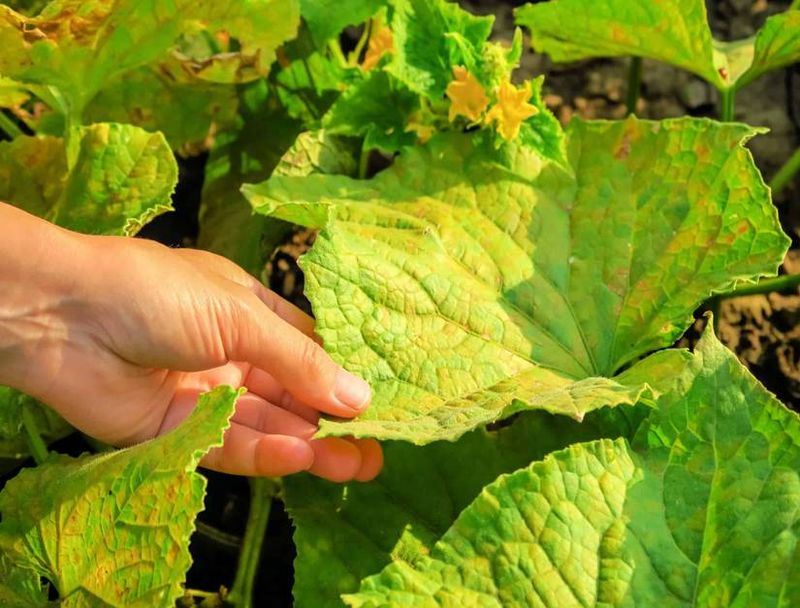
Pulling together everything the previous sections cover into a practical weekend workflow makes the inspection easier to complete without missing anything important. Start by identifying which leaves are affected: are they the oldest, lowest leaves, newer growth near the vine tips, or scattered across the plant at multiple ages? That single observation narrows the possibilities more than almost anything else.
Next, turn several leaves over and examine both surfaces in good light. Look for stippling, webbing, live insects, sticky residue, angular spots, powdery growth, or fuzzy underside growth. Check whether any spots are bounded by veins. Feel the soil several inches down near the root zone and note whether it is wet, moist, or dry.
Then inspect the stems at the soil line and just below the crown for lesions, soft spots, holes, or unusual discoloration. Cornell Cooperative Extension’s guide to identifying plant diseases recommends this kind of systematic symptom inventory before reaching for any product.
Photograph the whole plant from a step back, then take close-ups of the most affected leaves, both surfaces. Those images are invaluable if you end up contacting your local extension service or submitting a sample to a diagnostic clinic. When symptoms are spreading rapidly, affecting multiple plants, involving distorted new growth, or including severe wilting, do not wait – seek help from a plant disorder diagnostic resource or your state’s extension plant clinic.
Hold off on fertilizer until you have a supported reason to apply it. UMN Extension’s fertilizing guide cautions that nutrient deficiencies can mimic disease or water stress visually, and that excess nitrogen can push lush foliage while reducing fruiting. If a pest or disease is confirmed and a product seems appropriate, read the label fully before applying. EPA guidance on reading pesticide labels is clear that the label is the legal use direction, and that means checking whether the product is registered for cucumbers, what the harvest interval is, how many applications are allowed, and what protective equipment is required.
EPA pollinator protection guidance recommends avoiding applications while pollinators are actively foraging, which matters especially during cucumber bloom when bees are essential for fruit set.
Use the warning to protect new growth
A yellow leaf earns its attention because it prompts a useful inspection, not because it delivers an instant diagnosis. Once you have worked through what the pattern, the soil, and the plant’s overall condition are telling you, the goal shifts from worrying about the yellow tissue to protecting the growth that is still healthy and coming in.
Damaged yellow tissue will not turn green again after the underlying cause is corrected. University of Maryland Extension’s yellowing leaves resource frames the realistic outcome clearly: fix the verified cause and focus on the new growth that follows. If soil moisture was off, correct it and watch how the vine responds over the next week. If a pest was identified, address it through credible guidance and monitor rather than escalating immediately.
If disease symptoms are confirmed, adjust practices that apply specifically to that disease and consult your extension service about whether anything further is warranted.
One aging leaf on a vigorous plant is a minor note. Rapid, spreading yellowing combined with wilting, stunting, or distorted new growth is the pattern that calls for prompt investigation. CSU Extension’s plant disorder guide reinforces that the speed and spread of symptoms are as informative as the symptoms themselves. A cucumber plant that keeps putting out healthy new leaves after a few old ones yellow is, in most cases, still doing its job – the inspection confirmed it, and that is exactly what the warning was for.