
If You Want More Christmas Cacti For Free, Here’s How One Small Cutting Turns Into A Whole New Plant
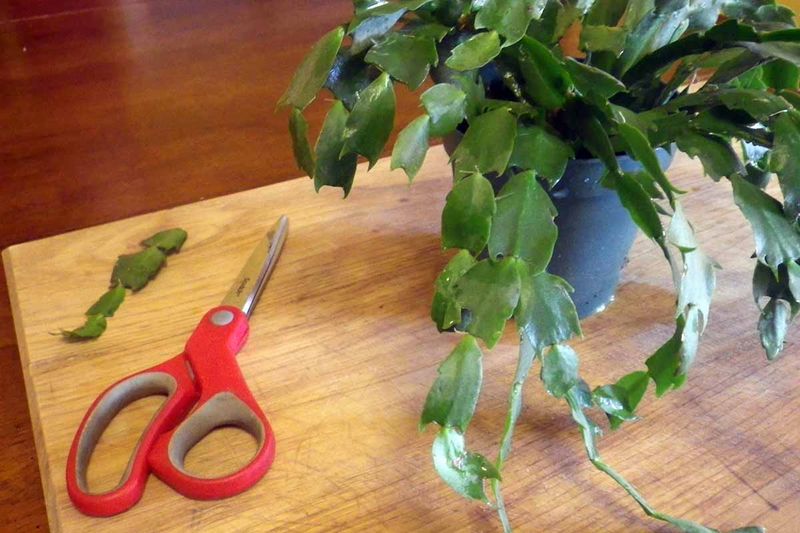
Your Christmas cactus has been growing happily on the windowsill, and now you want more of them without spending a dime at the garden center. Good news: a small multi-segment cutting snipped from a healthy plant can root into a brand-new one, and the process is simpler than most people expect.
The catch is that a couple of easy mistakes, like planting the cutting upside down or keeping it too wet, can stop rooting before it starts. Get those details right, and you could end up with several new plants from a single afternoon of snipping.
Start with a healthy, multi-segment cutting
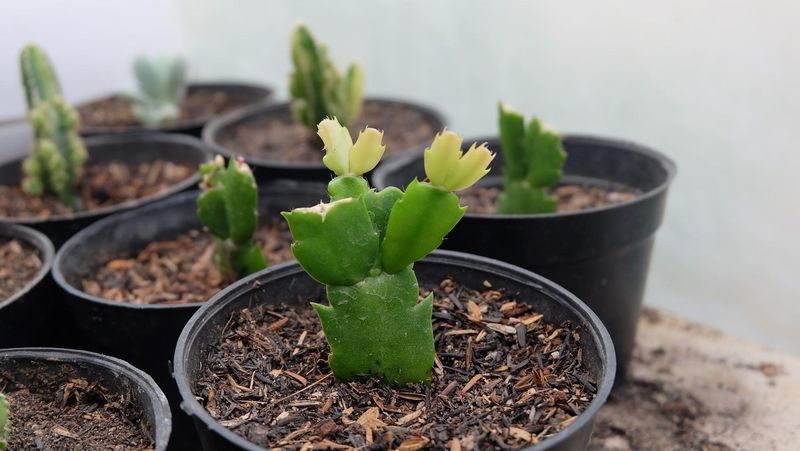
Pulling a cutting from your holiday cactus is genuinely exciting, but the cutting you choose matters more than most people realize. Iowa State University Extension guidance on Christmas cactus propagation recommends selecting a healthy stem section containing about 2 to 5 joined segments for home growers, rather than assuming any tiny fragment will take root on its own.
Commercial growers can root mature single-segment cuttings under controlled conditions, but for a reliable home attempt, a multi-segment piece gives the cutting enough stored energy to push out roots.
Finding the joint is straightforward. Each flat, leaf-like section of the stem, called a segment or cladophyll, connects to the next one at a narrow notch.
That notch is where you separate the cutting, either by gently pinching and twisting or by using clean scissors. The segment you want to remove should feel firm and look fully green, with no soft spots, yellowing, or signs of rot.
Diseased or damaged material can carry problems into your new pot, so skip any segment that looks off.
You may also want to take a closer look at which holiday cactus you actually own. University of Wisconsin-Madison Extension’s holiday cactus guide explains that a true Christmas cactus typically has smoother, more rounded segment edges, while a Thanksgiving cactus has more pointed, tooth-like projections along the margins and tends to bloom a few weeks earlier.
The two are closely related Schlumbergera plants, and the propagation steps described here apply to both. Knowing which one you have is a fun bit of plant trivia, but it will not change how you take or root the cutting.
Choose a period of active growth
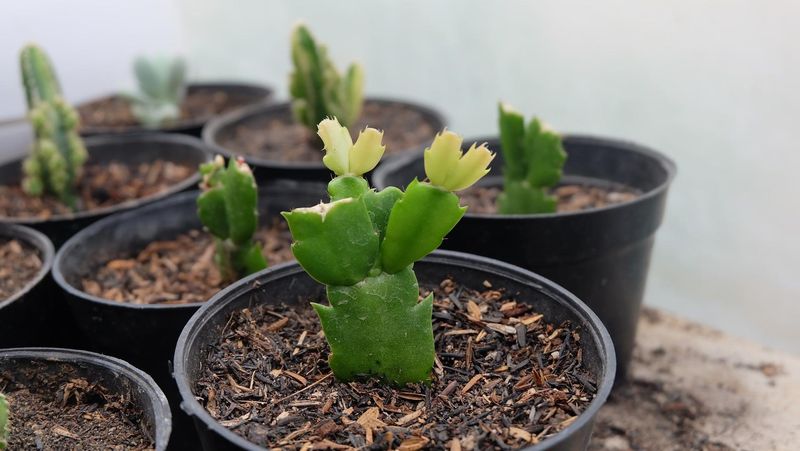
Timing a cutting around the plant’s own growth cycle gives it the best possible start. Wisconsin Horticulture Extension notes that late spring through summer is a commonly recommended window, as is the period right after flowering when the plant resumes active growth.
During these stretches, the cactus is putting energy into new tissue, and a cutting taken at this time has favorable conditions ahead of it for rooting and establishing.
That said, propagation does not have to be a rigid seasonal event. Some gardeners successfully start cuttings at other times of year when indoor temperatures are stable and light is adequate.
The seasonal recommendation is practical guidance, not an absolute rule, so if you missed the ideal window but your plant looks healthy and vigorous, it is still worth trying. What matters most is that the cutting comes from a plant that is actively growing rather than one that is stressed, recently repotted, or just finishing a difficult winter.
Taking the cutting itself is quick. Pinch the stem firmly at the joint and twist gently until the segment separates, or use clean, sharp scissors or pruners if the joint feels tight.
UMass Amherst’s commercial holiday cactus production guidance emphasizes clean cutting tools and sanitary practices to reduce the risk of introducing pathogens. Wiping blades with rubbing alcohol before you cut takes only a moment and removes one more variable that could cause problems later.
Let the cut end callus, then keep the direction straight
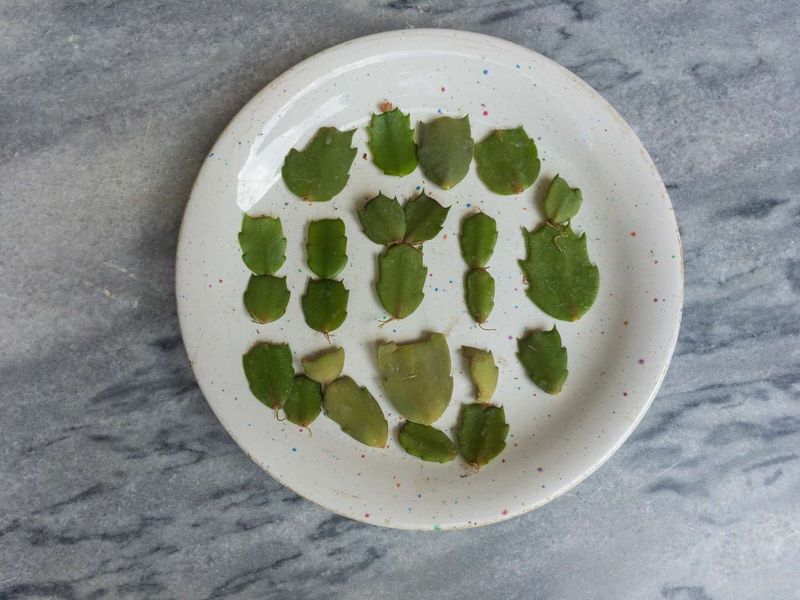
After the cutting comes off the parent plant, resist the urge to stick it straight into soil. The cut surface needs a short drying period, generally overnight to a couple of days, so that the wound can form a thin, dry layer called a callus.
That layer acts as a barrier and reduces the chance of rot once the cutting is in a moist medium. Iowa State Extension’s propagation instructions support this brief rest period rather than prescribing an exact number of days for every situation.
A shaded countertop or a dry tray works fine for callusing. You do not need a special setup, just a spot out of direct sun where air can circulate around the cut end.
Leaving the cutting out for an unnecessarily long time could dehydrate it, so a few days is plenty for most home situations. Once the cut end looks dry and slightly firm rather than wet or sticky, it is ready.
Here is the detail that catches people off guard: orientation matters completely. Iowa State Extension specifically warns that a cutting planted upside down will not root.
The end that was attached to the parent plant, the bottom of the cutting as it grew, must go into the medium. If you are working with several cuttings at once, mark the bottom end with a small piece of tape or set them all in the same direction on your tray so you do not lose track before planting.
Choose a draining medium that holds modest moisture
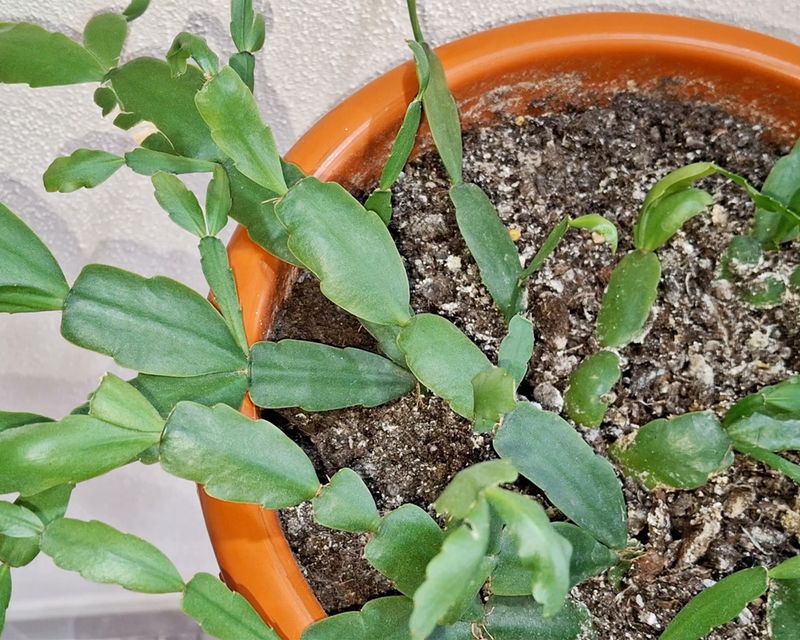
Holiday cacti are rainforest plants at heart, not desert dwellers. University of Connecticut Extension’s holiday cacti factsheet describes them as epiphytes that grow naturally in tree crevices filled with organic debris, where roots get moisture but never sit in standing water.
That background explains why the rooting medium needs to drain freely while still holding a little moisture, rather than behaving like a bone-dry cactus mix or a heavy, waterlogged potting soil.
Perlite, coarse sand, vermiculite, or a well-drained potting mix are all supported options. Some gardeners use a 50/50 blend of perlite and a standard potting mix, which balances drainage with just enough organic matter.
The exact recipe matters less than the result: water should move through the medium quickly, and the surface should feel lightly damp rather than soggy when you check it.
Before the cutting goes in, pre-moisten the medium so the cutting immediately contacts a slightly humid environment rather than dust-dry grit. Iowa State Extension recommends inserting roughly the bottom inch of a multi-segment cutting into the medium, or just enough depth to keep it standing upright without toppling.
A small pot or even a clean plastic cup with drainage holes works well for a single cutting. Press the medium gently around the base so the cutting stays vertical, because a cutting that keeps falling over is harder to monitor and more likely to dry out unevenly.
Support rooting with indirect light and careful moisture
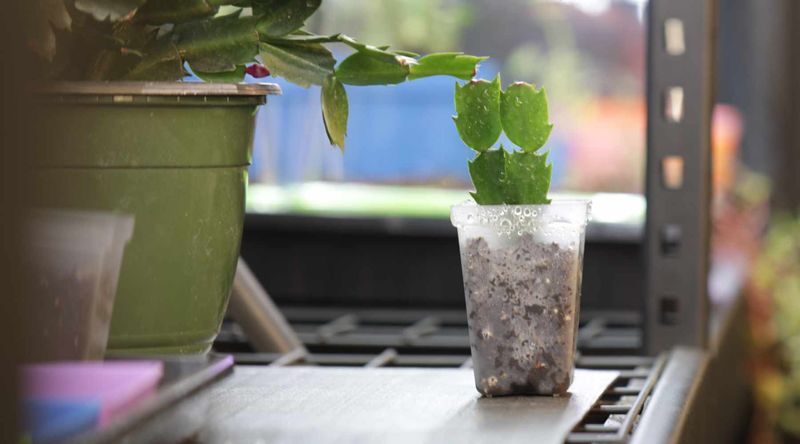
Once the cutting is in its medium, the waiting game begins, and your job shifts to creating a stable environment rather than doing much at all. Bright, indirect or filtered light is the right setting.
UC Agriculture and Natural Resources describes Christmas cacti as plants that thrive in filtered light similar to what filters through a forest canopy, so a spot near a window with a sheer curtain, or a few feet back from a south or east-facing window, is ideal. Harsh, direct sun can stress the cutting before roots have formed to support it.
Moisture management is where most home propagators either succeed or accidentally cause rot. Check the medium every few days by pressing a finger about half an inch into it.
Water lightly when it starts to feel nearly dry, and then let it approach that point again before watering once more. University of Florida IFAS guidance on Christmas cactus warns that constantly soggy conditions promote stem and root rot, which can end the cutting’s chances before any roots appear.
Lightly moist is the target, not wet.
A clear plastic bag loosely placed over the cutting can raise humidity around it, which some extension sources suggest as an optional boost. If you try this, leave an opening for some air exchange and check underneath regularly so condensation does not pool at the base.
UC Master Gardeners of Sacramento County note that rooting hormone powder or gel is an option some gardeners use on the cut end before planting, but multiple extension sources describe successful propagation without it. Buying rooting hormone is entirely optional, not a requirement for this to work.
Wait several weeks and check for usable roots
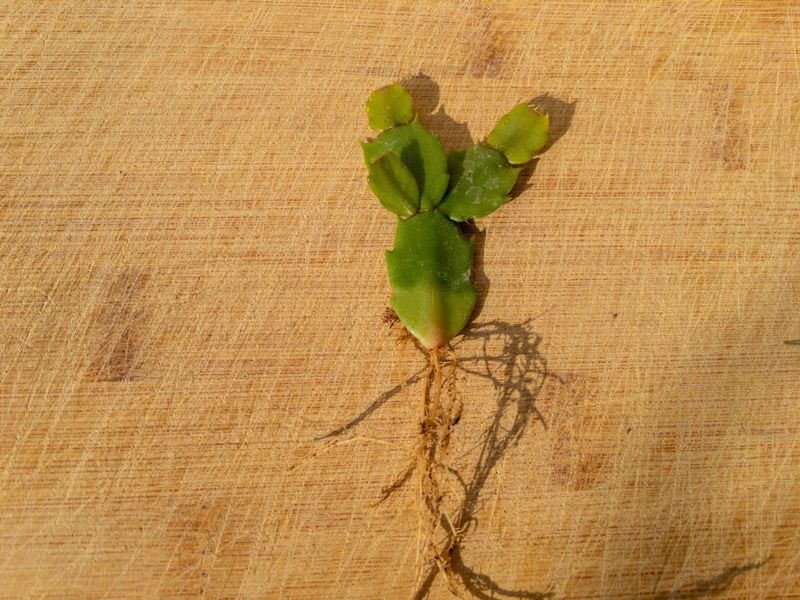
Patience is the skill most needed at this stage. Rooting timelines for holiday cactus cuttings vary considerably depending on the medium, temperature, humidity, and the cutting itself.
University of Wisconsin-Madison Extension reports that rooting can take anywhere from a few weeks to several months under different conditions, and other university sources describe timelines ranging from roughly 2 to 3 weeks on the fast end to 6 to 12 weeks or longer. Expecting a fixed two-week deadline will only cause frustration, so plan for several weeks and treat any earlier development as a bonus.
Checking for roots without destroying the cutting is easy. Give it a very gentle tug after three or four weeks.
If you feel resistance, roots have anchored into the medium. If the cutting pulls out cleanly, set it back, firm the medium around it, and give it more time.
You can also look for new segment growth at the top of the cutting, which is a good sign that the plant is establishing itself, though visible top growth does not always mean the roots are ready for transplanting yet.
Iowa State Extension suggests waiting until roots are about an inch long and well developed before moving the cutting into a well-drained potting mix. Transplanting too early can disrupt fragile root tips.
Once it is in its permanent pot, the cutting enters the next stage of growth, but that stage takes its own time. Iowa State’s broader holiday cactus guide makes clear that flowering depends on plant maturity and specific light and temperature cues, not just on successful rooting.
Try water propagation if you want to see the roots
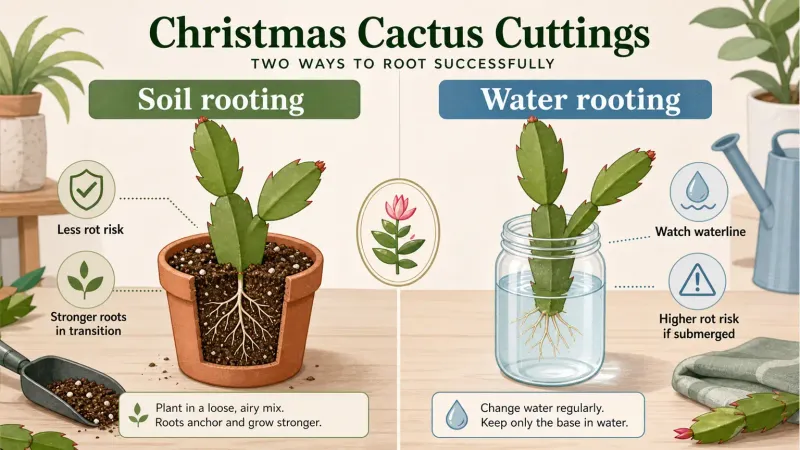
Some gardeners prefer to see exactly what is happening before they commit a cutting to soil, and water propagation makes that possible. The process is straightforward: suspend the callused cutting so that just the bottom end touches the water, without submerging the whole stem.
A small jar works well, and you can rest the cutting across the rim or use a piece of plastic wrap with a hole poked through it to hold the cutting at the right depth.
UC Cooperative Extension’s holiday cactus pruning and propagation guidance documents water rooting as a legitimate alternative, and University of Vermont Extension’s houseplant propagation resource similarly describes rooting cuttings in water before transferring them to a growing medium. The practical appeal is obvious: you can watch roots emerge and grow without disturbing the cutting at all.
The tradeoff is an extra step. Once the roots in water reach a usable length, the cutting needs to move into a well-drained potting medium, because roots that develop in water are sometimes more fragile and may need a short adjustment period in the new medium.
Change the water every few days to keep it fresh and reduce the risk of bacterial buildup. Neither water propagation nor medium-based rooting is proven superior to the other by a direct comparison, so the choice comes down to what works best for your setup and how much you enjoy watching the process unfold.
Use rooted cuttings to fill a pot and shape the parent
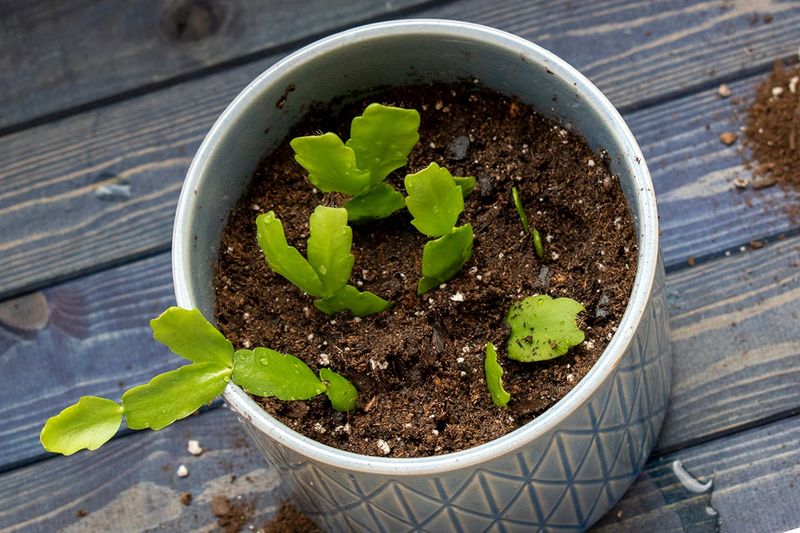
Once you have a few rooted cuttings, you have options beyond just lining up individual pots. Planting several rooted cuttings together in one container creates a fuller, more visually satisfying plant much sooner than waiting for a single cutting to bush out on its own.
Wisconsin Horticulture Extension notes that grouping multiple cuttings in one pot is a practical way to achieve that lush, established look. The important clarification is that sharing a pot does not speed up each cutting’s individual maturity; it simply means the container looks fuller from the start.
The cuttings you take are also genetic clones of the parent plant. University of Illinois Extension explains that stem-cutting propagation preserves the parent’s traits, so whatever flower color or cultivar characteristics your original cactus carries will generally show up in the new plants too.
If you love the deep magenta blooms on your parent plant, the cuttings should produce the same color.
Taking cuttings also does something useful for the parent plant. University of Minnesota Extension notes that pruning can stimulate one or two new segments to grow at the cut point, which can help reshape a leggy or uneven plant over time.
Just make sure the parent is healthy before you start harvesting from it. UMass Amherst’s commercial production guidance emphasizes that clean, pathogen-free plant material is the foundation of successful propagation, so a visibly diseased or rotting parent is not a good source for cuttings meant to start healthy new plants.
Treat the new plant as a long-term project
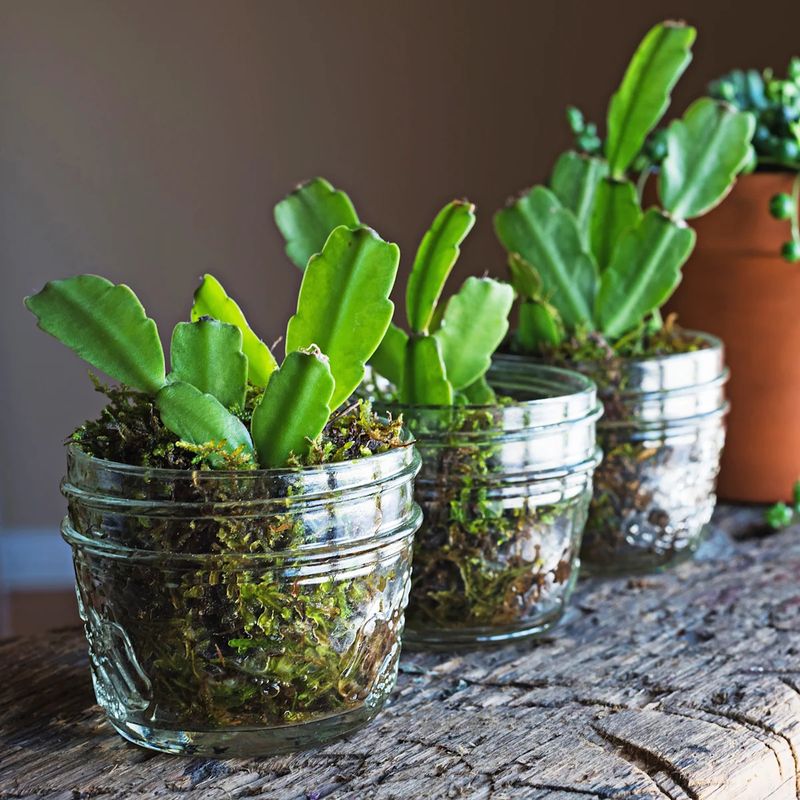
The full process, from snipping to a rooted cutting ready for its permanent pot, comes down to a short checklist. Take a 2 to 5-segment section from a healthy plant at a joint, let the cut end dry for a day or two until it forms a callus, then plant it right-side up in a free-draining medium that you have pre-moistened.
Iowa State Extension’s propagation guide covers these steps as the reliable home method, and they hold up whether you are working with a true Christmas cactus or a Thanksgiving cactus.
Provide bright indirect light and check the medium regularly so it stays lightly moist without sitting wet. Then wait.
Wisconsin Horticulture Extension and other sources make clear that rooting takes several weeks under typical home conditions, so build that patience into your expectations from the start. Once roots are about an inch long, transplant into a well-drained potting mix and continue normal holiday cactus care.
One honest note on cost: the plant material itself is free if you already own the parent cactus, but a small pot, some perlite, and a bag of potting mix may still require a modest purchase. UConn Extension’s holiday cacti guide is a good reference for ongoing care once your cutting graduates to a real pot.
A rooted cutting is a genuine new plant, but substantial size and flowering take continued time and care. The reward is worth the wait, and each new plant carries the same colors and character as the one you started with.