
The One Thing North Carolina Tomatoes Need When The Lower Leaves Yellow Or The Plant Keeps Declining
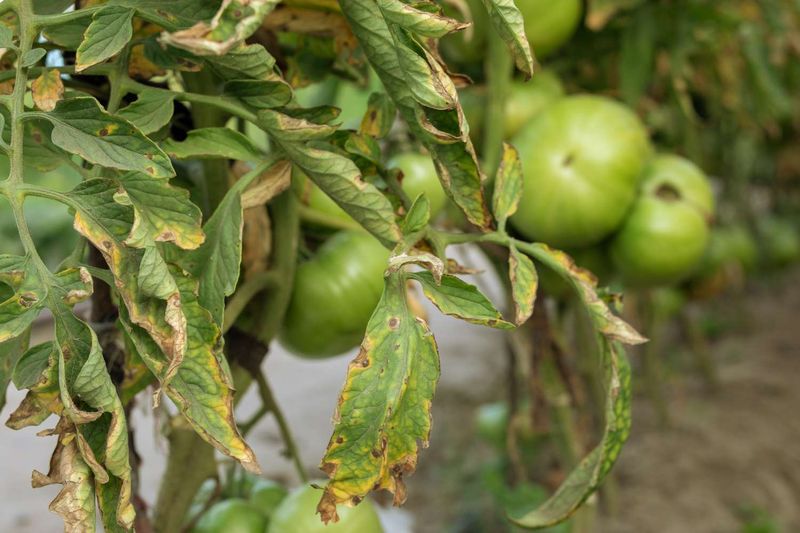
Yellowing lower leaves on a tomato plant can make any gardener reach for the nearest fertilizer or home remedy, but that reaction often misses the real problem. Lower-leaf yellowing is a symptom location, not a diagnosis, and the cause can range from a simple watering issue to a destructive soil disease.
Knowing how to read the plant before you act is what separates a saved harvest from a lost one. North Carolina’s varied soils and humid summers give tomatoes more ways to decline, which makes a careful inspection even more valuable.
Yellow leaves call for inspection, not a product
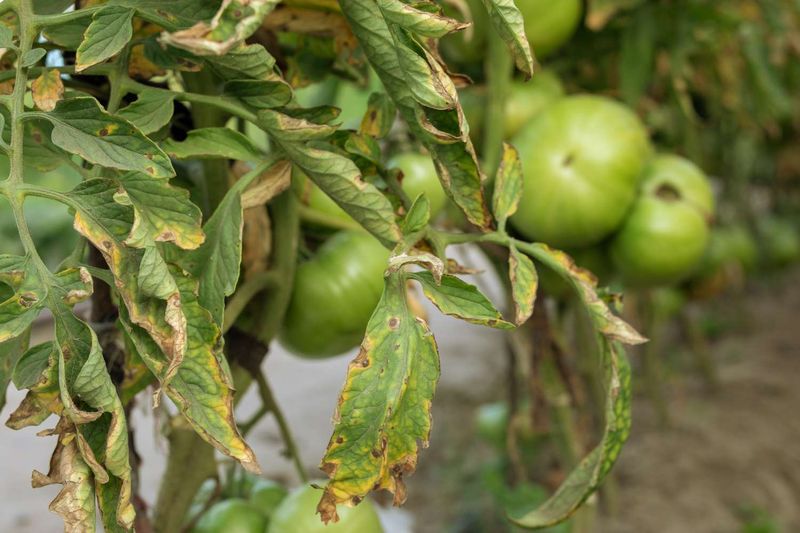
Lower leaves going yellow is one of the most common distress signals a tomato plant sends, and the instinct to grab a product off the shelf is understandable. The problem is that yellowing lower leaves can mean a dozen different things, and choosing a fix before understanding the cause can waste time, money, and the plant itself.
NC State Extension’s home tomato guide lists soilborne diseases, wind-dispersed fungal pathogens, insect-transmitted viruses, and nutritional problems as documented causes of tomato decline, all of which can produce overlapping symptoms.
Start with a full inspection before touching anything. Stand back and ask whether the entire plant looks pale and washed out, or whether only a cluster of lower leaves has turned yellow while the upper growth stays green.
That single observation already narrows the field significantly. Then move in closer and check the new growth at the top of the plant: actively growing tips that look healthy and normally colored are a reassuring sign, while stunted, curled, or discolored new leaves suggest a different category of problem.
Next, look at the leaf surfaces carefully. Run your fingers along the undersides and check for spots, lesions, or powdery residue.
Feel the soil a few inches down and note whether it is bone dry, reasonably moist, or soggy. Look at the base of the stem and check whether the lowest part of the plant shows any soft tissue, dark streaking, or unusual discoloration.
NC State’s diagnostic tables consistently point toward pattern recognition as the first step before any corrective action.
Finally, note the pace of decline. A few lower leaves yellowing gradually over a week or two tells a different story than a plant that went from healthy to wilted and spotted in three days.
NC State’s diagnostics chapter emphasizes that the speed and spread of symptoms are meaningful clues. Prompt inspection is not about hitting an arbitrary deadline; it is about catching a manageable problem before it becomes an unmanageable one.
Read the pattern before you choose a cause
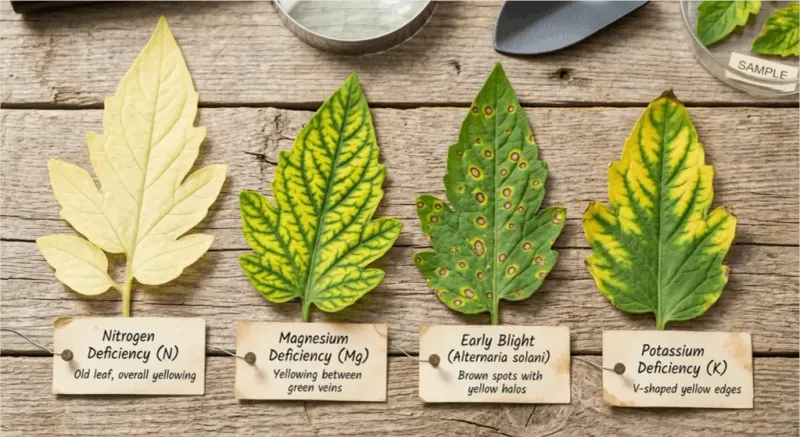
Symptom patterns on tomato leaves are clues, not certainties. Reading them carefully can point you toward the right category of problem, even if they cannot give you a confirmed diagnosis on their own.
The most important distinctions involve where the yellowing starts, which tissues are affected, and what the leaf surface actually looks like up close.
When the whole plant looks uniformly pale green and growth has slowed noticeably, nitrogen deficiency is a reasonable possibility. University of Georgia Extension’s tomato troubleshooting guide notes that nitrogen deficiency typically produces overall light-green coloring starting on older leaves, rather than the sharply defined spots or one-sided symptoms that suggest disease.
That distinction matters because a plant that looks pale all over and is growing sluggishly is a very different situation from one with isolated spotted leaves on an otherwise vigorous vine.
A pattern where the tissue between the leaf veins turns yellow while the veins themselves stay greener on older or lower leaves can be a possible magnesium-related symptom. This interveinal pattern is worth noting, but it is not a reliable solo diagnosis.
NC State’s magnesium deficiency resource describes similar patterns in crops where vein tissue retains color while surrounding tissue yellows. Similar interveinal chlorosis can also result from other nutrient imbalances or even certain disease processes, so testing before treating is essential.
Spots on the leaf surface shift the picture entirely. Small, circular, tan or gray spots with darker margins and sometimes a yellow halo point toward Septoria leaf spot.
Larger lesions with a target-like pattern of concentric rings are more consistent with early blight, which is common across North Carolina in warm, humid conditions. Neither of these is a fertilizer problem.
Yellowing or curling of the youngest leaves at the top of the plant, especially when combined with stunting or flower drop, is a separate category altogether. Tomato yellow leaf curl virus, transmitted by whiteflies, primarily affects young growth rather than old lower leaves.
Herbicide drift can produce similar distorted new growth. When the vine is otherwise vigorous and only the oldest, most shaded lower leaves are yellowing without any spots or wilt, UC Cooperative Extension’s yellow-leaf guide notes that natural aging and shading become plausible explanations, particularly if yellowing is not climbing the plant or affecting fruit production.
Use soil testing to guide corrective feeding
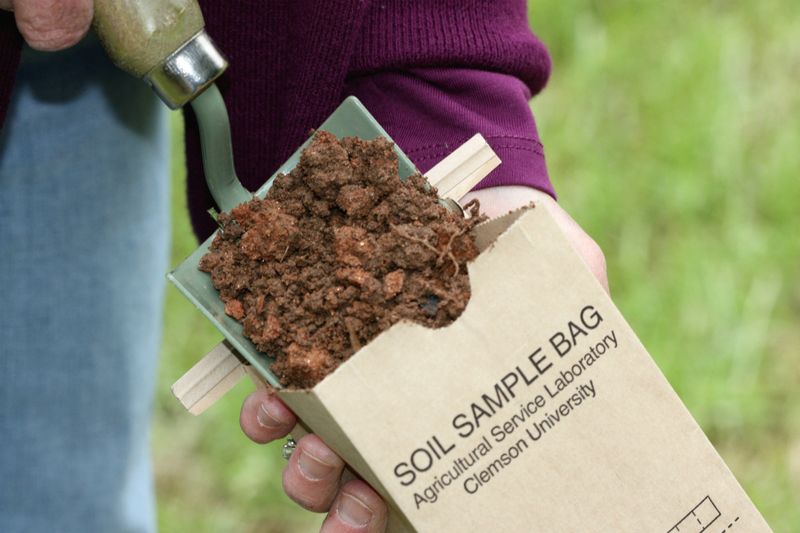
Before adding any amendment to your soil, a soil test gives you something that visual symptoms cannot: actual numbers. Guessing at a deficiency and then applying fertilizer, lime, dolomite, or Epsom salt without knowing your soil’s current status can worsen nutrient imbalances, damage plant roots, and send excess materials into local waterways.
NC State’s gardener’s guide to soil testing describes laboratory testing as the reliable way to determine soil pH and nutrient levels before making corrective decisions.
Epsom salt comes up frequently in tomato forums as a quick fix for yellowing leaves, but it supplies only magnesium and sulfur. It does not provide nitrogen, calcium, or any disease control.
Extension specialists caution that applying Epsom salt when magnesium is not actually deficient can introduce unnecessary salts into the soil and may do nothing useful at all. Ask Extension’s Epsom salt and tomatoes entry explains that the product is often applied based on assumed deficiency rather than confirmed need, which is exactly the situation a soil test can prevent.
Magnesium deficiency in particular cannot be reliably diagnosed from a photo or a general description of interveinal yellowing. Similar patterns can appear from manganese problems, certain diseases, or other imbalances.
Soil or tissue testing is the appropriate next step before reaching for any magnesium product, including dolomitic lime, which raises pH at the same time it adds magnesium. If your soil pH is already in range, adding dolomite to address a suspected magnesium problem could shift pH in the wrong direction.
NC State’s home tomato growing guide recommends sidedressing with 2 to 3 tablespoons of a complete fertilizer such as 8-8-8 or 10-10-10 per plant after fruit set, repeated every 4 to 6 weeks during the season, keeping fertilizer 4 to 6 inches from the stem. That is routine maintenance guidance for a healthy or reasonably performing plant, not a rescue dose for one that is already in visible decline.
Applying routine fertilizer to a plant that is actually struggling with a disease or a root problem does not address the real cause and may accelerate stress. When symptoms suggest a possible deficiency on a declining plant, test first, then follow the results and the product label.
Spots signal a disease-management problem
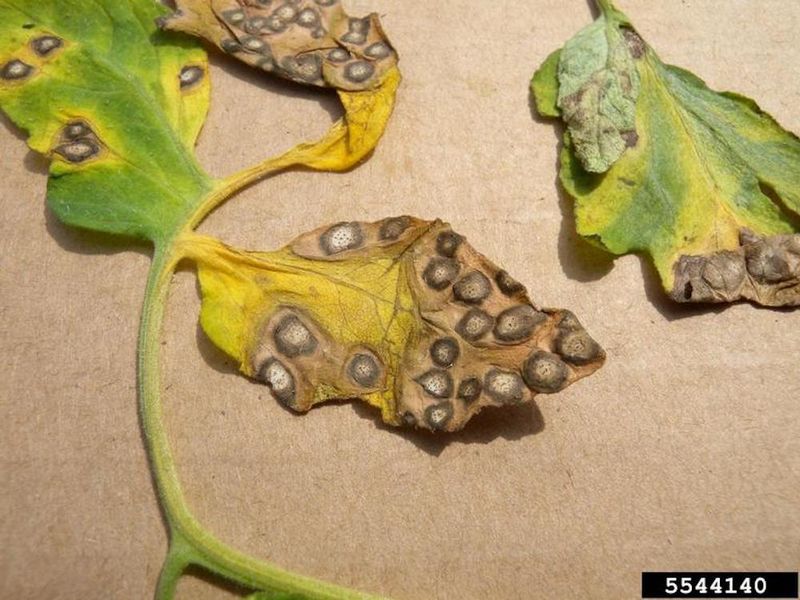
When spots appear on the lower leaves of a North Carolina tomato plant, the situation calls for disease management, not fertilizer. Two of the most common culprits are early blight and Septoria leaf spot, and both typically begin on the oldest, lowest leaves before working their way up the plant.
Learning to tell them apart by their lesion patterns helps you respond appropriately, even if appearance alone cannot give a guaranteed identification.
NC State’s early blight guide describes the lesions as relatively large, with a distinctive target-like appearance of concentric rings inside a brown or dark border. Septoria leaf spot produces smaller, more numerous circular spots, typically tan or gray in the center with darker margins, sometimes surrounded by a yellow halo, and often containing tiny dark structures visible at the center of each spot.
Both diseases thrive in North Carolina’s warm, humid summers and can spread rapidly if conditions favor them.
The practical response to either disease starts with careful leaf removal. Take off the clearly affected lower leaves without stripping the plant down to bare stems, which would remove too much of the plant’s photosynthetic capacity.
Place the removed leaves in a sealed garbage bag or other container rather than leaving them on the ground near the garden, and avoid casually tossing them into a home compost pile, since home composting does not reliably destroy all fungal pathogens. NC State’s Septoria leaf spot publication recommends removing crop debris and disposing of infected material carefully.
Beyond leaf removal, improve airflow by staking or trellising the plant if it is not already supported. Mulch around the base of the plant to reduce soil splash, which is how both diseases spread from the soil surface onto lower leaves.
Irrigate at the base of the plant rather than overhead, and avoid working in the garden when the foliage is wet. Fungicides registered for Septoria are preventative tools, meaning they protect healthy tissue from new infections rather than reversing spots that have already formed.
Pruning and cultural controls reduce disease pressure and can slow the spread, but they cannot cure an established infection or reverse vascular disease.
Persistent wilt deserves prompt escalation
Tomato plants wilt during a hot North Carolina afternoon, and that alone is not cause for alarm. Healthy plants can droop noticeably during peak heat and recover their turgor by evening or early the next morning.
What matters is whether the wilt goes away. NC State’s diagnostics chapter notes that extended wilting that does not resolve is abnormal and warrants a closer look at the stem, roots, and overall plant condition.
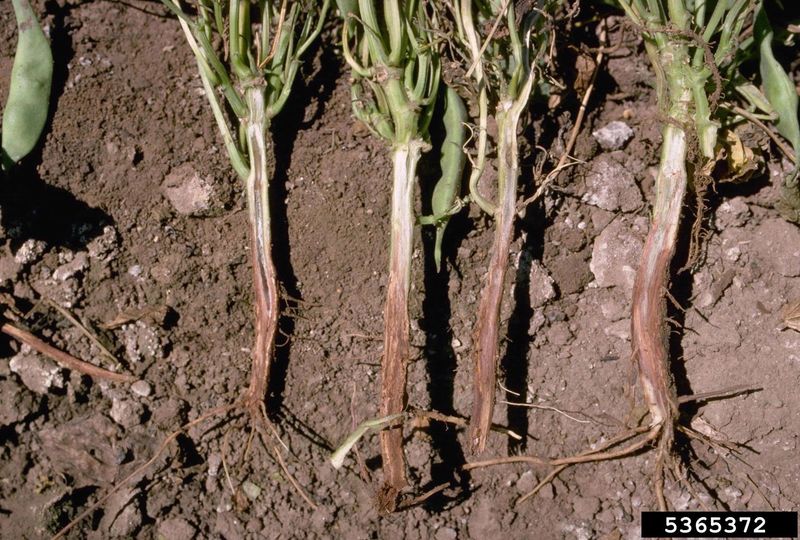
One-sided yellowing and wilting, where symptoms appear more pronounced on one branch or one half of the plant while the other side looks relatively normal, can be a warning sign of Fusarium or Verticillium wilt. Both are soilborne fungal diseases that invade the plant’s vascular system and restrict water movement.
Oklahoma State University Extension’s tomato guide describes how cutting the lower stem of a suspected wilt-infected plant may reveal brown or tan discoloration of the internal vascular tissue, which is a meaningful warning sign rather than proof of one specific disease. If you see that discoloration and the plant continues to decline despite adequate water, disease is the more likely explanation than drought.
Bacterial wilt presents differently and more urgently. A plant infected with bacterial wilt can collapse quickly, often without the gradual yellowing pattern that precedes fungal wilt.
Stem discoloration and a test where a freshly cut stem section is suspended in clear water may show bacterial streaming as a milky or cloudy thread from the cut end. These observations are warning signs worth taking seriously, though confirming bacterial wilt definitively requires laboratory testing.
When you suspect bacterial wilt, contact your local cooperative extension office for guidance.
NC State’s bacterial wilt publication recommends removing suspected plants promptly and sealing them in a garbage bag or other container to prevent spreading contaminated soil and bacteria to the rest of the garden. There are no chemical controls that reliably manage bacterial wilt once the disease is established in a plant.
Acting quickly to remove the affected plant protects the rest of your planting, even when it means accepting the loss of one vine.
Match watering to the soil and the weather
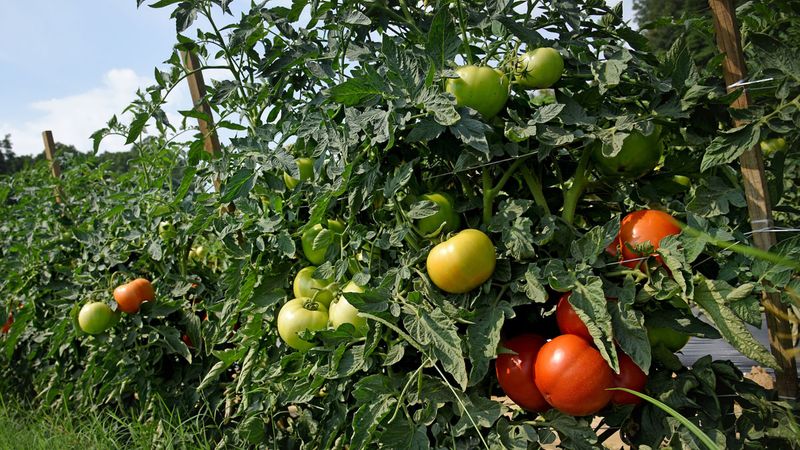
Both too little and too much water can push a tomato plant toward decline, and they can look surprisingly similar from a distance. Drought-stressed plants drop lower leaves and may wilt during the day without recovering fully.
Waterlogged roots suffocate, lose their ability to take up nutrients, and create conditions that favor root rot and soilborne diseases. Correcting the wrong one makes things worse, not better.
NC State’s home tomato guide recommends soaking the soil to a depth of roughly 6 to 8 inches about every 7 days, with the general target of approximately 1.5 inches of water per week during fruiting. Those numbers are a starting point, not a fixed schedule.
Rainfall, temperature, plant size, soil type, and drainage all change what your specific plants actually need. Soil should feel moist a few inches down but not muddy or compacted with standing water.
Soil type matters considerably across North Carolina’s different regions. Sandy soils common in the Coastal Plain drain quickly and can lose both water and nitrogen faster than heavier soils, which means plants on the coast may need more frequent attention during dry stretches.
NC State’s Piedmont and Coastal Plain tomato production guide describes how these regional soil differences affect water and nutrient management. Piedmont clay soils tend to hold moisture longer but can also drain poorly in low spots, increasing the risk of waterlogged conditions and root problems during wet periods.
Mountain growers face a different set of variables. Cooler temperatures, higher rainfall in many areas, and steeper terrain affecting drainage mean that Eastern North Carolina watering schedules do not translate directly to a mountain garden.
If you garden in the Blue Ridge or western foothills, rely on local conditions, your specific soil’s drainage behavior, and guidance from your county extension office rather than assuming that flat-terrain recommendations apply to your site. Regardless of region, correcting a watering problem can stop further stress-related decline, but it will not reverse an established fungal or bacterial disease.
Measure recovery by what grows next
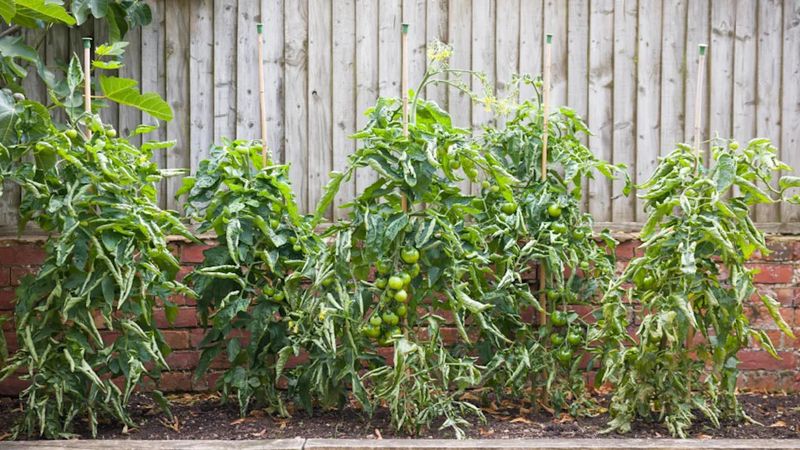
After you have identified and addressed the likely cause, the plant’s response will not be instant. Yellow tissue that is already damaged will not turn green again, regardless of what caused the problem or how well you correct it.
Extension diagnostic guidance consistently points to healthy new growth and a halt in upward spread as the meaningful signs of improvement, not a color change in leaves that were already affected.
Watch the top of the plant over the following week or two. New leaves that emerge with normal green color and typical size, combined with yellowing that stops climbing, suggest the plant is stabilizing.
If spots continue to appear on leaves that were previously healthy, or if wilt persists after consistent and appropriate watering, or if fruit production drops without explanation, the plant may have more than one problem or an established disease that cultural corrections alone cannot stop. NC State’s diagnostic tables can help you work through overlapping symptoms when decline continues despite your best efforts.
Escalating to your county cooperative extension office is a reasonable next step when you cannot identify the cause, when decline accelerates, or when multiple plants in the same bed begin showing symptoms. They can recommend soil and tissue testing, review photos, and in some cases connect you with a plant disease clinic for a more definitive answer.
The practical takeaway across all of this: inspect the plant and the soil promptly rather than reaching for a product first, test before adding corrective amendments, keep moisture balanced and foliage dry, follow appropriate fertilizer guidance for a healthy plant rather than improvising rescue doses, and remove a plant promptly when destructive wilt is genuinely suspected rather than hoping an unproven remedy will turn things around. NC State’s bacterial wilt guidance makes clear that speed matters for protecting the rest of your garden.
A tomato plant that declines and gets properly diagnosed has already taught you something useful about your soil, your site, and what to watch for next season.