
The Most Underrated North Carolina Herb You Tuck Into Window Boxes This September For Cuttings All Fall
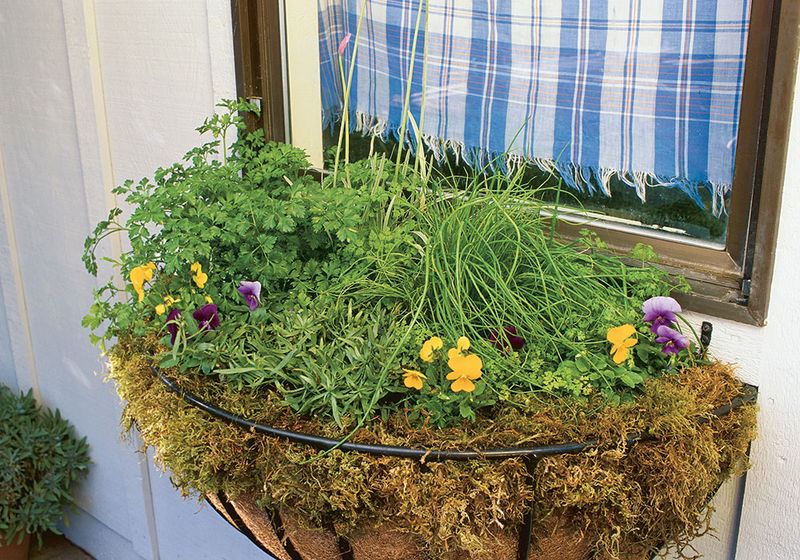
Most gardeners walk right past garden chervil at the seed rack without a second glance, yet this feathery, anise-scented herb thrives in the cool, lower-light conditions that shut down basil and stress out parsley. Known as French parsley, chervil is one of the few edible herbs that actually prefers the shortening days and dropping temperatures of a North Carolina fall.
Tucked into a window box in late summer or early fall, it can reward you with tender, flavorful leaves in roughly six to eight weeks under the right conditions. One clarification before you start: chervil grows from seed, not from stem cuttings, so the approach here is a bit different from what the original title suggests.
Garden chervil fits the fall window box—but it is not a cutting project
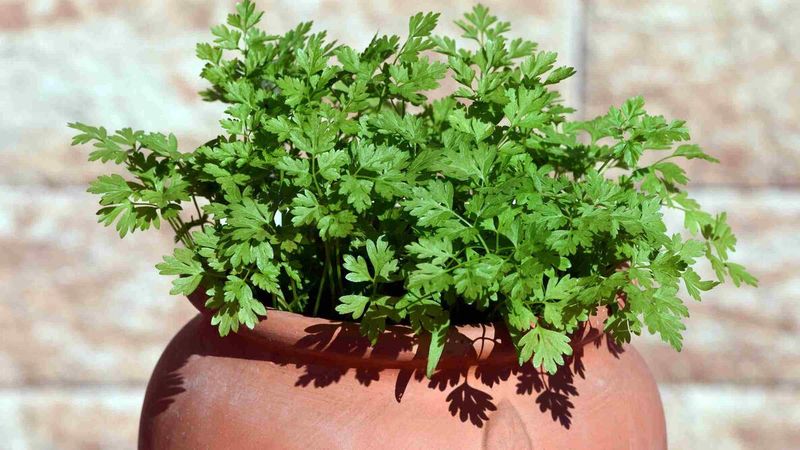
Garden chervil, known botanically as Anthriscus cerefolium and sometimes called French parsley, is the herb worth growing in your North Carolina window box this fall. Its finely cut, fern-like leaves carry a mild anise flavor that pairs well with eggs, fish, and light sauces, yet most home gardeners have never grown it.
That gap between its usefulness and its obscurity makes “underrated” a fair description, even if no official ranking puts it at the top of any list.
The case for chervil in a fall window box is grounded in straightforward plant behavior. The NC State Extension Gardener Plant Toolbox recommends sowing chervil in pots or in the ground in early spring or fall, noting that it prefers cool weather, moist well-drained soil, and partial to full sun.
Separately, NC State’s Piedmont container gardening guidance points out that chervil tolerates cool weather and low light, can continue growing into fall, and may be ready to harvest approximately six to eight weeks after sowing under suitable conditions. That profile fits a residential window box better than most cool-season herbs.
Here is the correction the title needs: chervil does not root from stem cuttings the way rosemary or sage does. NC State lists seed as its recommended propagation method and notes that the plant does not transplant well, because seedlings develop a taproot early.
Rooting a chervil stem cutting is not a supported technique, so readers should plan to sow seed directly rather than snipping stems and hoping they root.
“Underrated” is a reasonable, subjective label for an herb this useful and this overlooked. What the title overpromises is the cutting method and an unqualified all-fall guarantee.
The sections ahead correct both points while keeping the window-box payoff fully intact.
Choose your planting window by region, not by the calendar
A single September planting date sounds tidy, but North Carolina’s climate does not cooperate with tidy. The state stretches from sea-level barrier islands to mountain peaks above five thousand feet, and that range creates wildly different fall growing windows.
Using a fixed calendar date rather than local conditions is one of the fastest ways to end up with a box of nothing.
Chervil needs cool, moist conditions to germinate and grow well. Heat is its primary enemy: when temperatures stay high, seeds germinate poorly and young plants bolt quickly, sending up flower stalks instead of the tender foliage you want.
In the Coastal Plain, early September can still feel like midsummer, with daytime highs regularly in the upper eighties or low nineties. Sowing before the heat backs off in that region often produces disappointing results.
Piedmont gardeners generally have a more forgiving window, with temperatures easing into the comfortable range for chervil somewhat earlier in the season.
Mountain gardeners face the opposite problem. NC State’s average first and last freeze date data shows that some high-elevation mountain locations see a first freeze as early as October 1 to 7, which compresses the usable fall window considerably.
Sowing too late in the mountains may not leave enough frost-free weeks for a full harvest.
The most practical guidance is to watch your local overnight lows rather than the date on the calendar. When nighttime temperatures are consistently falling into the sixties and daytime highs are dropping below eighty, conditions are moving in chervil’s favor.
For most Piedmont and mountain gardeners, that shift happens somewhere in the late-summer-to-early-fall range. Coastal Plain gardeners should wait until their own local heat breaks, which may push the sowing date later than a statewide September rule would suggest.
Direct-sow identified seed in the window box
Before anything else, confirm you have identified garden chervil seed. Look for “Anthriscus cerefolium” on the packet label.
Seed sold simply as “chervil” at a reputable garden center or online herb seed supplier is almost certainly the correct species, but checking the botanical name removes any ambiguity. The safety section later in this article explains why that identification step matters more than it might seem.
Choose a window box with drainage holes. A container that holds standing water will rot chervil roots quickly, and the plant’s preference for moist, well-drained soil means drainage is non-negotiable.
Fill the box with a loose potting mix that retains some moisture without becoming heavy or compacted. A standard quality potting mix works well; avoid dense garden soil, which can compact in containers and impede root development.
The Royal Horticultural Society’s chervil growing guidance recommends fertile, moist but well-drained soil, which a good potting mix replicates in container form.
Sow the seeds directly into the box where the plants will grow. Chervil seeds need light to germinate, so press them gently onto the surface of the mix and cover them only very lightly, or leave them nearly uncovered.
A dusting of fine potting mix or vermiculite, just enough to barely obscure the seeds, is sufficient. University of Illinois Extension’s chervil profile confirms that seeds require light for germination, making deep burial a common sowing mistake to avoid.
Keep the surface consistently moist from sowing until germination. A gentle misting rather than a hard stream of water prevents seeds from washing to one end of the box.
Once the seedlings are up and growing, maintain steady moisture without letting the mix become waterlogged.
Do not try to transplant chervil seedlings started elsewhere into the box. NC State’s plant profile notes that chervil develops a taproot and transplants poorly, which is precisely why direct sowing into the final container is the right approach from the start.
Give tender foliage cool, sheltered light
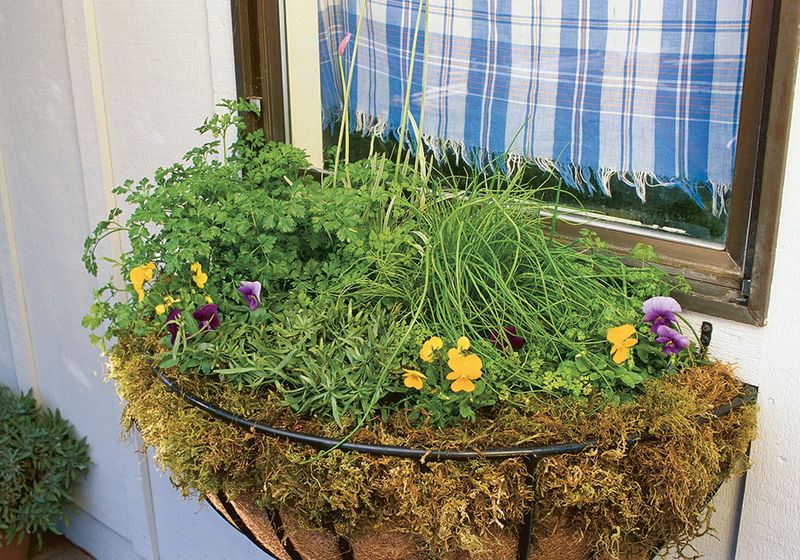
Placement matters as much as timing for a chervil window box. The herb tolerates partial shade and lower light levels better than most culinary herbs, which is genuinely useful for north- or east-facing windows that would frustrate basil or rosemary.
Morning sun with protection from intense afternoon heat is an ideal arrangement. A spot that receives direct sun before noon and then shade or filtered light through the afternoon keeps the foliage tender and slows the bolting process.
Hot afternoon sun is the main placement mistake to avoid. RHS guidance on growing chervil specifically notes that hot, dry conditions encourage premature bolting.
Once a chervil plant sends up a flower stalk, the leaves become smaller, tougher, and less flavorful. Keeping the box out of the hottest afternoon exposure delays that transition and extends the harvest window.
Window boxes dry out faster than in-ground beds, and that drying accelerates in sunny or windy spots. Check the moisture level of the potting mix every one to two days during warm, breezy weather.
Press a finger about an inch into the mix: if it feels dry at that depth, water thoroughly until water drains from the bottom of the box. If it still feels damp, wait and check again the next day.
The goal is steady moisture, not constant saturation. Waterlogged soil deprives roots of oxygen and invites rot, which is the opposite of what chervil needs.
A container with good drainage holes and a quality potting mix makes this balance easier to maintain. Think of the moisture target as consistently damp rather than wet: the mix should feel like a wrung-out sponge, not a soaked one.
Harvest young leaves before the plant flowers
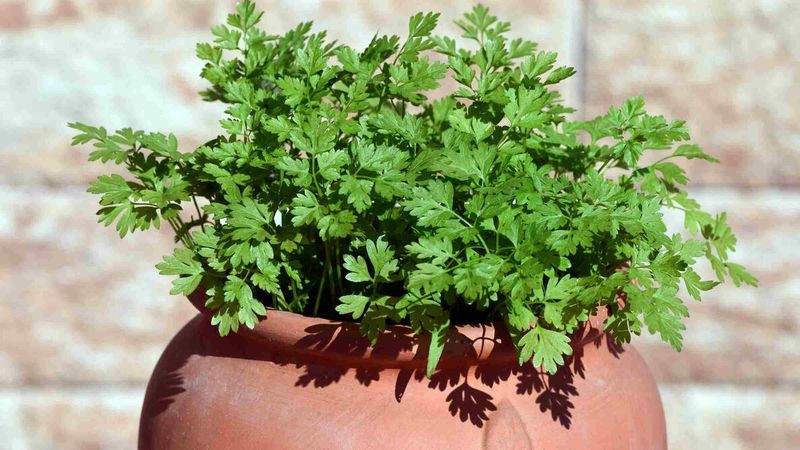
Young, fully opened chervil leaves are the target. They carry the best flavor and the most tender texture before the plant channels its energy into flowering.
Waiting until the foliage looks mature and full before harvesting is a reasonable instinct, but with chervil the window between ready-to-harvest and beginning-to-bolt can be shorter than expected, particularly during any warm spell.
Harvest by snipping individual stems or small clusters of stems as you need them. Leave roughly 2 inches of stem above the soil rather than cutting the plant flush with the potting mix.
That remaining stem gives the plant material to recover from and may produce additional foliage before the plant completes its life cycle. NC State Extension’s herb harvesting guidance recommends harvesting herb foliage in the morning after any dew has dried, when the leaves hold the highest concentration of flavor compounds.
Watch the center of the plant for signs of a flower stalk forming. Once that stalk begins to elongate, the flavor of the remaining leaves fades and the foliage texture coarsens.
If you spot early bolting, harvest the remaining usable leaves promptly rather than waiting. The plant is signaling that its productive phase is ending.
RHS chervil guidance and University of Illinois Extension both note that regular harvesting before flowering helps maintain foliage quality. One planting may not supply leaves every week through the entire fall, especially if a warm stretch accelerates bolting.
Setting that expectation honestly makes the next section, about successive sowings, the practical answer rather than a disappointment.
Use successive sowings for a longer supply
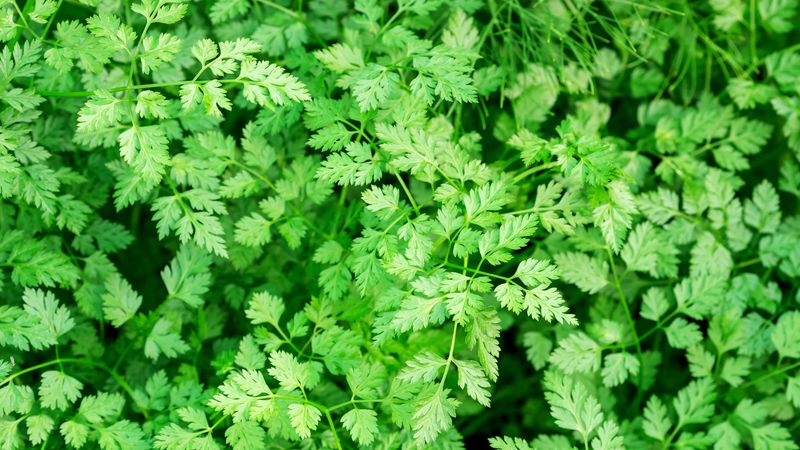
One sowing of chervil rarely covers an entire season. The plant bolts readily when conditions warm or when it matures, and a single container can go from harvestable to flowered in a matter of days during a mild warm spell.
The practical fix is to start a second small sowing before the first one finishes.
University of Illinois Extension recommends sowing chervil at three- to four-week intervals because of how quickly the plant runs to flower. Applied to a North Carolina window box, that means scattering a small pinch of seeds into one end of the box, or into a second smaller container, roughly three to four weeks after the first sowing.
By the time the first planting is bolting, the second is approaching its harvest stage.
Adjust the interval to your local weather. During a cool, stable stretch in the Piedmont, a first sowing may stay productive longer than the three-week mark, and you can delay the follow-up accordingly.
During a warmer-than-average October, a shorter interval keeps the supply more consistent.
How far into fall successive sowings remain practical depends on your location and your first expected freeze. Mountain gardeners working with an early October freeze date may only have room for one or two rounds before the window closes.
Piedmont gardeners often have more flexibility, with a first freeze typically arriving later in October or into November. In favorable spots with shelter from frost, a container may continue producing into early winter, though that outcome should be treated as a pleasant surprise rather than a firm promise.
The NC State freeze date tool is worth checking for your specific county before planning how many rounds of sowing are realistic.
Buy cultivated chervil and avoid dangerous lookalikes
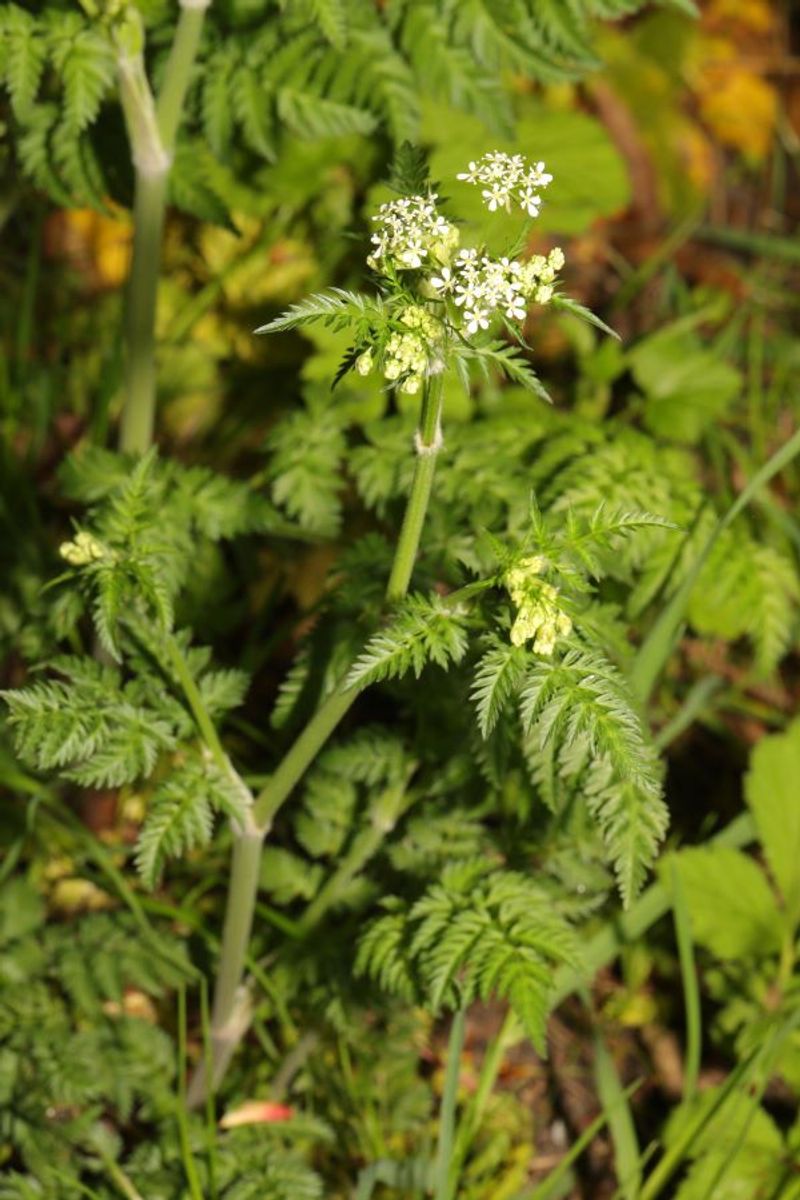
Garden chervil belongs to the carrot family, Apiaceae, a group that includes many plants with similar lacy, finely divided leaves and small white flowers arranged in umbrella-shaped clusters. That family resemblance is a genuine hazard for anyone tempted to harvest an unidentified plant from a yard, roadside, field, or wild area.
Several carrot-family plants are highly toxic, and leaf shape alone is not a reliable way to tell them apart.
Poison hemlock is the most serious concern. Penn State Extension’s comparison of poison hemlock and wild chervil notes that the two are frequently confused, even by experienced observers.
Wild chervil itself is a different plant from garden chervil and is considered invasive in parts of the northeastern United States. University of Minnesota Extension’s poison hemlock profile describes the plant as highly toxic to people and animals, with all parts of the plant posing a risk.
A photograph, a smartphone plant-identification app, or a quick comparison of leaf shapes is not adequate to safely distinguish garden chervil from its dangerous relatives. UC IPM’s poison hemlock resource reinforces that visual identification of carrot-family plants requires careful, expert attention to multiple features simultaneously.
Do not rely on a single characteristic.
The safe path is straightforward: purchase clearly labeled garden chervil seed, with “Anthriscus cerefolium” on the packet, from a reputable garden center or seed supplier. Grow it yourself from that identified seed.
Never harvest a lacy-leaved plant growing wild or volunteer in your yard unless you have had it positively identified by a qualified botanist or extension professional. The window-box approach described in this article sidesteps the lookalike problem entirely by starting with known seed.
Sow chervil when your local fall begins
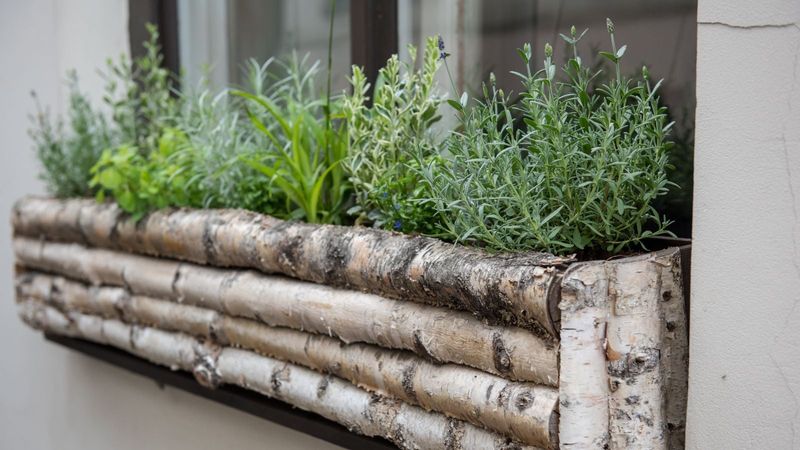
The practical summary is short: get identified garden chervil seed, fill a draining window box with a loose moisture-retentive potting mix, scatter the seeds on the surface with only the lightest covering, and keep the mix consistently moist. Place the box where it gets morning light and shade from the hottest afternoon sun.
Harvest young leaves as needed, leaving about 2 inches of stem, and start a follow-up sowing every three to four weeks to keep the supply going as individual plants bolt.
The promise here is repeated leaf harvests from a cool-season container herb, not rooted stem cuttings and not a guaranteed uninterrupted supply from a single sowing. Chervil bolts readily, so successive sowings are the honest answer to a longer fall harvest.
For timing, skip the fixed date and check your county’s average first freeze date alongside your current overnight lows. When the heat backs off and nights cool down, that is your signal.
A window box of feathery, anise-scented chervil is a genuinely useful fall crop; you just have to let your local weather, not a calendar, tell you when to start.