
Your Rosemary Won’t Survive Every Winter – Take These Herb Cuttings Before The First Frost Hits
One hard freeze can turn a bushy, fragrant rosemary plant into a pile of brown, brittle sticks overnight. If you live anywhere colder than USDA Zone 8, your rosemary is living on borrowed time once fall arrives.
The good news is that a few snips from the plant right now can give you brand-new rosemary plants by spring. Here is exactly how to take cuttings, root them indoors, and keep your favorite herb going no matter what winter throws at it.
1. Know Why Your Rosemary Is at Risk
Picture a rosemary bush that smelled amazing all summer, then looked like dry toast after one January cold snap. That heartbreak happens to thousands of gardeners every year.
Rosemary comes from the warm Mediterranean coast, so it was never built for snowy American winters.
In USDA Zones 8 and warmer, rosemary usually acts like a true evergreen shrub. North of that line, it behaves more like a tender perennial.
A single night in the single digits can kill the whole plant, roots and all.
Digging up the entire bush and hauling it inside sounds like a fix, but it often backfires. Indoor air with forced-air heat runs warm and dry, which can cause needle drop and slow decline.
Cuttings are smaller, easier to manage, and far more forgiving, which makes them the smartest backup plan you can have.
2. Time Your Cuttings Before the First Frost
Timing is the quiet secret here. Late summer through early autumn, roughly August into September, is the sweet spot for most of the country.
Aim to finish at least a few weeks before your local first frost date.
Why the rush? Stems taken from a stressed, half-frozen plant root poorly, if at all.
Healthy, actively growing rosemary has more energy stored up to push out new roots.
Not sure when frost usually arrives where you live? Look up your ZIP code on a frost date chart or ask your county extension office.
Mark the date, count back three or four weeks, and put a reminder on your phone so it does not sneak up on you.
3. Pick the Right Semi-Hardwood Stems
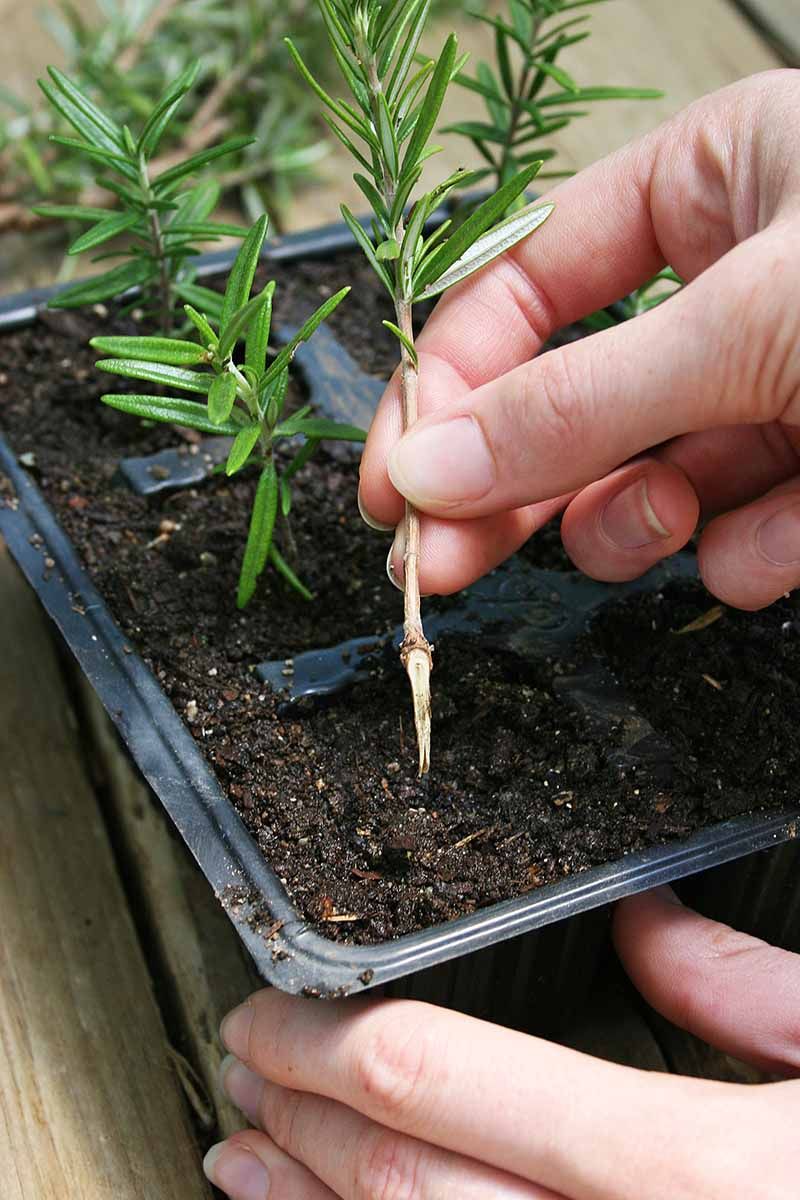
Not every branch makes a good cutting, and picking the wrong one is the most common reason rooting fails. You want what gardeners call semi-hardwood stems.
They are green and bendy near the tip but turning a little woody and tan at the base.
Skip the super soft new shoots, since those tend to wilt and rot. Old, thick, bark-covered wood is the opposite problem, because it is slow and stubborn about rooting.
Also avoid stems with flowers on them, since blooms pull energy away from root growth.
Look for pieces 3 to 6 inches long. Then grab more than you think you need.
Success rates often land somewhere between 30 and 70 percent, so taking a dozen cuttings to end up with a few strong plants is perfectly normal.
4. Snip and Strip Like a Pro
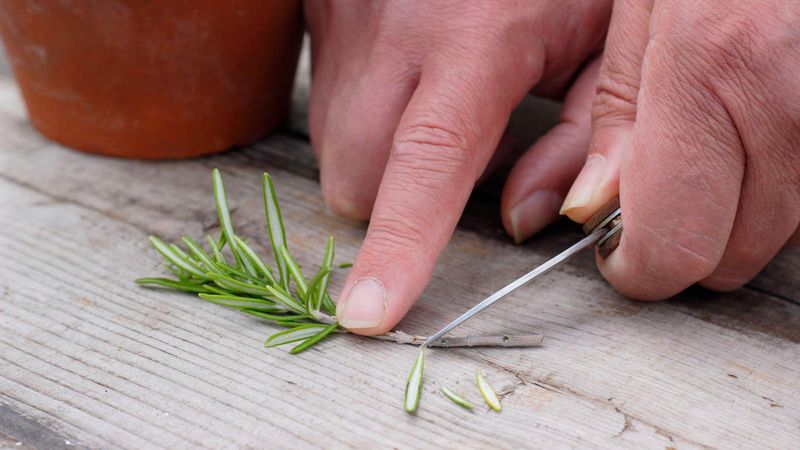
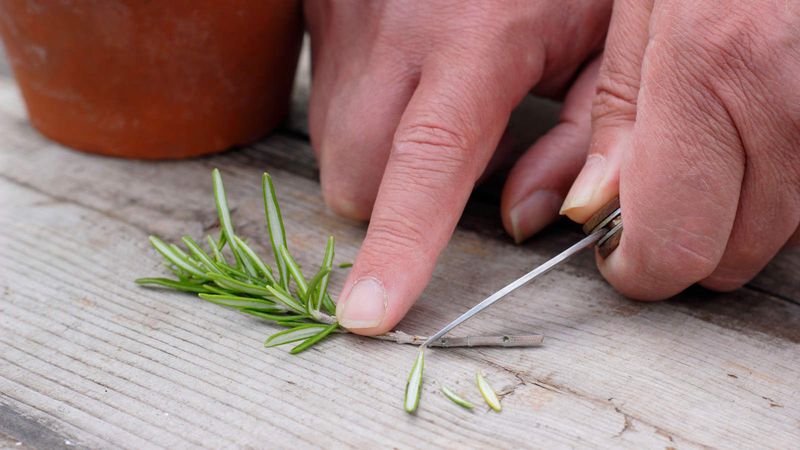
Clean tools matter more than fancy ones. Wipe your scissors or pruners with rubbing alcohol, then make each cut just below a leaf node, the little bump where leaves grow from the stem.
Roots love to form right at those spots.
Next, strip the needles off the bottom 2 to 3 inches of each stem. Pinch and pull gently downward, or slide your fingers along the stem.
Any leaves left below the soil line can rot and drag the whole cutting down with them.
Want a small boost? Dip the bare end in rooting hormone powder before planting.
It is not required, but it can improve your odds, especially if you only have a few stems to work with.
5. Plant in a Light, Fast-Draining Mix

Soggy soil is rosemary’s enemy, even as a baby. Choose a light, airy medium like seed-starting mix, coconut coir, or a fluffy potting soil.
Moisten it first so it feels damp but not dripping.
Some folks root rosemary in a glass of water on the windowsill, and it can work. Many gardeners, though, report better results going straight into soil.
The roots that form in soil are tougher and handle transplanting with less shock.
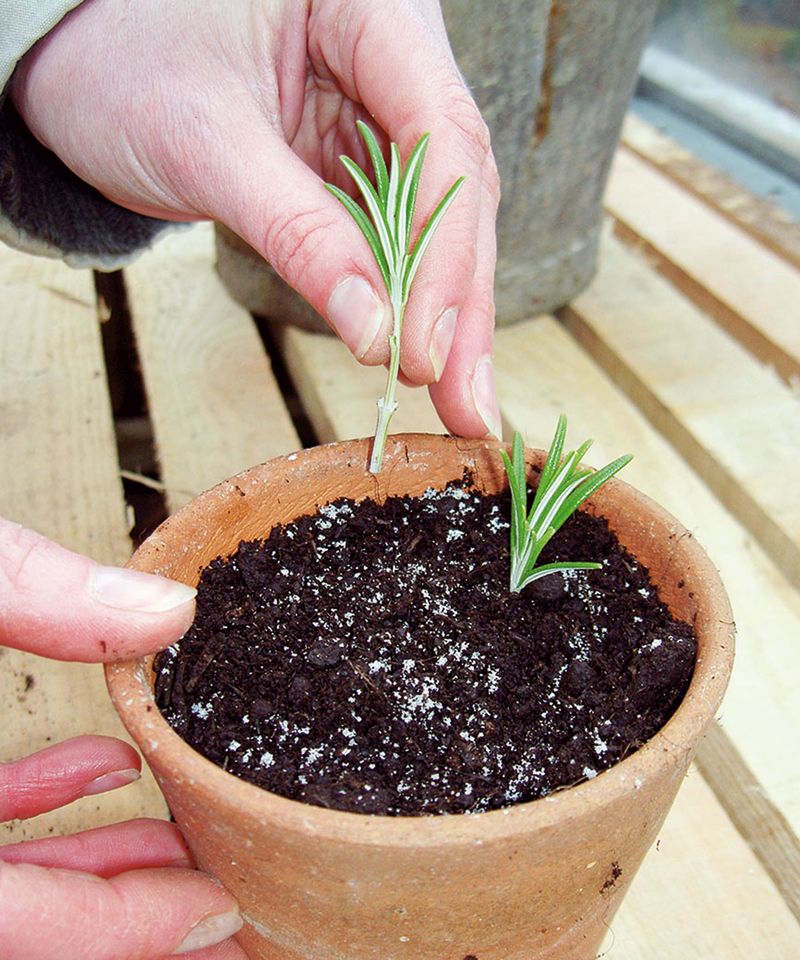
Poke a hole with a pencil, slide the bare stem in, and firm the mix around it. Make sure the leafy top stays above the surface without touching the soil.
Several cuttings can share one 4-inch pot, which saves space on a crowded windowsill.
6. Build a Mini Greenhouse for Humidity

Think of it as a tiny spa for your cuttings. Without roots, those stems cannot drink much, so they lose water fast through their needles.
Trapping humidity around them buys time while roots form.
Cover the pot with a clear plastic bag or a humidity dome. Prop it up with chopsticks or straws so the plastic does not rest on the leaves.
Open it every few days for fresh air to help prevent mold.
Set the pot in bright, indirect light rather than harsh direct sun, which can cook cuttings under plastic. Keep the mix as damp as a wrung-out sponge.
A seedling heat mat set around 70 to 75 degrees Fahrenheit can speed rooting noticeably, though a warm room works too.
7. Check for Roots and Care Through Winter
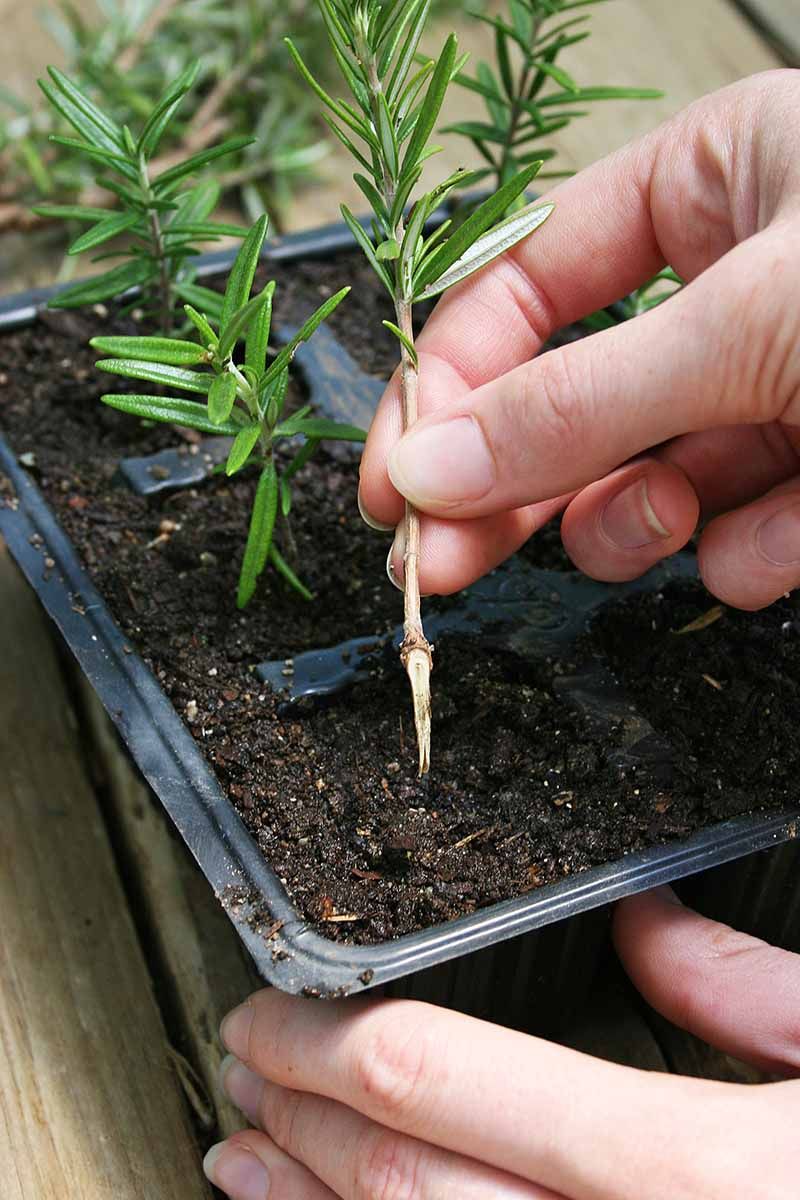
Patience pays off here. Roots usually show up in 4 to 8 weeks, though under perfect conditions some cuttings root in as little as two or three.
Fresh new growth at the tip is your first clue.
To double-check, give a cutting the gentlest tug. If it resists, roots are holding on.
Then remove the plastic gradually over several days so the young plants adjust to drier indoor air.
From there, give them your brightest window and let the top inch of soil dry before watering again. Skip fertilizer until spring, since the plants are resting rather than growing hard.
Come warm weather, harden them off outdoors and you will have fresh rosemary ready for the garden, all from a few snips you took in fall.