
Follow These 8 Easy Steps To Multiply Your Clematis From Softwood Cuttings
If you have a clematis vine you love, you can grow more of it from cuttings taken right off the plant this season. Many clematis respond well to this approach, producing new plants that are genetically identical to the original.
The process takes patience and some care, but backyard gardeners who already grow clematis are well-positioned to pull it off. Results do vary by cultivar and conditions, so the goal here is a practical, honest walkthrough rather than a guaranteed formula.
Start With a Healthy Vine and the Right Growth
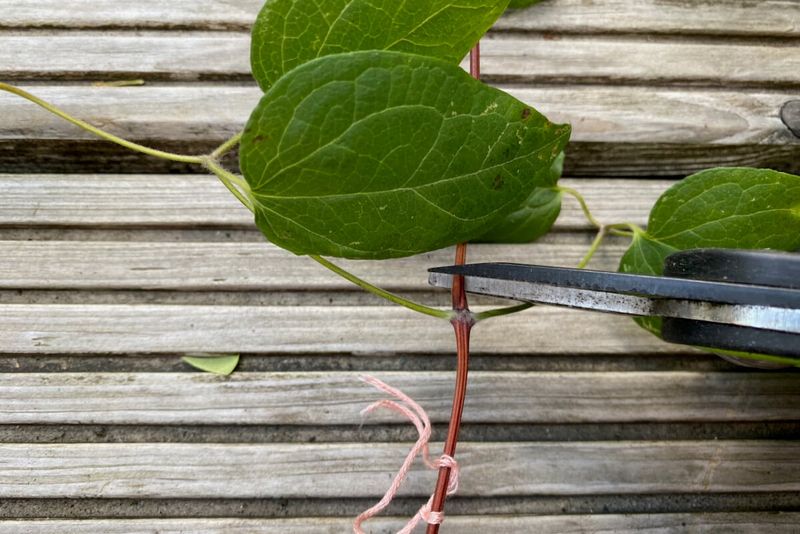
Before reaching for any tool, spend a moment looking at your clematis with fresh eyes. What you want is a shoot that is actively growing, free of spots or wilting, and not carrying any open flowers or swelling buds.
A vine that looks stressed, shows yellowing foliage, or has signs of stem rot is not a good donor right now. Clemson Extension notes that clematis wilt and leaf spot are serious concerns, especially in large-flowered types, so starting with clean, healthy tissue protects both the cuttings and the parent plant.
Once you have identified a vigorous shoot, focus on its middle section. The very tip of a new stem is usually too soft and prone to wilting under the stress of propagation.
The lower, older portion may be too woody to root reliably. The sweet spot sits in between: growth that still bends without snapping but has begun to firm up and feels less rubbery than brand-new foliage.
The International Clematis Society describes this as material where the base is firm and the tip remains soft, and that physical description matters more than any calendar date because growth timing shifts with your local climate and the season’s weather.
Keep realistic expectations about how many cuttings a single vine can provide. A clematis with long gaps between leaf nodes, sparse new growth, or mostly flowering wood may yield only a handful of usable pieces.
Trying to force more material than the vine can spare is where propagation starts to harm the parent plant.
Propagation is not the same as pruning, and the two should not be confused. Whether your clematis blooms on old wood, new wood, or both determines when and how much you can safely cut.
NC State Extension emphasizes that cutting timing and method depend on plant type, so taking a limited number of suitable stems for propagation is a different decision from a full pruning session. Removing a few well-chosen pieces from a healthy, vigorous vine is generally manageable, but indiscriminate cutting without knowing your clematis type carries real risk.
Prepare a Clean Cutting Station and Airy Medium
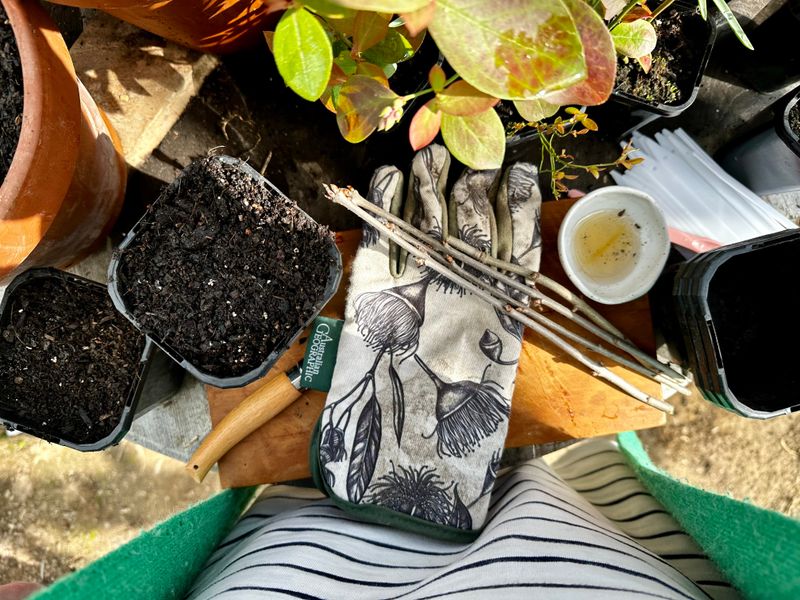
Setting up your workspace before you cut a single stem pays off immediately. Once a stem is severed, the clock starts on the basal cut – it should not sit exposed and drying while you search for a pot or fumble with a bag of medium.
Gather everything first: a clean, sharp blade or bypass pruner, small containers with drainage holes, a sterile rooting medium, a spray bottle or watering can, and a clear humidity cover such as a plastic bag or a purpose-made propagation dome.
Tool sanitation matters more than many gardeners realize. A blade that carried disease from another plant can transfer pathogens directly into an open cut.
Virginia Cooperative Extension recommends wiping tools with 70% or higher isopropyl alcohol or a 1-to-9 bleach-to-water solution before use. Sanitation reduces the risk of transferring problems but does not guarantee disease-free results, especially if the parent plant already has an undetected issue.
The rooting medium is equally important. Ordinary garden soil holds too much water, compacts around delicate developing roots, and is rarely sterile.
What you want instead is something that stays evenly moist while keeping air around the stem. NC State Extension recommends coarse sand, perlite-based mixes, or other propagation media that are low in fertility and well-drained.
A 50-50 blend of perlite and peat, or straight horticultural-grade perlite, both work well and are widely available at garden centers. Pre-moisten the medium before you plant so you are not trying to water dry perlite around a freshly cut stem.
The International Clematis Society also recommends having your containers ready and moist before taking stems from the vine, reinforcing that preparation order matters.
Cut the Vine Into Single-Node Pieces
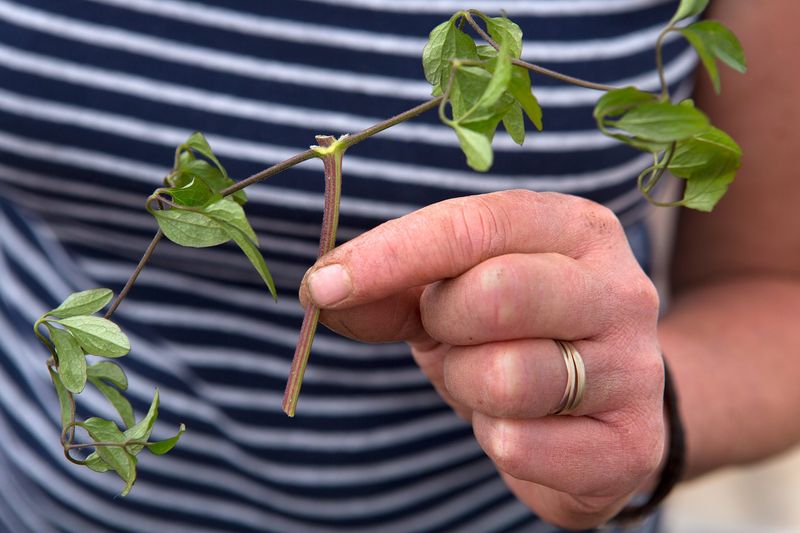
With your station ready and your target shoot identified, you can begin cutting. The standard approach for clematis is the single-node or leaf-bud cutting: a short stem section that includes one leaf node, the attached leaf or pair of leaflets, and roughly two to four centimeters of stem below that node.
NC State Extension identifies clematis as a plant well-suited to leaf-bud and single-node cuttings, making this method the most defensible starting point for home gardeners.
The node is the slight swelling or joint on the stem where the leaf attaches. Roots and new shoots tend to emerge from or near this point, which is why each cutting needs at least one.
Cut just above the node at the top of your piece and leave a short tail of stem below it at the base. That lower section of bare stem is what goes into the medium.
Make each cut clean and straight rather than ragged, using one deliberate motion rather than sawing back and forth, which can crush the tissue.
Orientation matters. The basal end – the cut end that was closer to the roots on the parent vine – goes down into the medium.
Planting a cutting upside down is an easy mistake to make when you have several similar-looking pieces on your bench, so mark the base of each piece immediately or process them one at a time. The International Clematis Society specifically warns against confusing stem orientation during this step.
Remove any flowers or flower buds from each cutting before it goes into the medium. A stem carrying a flower bud may root, but propagation guidance from Virginia Cooperative Extension notes that axillary flower buds can root without producing a useful new vegetative shoot, leaving you with a rooted piece that cannot grow into a new plant.
Strip buds cleanly rather than tearing, and move quickly to keep the cut ends from drying out.
Trim the Foliage Without Stripping the Cutting Bare
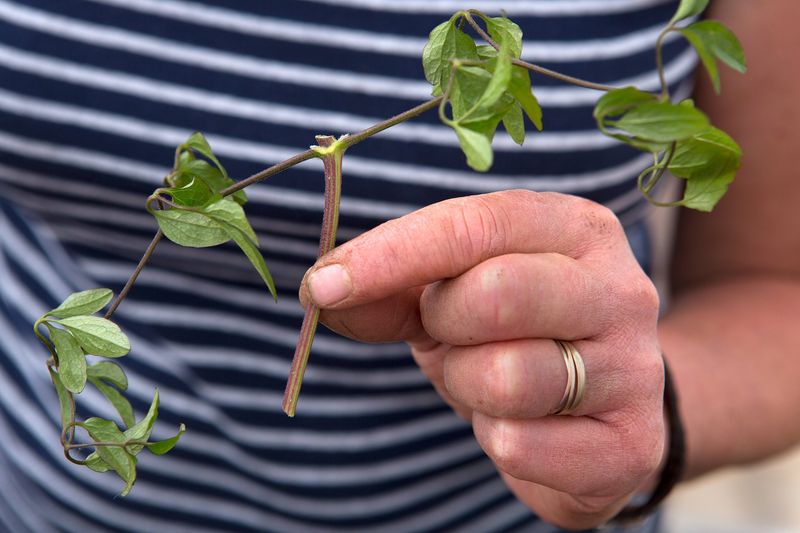
Leaves play two roles that pull in opposite directions once a cutting has no roots. They lose water through their surfaces, which can cause wilting and collapse before roots ever form.
At the same time, they capture light and carry out photosynthesis, which generates the energy a cutting needs to push out new roots and stay alive. Stripping a cutting completely bare removes that energy source; leaving too much foliage on a rootless stem accelerates water loss faster than the cut stem can compensate.
The practical balance is to remove the lower leaves from the bare stem section that will sit in the medium, then assess what remains above. NC State Extension guidance recommends reducing leaf area only as needed to prevent wilting, which means there is no single correct formula.
A cutting with small leaflets may need no further trimming. A cutting carrying large, broad leaves benefits from having those leaves cut in half crosswise, reducing the surface area losing moisture without eliminating photosynthesis entirely.
Flowers and buds deserve a second look at this stage. Even if you removed obvious buds when making your cuts, check again now.
The International Clematis Society notes that a flower bud at a leaf axil can be easy to overlook, and one that roots without sending up a new shoot wastes a spot in your propagation tray. Remove anything that looks like a developing bud rather than a leaf.
Work quickly and keep cuttings out of direct sun while you trim. A few minutes on a shaded bench is fine; leaving trimmed cuttings sitting in heat or wind while you work on others invites wilting before the stems even reach the medium.
Virginia Cooperative Extension reinforces that speed and shade during preparation reduce stress on the cutting material before planting.
Plant Each Cutting in the Prepared Medium
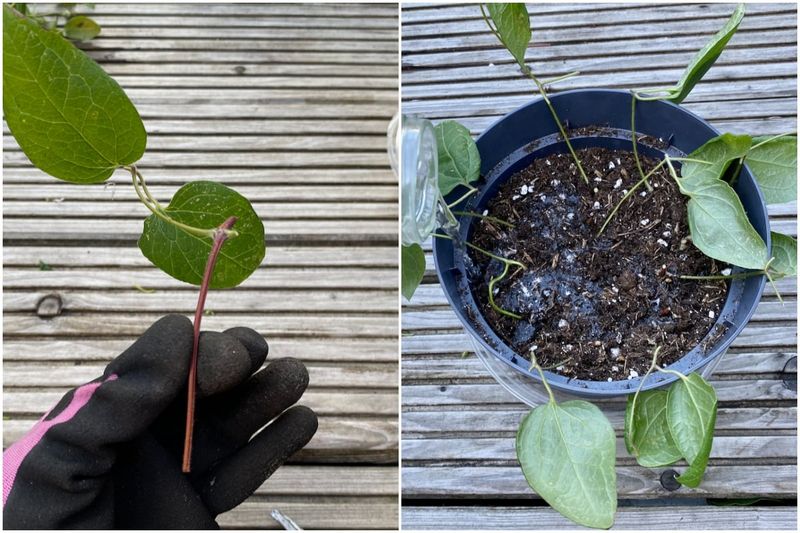
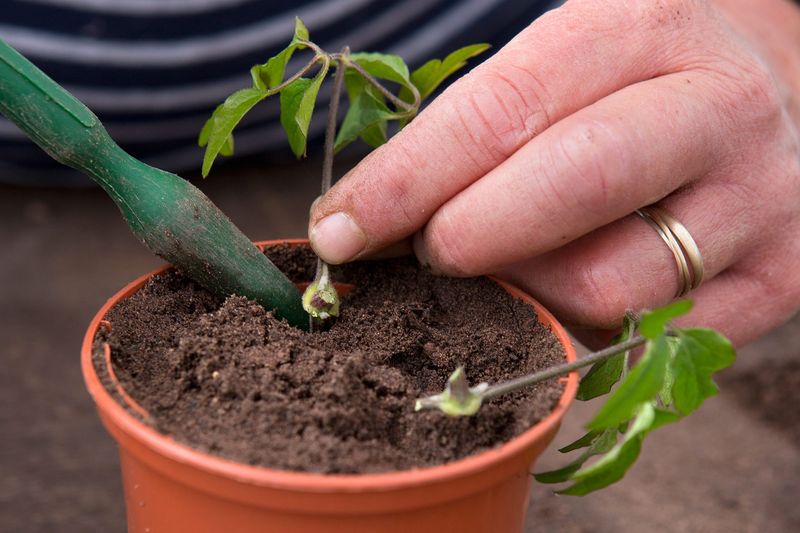
Planting a clematis cutting takes less than a minute per piece, but the details matter. Use a pencil, dowel, or finger to make a small hole in the pre-moistened medium before inserting the cutting.
Pushing the bare stem directly into the medium without a pilot hole can scrape off the rooting tissue at the base and knock away any rooting hormone powder if you have chosen to use it.
Lower the basal end of the cutting into the hole so the node sits at or just below the medium surface, with the leaf or leaflets above it. Gently firm the medium around the stem to close air gaps, which can dry out the cutting base.
Do not pack it tightly – the medium should hold the cutting upright while still allowing air movement around the stem.
Rooting hormone is worth understanding rather than automatically reaching for. A peer-reviewed study on clematis propagation found that IBA rooting hormone improved survival for some cultivars, including Jackmanii, but did not produce a consistent benefit across all tested clematis.
That finding makes rooting hormone an optional experiment rather than a required step. If you try it, use a powder or gel formulated for softwood or semi-ripe cuttings, dip only the basal centimeter of the stem, and tap off any excess before planting.
The same study found that perlite and coarse sand both supported rooting in the tested cultivars, with perlite producing greater root dry mass in some comparisons. NC State Extension similarly recommends perlite-based or sand-based propagation mixes over soil, but no single medium has been shown to work best for every clematis cultivar.
When you are propagating a named variety, label each pot or cell immediately with the cultivar name and the date. Memory is unreliable once several weeks pass and the pots start to look identical.
Create Humidity Without Trapping Rot
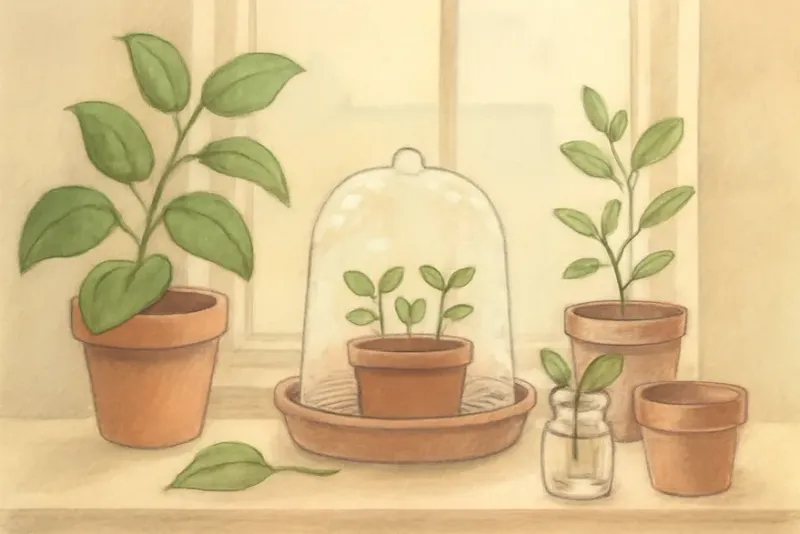
Unrooted cuttings lose water through their leaves constantly, and without roots to replace that moisture, they wilt and die. A humidity cover slows that water loss enough to buy the cutting time to develop roots.
The cover does not need to be elaborate: a clear plastic bag propped up with sticks or skewers, a cut plastic bottle placed over a single pot, or a purpose-made propagation dome all work on the same principle.
Whatever you use, keep the cover from touching the foliage directly. Leaves pressed against plastic stay wet, which encourages fungal rot right where the plant is most vulnerable.
Leave a centimeter or two of clearance, and make sure the container itself has drainage holes so water cannot pool at the base of the medium. NC State Extension recommends maintaining high humidity around cuttings while ensuring the medium stays evenly moist rather than waterlogged, because stagnant, overly wet conditions invite rot just as quickly as dry ones cause wilting.
Ventilation is the part many gardeners skip, and it matters. Lifting the cover for a few minutes each day or propping one edge open slightly allows fresh air to circulate, reducing the buildup of humidity that encourages mold and rot.
If you notice heavy condensation collecting and dripping onto the foliage, increase ventilation rather than letting it sit.
Light placement is equally critical. Bright, indirect light gives the cutting enough energy for the cellular work of rooting without the heat stress of direct sun.
A spot near a north- or east-facing window, under a shade cloth outdoors, or on a covered porch that receives reflected light rather than full afternoon sun all work well. Virginia Cooperative Extension warns that direct hot sun can overheat an enclosed propagation setup and accelerate water loss before roots have any chance to form.
If foliage begins to yellow, look limp despite adequate moisture, or shows dark patches, check whether the enclosure is overheating or whether the medium has become too wet rather than assuming the cutting has simply failed.
Wait for Roots on a Flexible Timeline
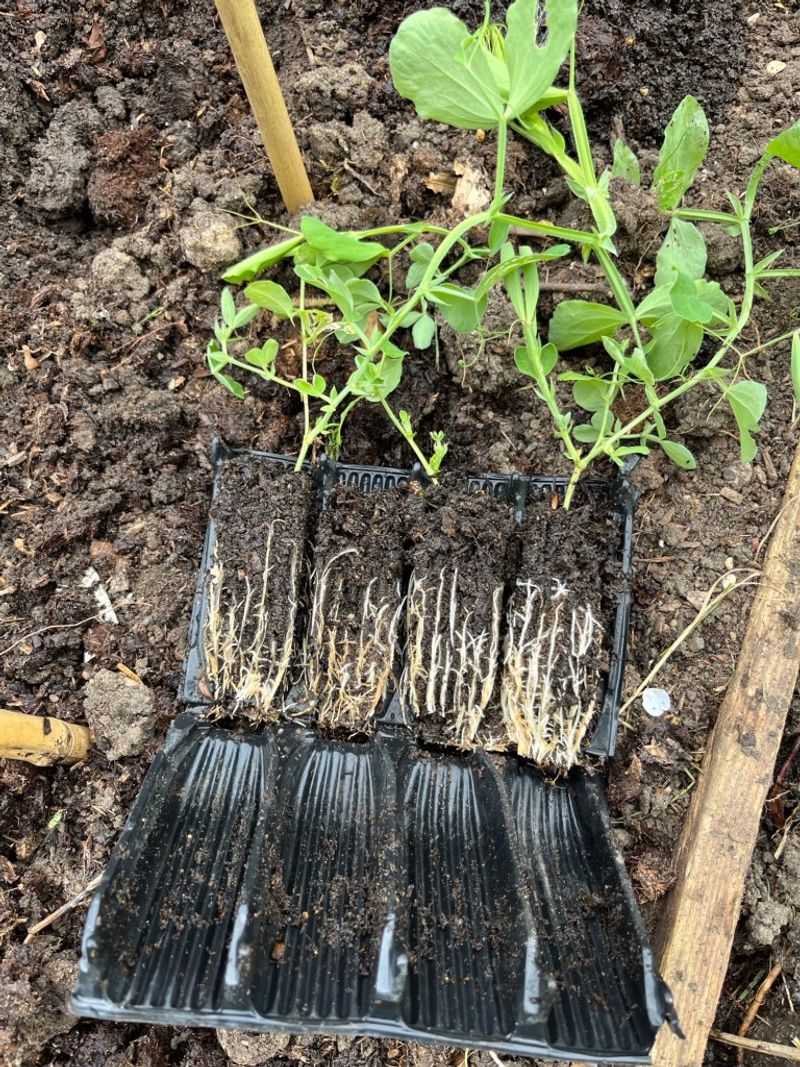
Patience is the skill most tested during propagation, and clematis will test it thoroughly. Reported rooting times vary considerably depending on the protocol, the cultivar, and the growing conditions.
A USDA NRCS guide for western clematis describes rooting in approximately 15 to 20 days under its specific conditions, while other references give roughly four weeks, and the British Clematis Society describes a window closer to four to six weeks for many garden cultivars. General RHS guidance for clematis extends that estimate to around six to eight weeks in some cases.
The practical takeaway: do not discard a cutting simply because it has not rooted by a date you had in mind.
Cultivar differences are real. The peer-reviewed study on clematis propagation found meaningful differences in survival among cultivars, with Comtesse de Bouchard and Gypsy Queen outperforming Jackmanii under the tested conditions.
A cutting from one clematis in your yard may root in three weeks while a cutting from a different variety takes twice as long or does not root at all. That variability is not a sign that you did something wrong.
During the waiting period, maintain your routine: check the medium moisture every day or two and mist lightly if the surface feels dry, ventilate the cover briefly, and keep the setup out of direct sun. Resist the urge to tug the cutting to test for resistance – repeated disturbance at the base breaks fragile new root tissue and sets the process back.
A gentle nudge after several weeks is reasonable; daily pulling is not.
Signs that rooting is progressing include a cutting that remains turgid and upright rather than wilting, new leaf growth emerging from the node, and, eventually, roots visible through the drainage holes or around the edge of the pot. Any of those signals is a cue to move toward the next stage rather than a guarantee that the root system is ready for transplanting.
Pot Rooted Plants on Before They Face the Garden
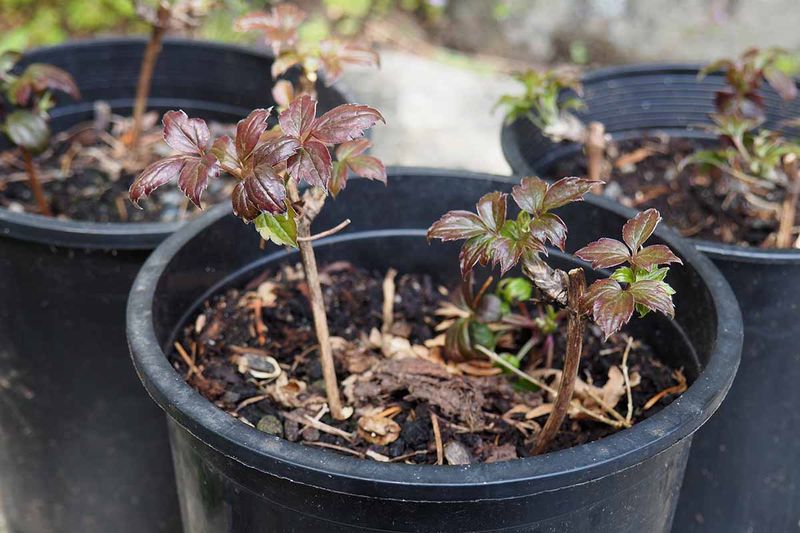
A cutting that has developed roots is not yet a garden-ready plant. Moving it straight from a small propagation cell into the ground asks a fragile root system to handle soil temperature swings, competition, and full outdoor conditions before it is equipped to cope.
The better path is to pot each rooted cutting individually into a small container with a quality potting mix and let it grow on for a period before outdoor planting.
RHS guidance on growing clematis notes that rooted cuttings are generally potted individually and grown on before being planted out, with young plants often spending additional time in containers to build a stronger root system. Some clematis growers keep young plants in containers for close to a year before moving them to a permanent garden spot.
During this growing-on period, keep the pots in a sheltered spot with good light, water regularly, and begin light feeding once the plant is clearly putting on new growth.
When the young plant is eventually ready for the garden, harden it off gradually by moving it outside for increasing periods over one to two weeks before planting. Set realistic expectations for flowering.
The International Clematis Society notes that young plants from cuttings may take a season or two to establish before flowering reliably, and RHS guidance similarly suggests that cuttings may take up to two years to flower. Pushing a young plant too hard or planting it in a stressful site delays that timeline further.
If you have a clematis cultivar that has been difficult to root from cuttings, or a long, flexible stem that reaches the ground naturally, serpentine layering offers a slower alternative. The RHS describes serpentine layering as particularly suited to long, flexible clematis stems, producing a well-established root system over one to two years while the stem remains attached to the parent plant.
It is a lower-pressure method, though it requires more time and suitable stem length.
One final consideration for US gardeners who want to share or sell propagated plants: some named clematis cultivars are protected by plant patents. The US Patent and Trademark Office explains that a plant patent can restrict asexual reproduction and the sale or offering for sale of the patented plant during the patent term.
Growing a patented cultivar for your own garden is a different matter from selling or distributing it, so check the label and patent status of any named variety before sharing propagated plants. A vine grown from cuttings of a plant you love, tended carefully through its first seasons, is one of the most satisfying things a backyard gardener can produce.