
If Your Fall Brussels Sprouts Grow Loose, Puffy Buttons Instead Of Firm Sprouts, One Topping Cut Fixes It
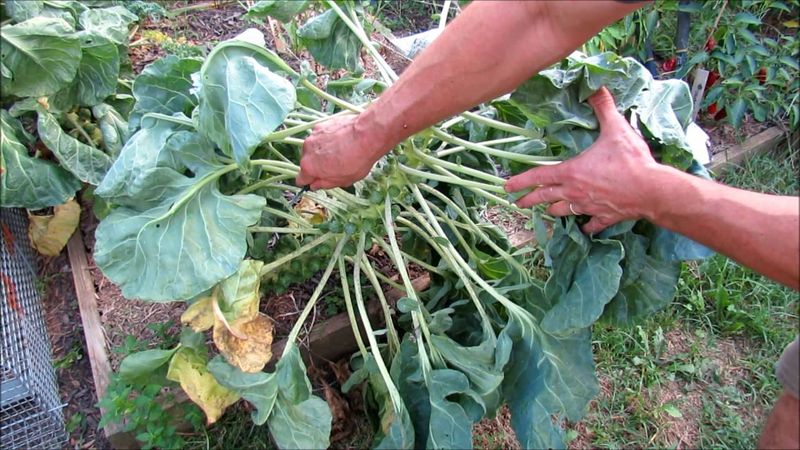
Fall Brussels sprouts are one of those crops that look promising all season and then let you down at harvest with puffy, loose buttons instead of the tight little heads you were hoping for. The frustrating part is that several different problems can cause that same disappointing result, and not all of them have the same solution. One practice that experienced growers use is topping the plant, which means removing the tender growing tip at the very top of the stalk. Understanding when and why to make that cut, and what it can and cannot do, can genuinely improve your results this fall.
Loose sprouts do not all signal the same problem
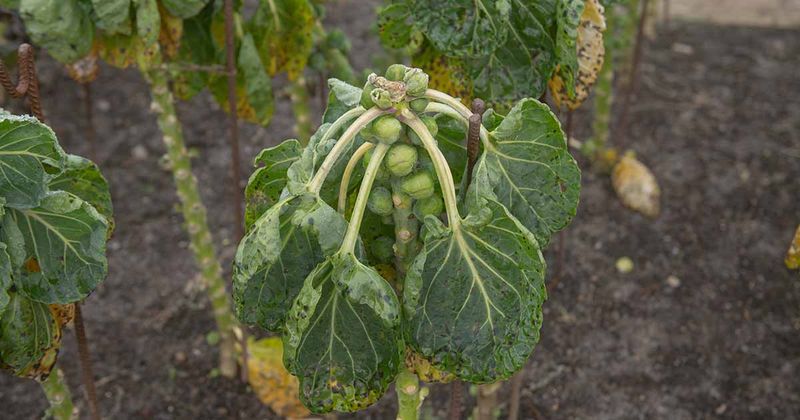
Walk down a row of Brussels sprouts and you might see buttons that never closed up tightly, tiny sprouts that stalled out at pea size, others that split open at the base, and a few that taste sharp and bitter even when they look decent. All of these qualify as a disappointing harvest, but they are not the same condition, and lumping them together leads to the wrong response.
Loosely wrapped or unevenly enlarged sprouts, where the outer leaves peel away from the button instead of pressing in firmly, are the situation that topping most directly addresses. Utah State University Extension identifies heat, inconsistent soil moisture, and excess nitrogen during sprout formation as separate contributors to loose and split sprouts, which means a cut at the top of the plant does nothing to undo those conditions once they have already acted on the crop.
Splitting, for example, often traces back to moisture swings rather than to the plant’s growing point. Bitterness can intensify when sprouts develop during warm weather. Naturally small sprouts may simply reflect a short growing season, a late planting, or a compact cultivar. Premature bolting is a stress response tied to temperature or day length, not to whether the plant was topped.
Before reaching for the pruners, take a close look at what is actually happening on the stalk. If sprouts are present and enlarging but the upper ones lag behind the lower ones in tightness or size, topping may be worth trying. If the sprouts are splitting, stalling, or tasting off, the University of Minnesota Extension points to growing conditions, timing, and variety as the factors most worth reviewing first. Topping is a targeted tool, not a general-purpose rescue for every Brussels sprout problem.
Removing the growing point can influence later sprout development
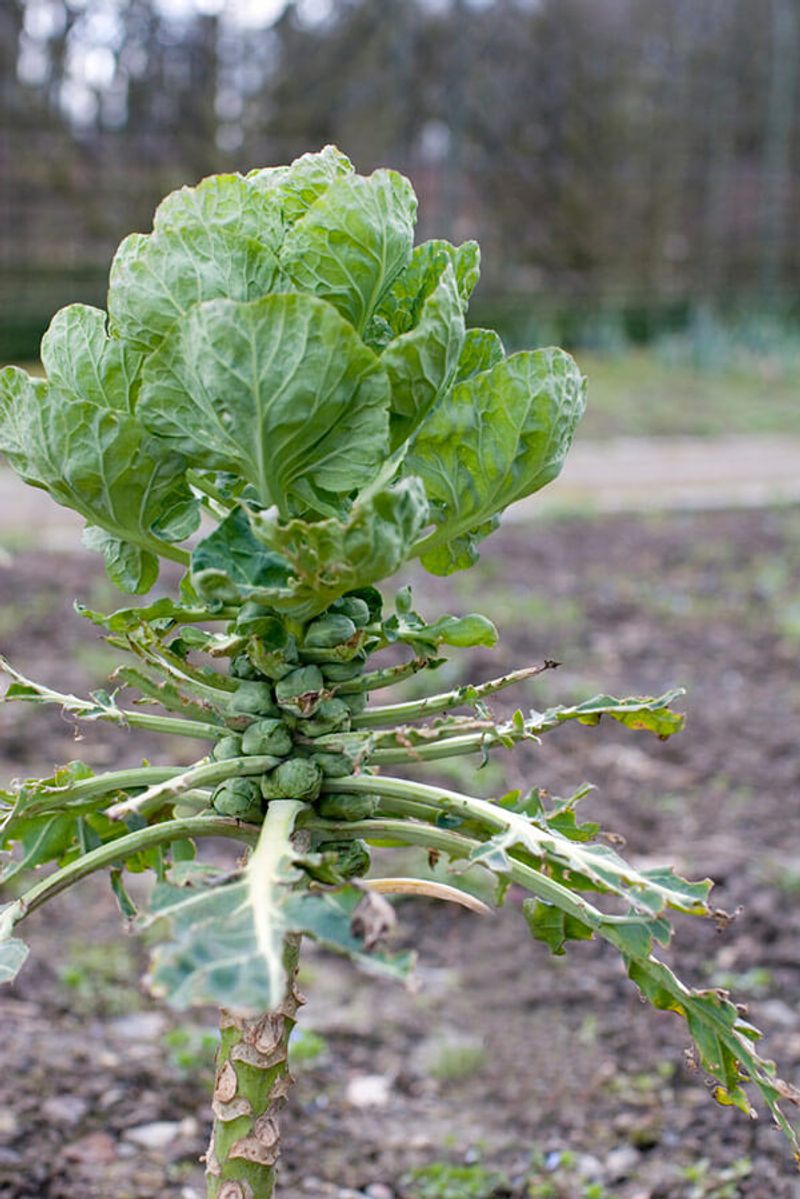
Topping a Brussels sprouts plant means removing the terminal growing point, the cluster of soft, immature leaves at the very top of the central stalk. That is a much smaller and more precise action than cutting off the entire top of the plant or pulling away the larger leaves lower down. The goal is simply to eliminate that one actively growing tip.
When the growing tip is removed, the plant can no longer push new top growth, and the sprouts that have already formed along the stalk tend to enlarge more evenly. Extension programs at University of Minnesota, Iowa State, Utah State, and Oregon State all describe topping as a standard practice for making sprout development more uniform, particularly when a gardener wants a once-over harvest rather than picking a few sprouts at a time over several weeks. The shorthand that this “redirects energy into tight buttons” captures the general idea, but it is worth treating as a useful simplification rather than a precise physiological guarantee.
Research from the University of New Hampshire’s Brussels sprouts variety trial and topping study found that topping’s effect on yield and uniformity varied depending on the cultivar being grown and when in the season the harvest took place. Benefits showed up in some situations but not consistently across all varieties or all harvest windows. That is an important finding for home gardeners: topping can improve uniformity in some plants, but it is not a switch that tightens every loose sprout on every variety in every garden.
The practical takeaway is that topping is most useful as a support tool when the underlying growing conditions are already reasonable. Utah State Extension notes that sprout quality depends on cool conditions, steady moisture, and restrained nitrogen, so topping works alongside those factors rather than replacing them.
Wait until the lower sprouts show that the plant is ready
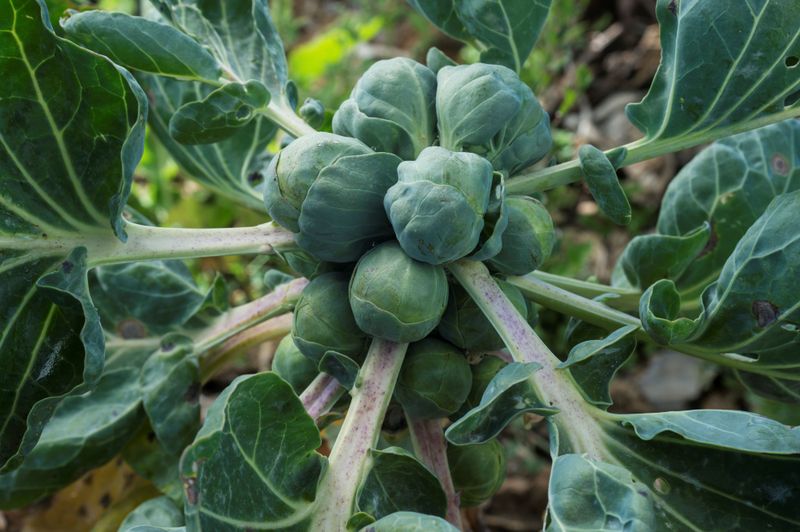
Timing the cut by the calendar alone is a common mistake. The right moment to top a Brussels sprouts plant depends on what the plant itself is showing you, specifically how far along the lower sprouts have developed, and how close the variety is to its expected harvest window. Regional extension programs agree on that general principle even though they use slightly different thresholds.
Iowa State University Extension recommends topping when the lower sprouts are roughly one-half to three-quarters of an inch in diameter, and specifies that the cut should happen no more than 60 days before the expected harvest date. Oregon State Extension uses a similar lower-sprout diameter of about one-half inch as its cue. Utah State ties its recommendation to when the lower sprouts begin forming, which in its regional guidance falls around mid- to late August. University of Minnesota Extension suggests waiting until the lowest sprouts reach about one inch before removing approximately one to two inches from the top.
These thresholds differ enough that no single calendar date or exact diameter works for every garden across the continental United States. A gardener in Minnesota faces a different fall timeline than one in the Pacific Northwest or the upper South. Using your own plant’s lower sprouts as the signal, combined with your variety’s days-to-harvest estimate, gives a much more reliable guide than any fixed date.
Cutting too early is the mistake most worth avoiding. The UNH variety trial and topping study found that early topping can cause the plant to produce new stalk growth instead of channeling resources into the existing sprouts, and that it may reduce yield and marketability. Patience here pays off: let the lower sprouts show you that the plant has genuinely committed to button production before you make the cut.
Make one clean cut through the tender top growth
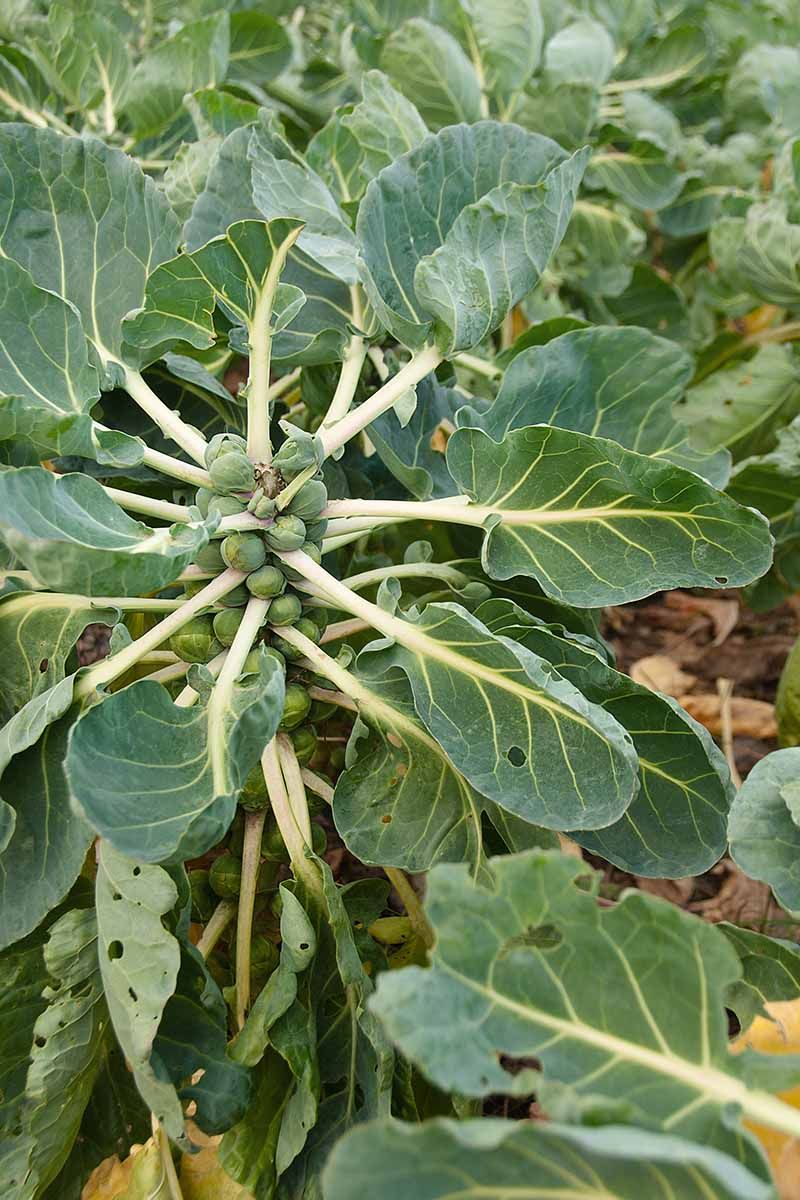
The actual cut is straightforward once the timing is right. Find the growing tip at the very top of the central stalk, which looks like a small, tight rosette of soft new leaves. That cluster, not the mature leaves lower on the plant, is what you are removing.
Use a clean, sharp knife or a pair of pruning shears that have been wiped down to avoid spreading disease from plant to plant. University of Minnesota Extension describes removing approximately one to two inches from the top, which in practice means taking off the growing tip and the very newest leaf growth immediately beneath it. The main stalk stays completely intact. You are not shortening the plant significantly; you are simply eliminating the point where new upward growth originates.
Leave the lower leaves alone. Iowa State University Extension specifically advises against stripping lower leaves, explaining that they are still needed to support continued plant growth. Pulling them off does not push the sprouts to size faster, and it removes the photosynthetic capacity the plant relies on through the rest of the season.
One clean cut is the whole job. There is no need to remove multiple sections, trim side shoots, or disturb the rest of the plant. The UNH topping study treated the intervention as a single targeted removal of the terminal growing point, not a series of cuts or a substantial reduction in plant height. Keeping the action minimal reduces stress on the plant and avoids accidentally removing growth that still has a role to play.
Cool growing conditions and steady moisture still matter
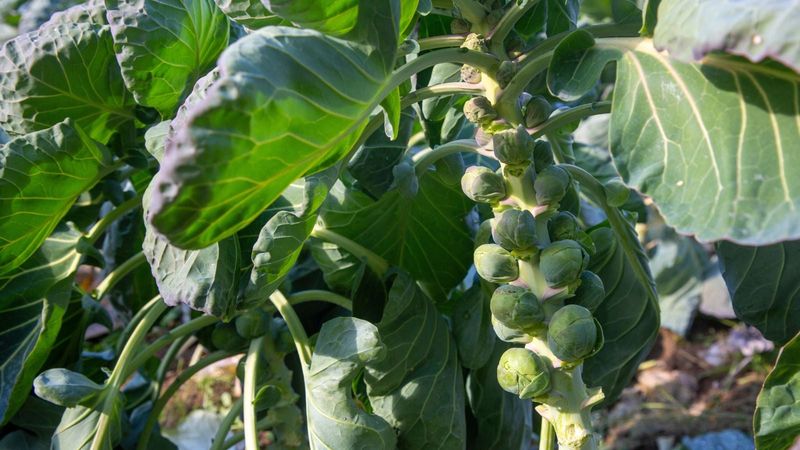
A well-timed topping cut works best when the surrounding conditions are already supporting good sprout development. Without those conditions in place, the cut alone is unlikely to produce firm, compact buttons. Iowa State University Extension places the ideal temperature range for Brussels sprout development at roughly 60 to 70 degrees Fahrenheit, and notes that this cool-season crop thrives when sprout formation happens during genuinely cool fall weather.
Utah State Extension warns that temperatures above 70 degrees Fahrenheit can reduce both growth and sprout quality, and specifically connects loose sprouts and splitting to high nitrogen levels during sprout formation. Adding fertilizer after the buttons begin forming is a common mistake that backfires: instead of tightening the sprouts, extra nitrogen at that stage encourages leafy, loose development. If your soil was amended with compost before planting, additional feeding after sprout set is generally unnecessary and potentially counterproductive.
Moisture consistency matters just as much as temperature. University of Minnesota Extension recommends about one inch of water per week when rainfall falls short. Utah State suggests a range of one to two inches weekly and specifically ties moisture fluctuations to splitting and bitterness. Letting the soil dry out and then soaking it creates stress cycles that show up in the sprouts as cracked bases and off flavors, problems that no amount of topping will reverse after the fact.
Mulching around the base of the plants helps hold soil moisture and moderates temperature swings between warm afternoons and cool nights. These are the conditions Brussels sprouts are built for, and keeping them as stable as possible through the fall gives topping the best environment to produce a noticeable result.
Your harvest goal and variety determine whether topping is worthwhile
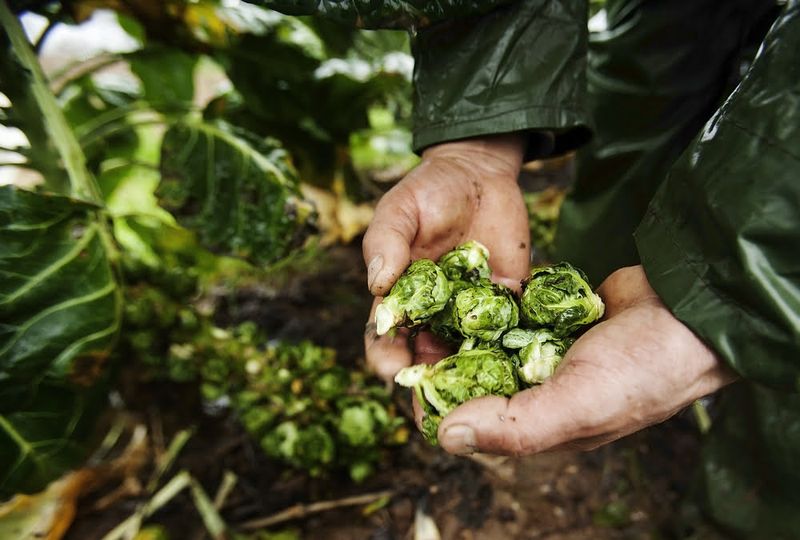
Not every Brussels sprouts grower benefits equally from topping, and the decision really comes down to two things: what you want from the harvest, and which variety you planted. Topping tends to offer the most value when your goal is a relatively simultaneous harvest, picking most of the stalk at once rather than working your way up from the bottom over several weeks. If you prefer gradual picking and enjoy a long harvest window, the case for topping is weaker, since the plant’s natural pattern of bottom-up development already suits that approach.
Variety makes a real difference. The UNH trial found substantial differences among cultivars in growth habit, yield, and response to topping. Some varieties showed measurable benefits from the cut; others did not. That variability is worth keeping in mind before assuming that topping will deliver the same result for every plant in every garden.
If you have grown a particular variety for a few seasons and found it consistently produces uneven buttons, experimenting with topping is a reasonable next step. If you are trying a new cultivar, check the seed packet or catalog description for notes on growth habit.
Planting timing is a factor that topping cannot override. Utah State Extension makes clear that fall Brussels sprouts need to be timed so that sprout formation and enlargement happen during cool weather. A planting that puts sprout development in late summer heat will struggle regardless of whether the plant is topped. Getting the transplant date right for your region, counting back from your average first frost using the variety’s days-to-maturity, is the foundational step that makes everything else, including topping, more likely to work.
Judge the result by firm, compact sprouts
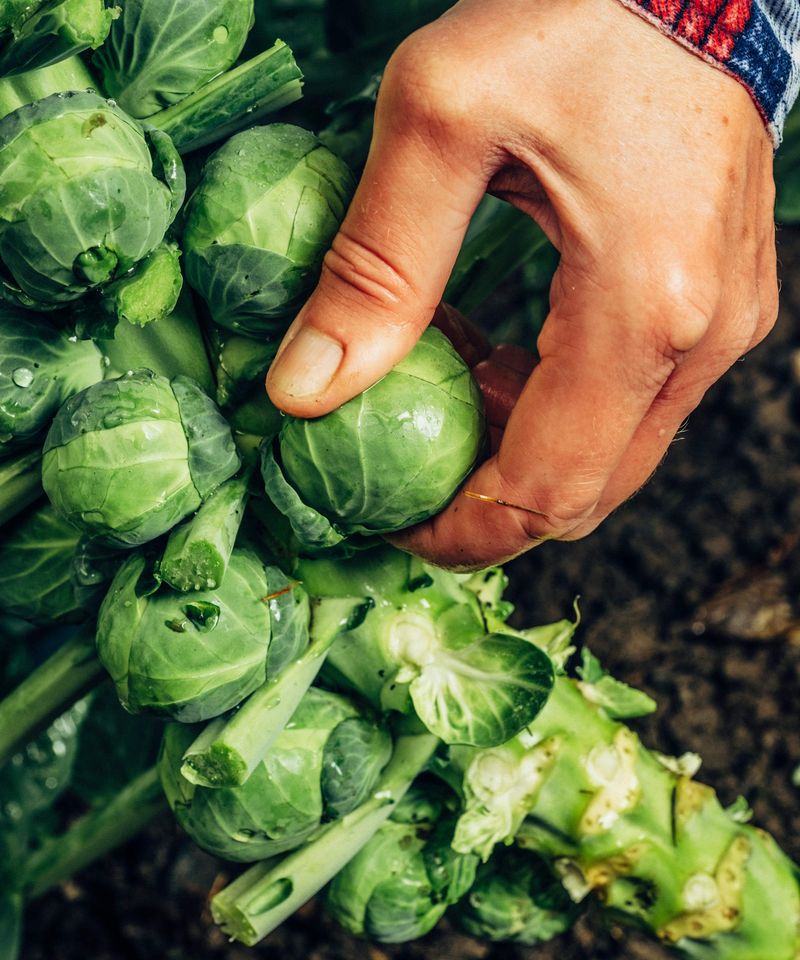
After topping, the measure of success is not the cut itself but what the sprouts feel like when you press them gently between your fingers. Firm, compact buttons that resist light pressure and hold their leaves tightly are what you are working toward. Iowa State University Extension puts the typical harvest size at one to one and a half inches in diameter, and describes starting at the bottom of the stalk and working upward as sprouts reach that stage.
A light frost can deepen the flavor of Brussels sprouts and is generally considered a welcome event for fall crops, but it does not repair structural looseness caused by heat, drought, or nitrogen excess earlier in the season. Utah State’s vegetable harvest guidance and their general Brussels sprouts resource both treat harvest quality as the cumulative result of the whole season’s conditions rather than a late-season correction.
The decision sequence that gives you the best chance at a good result runs like this: identify the actual problem on your stalk, wait for lower sprouts to reach the right development stage, make one small terminal cut, and keep the plants in cool, evenly watered, nitrogen-balanced conditions through to harvest. Topping is one useful step in that sequence, not a shortcut past the others. A stalk full of firm buttons at harvest is proof that the whole approach worked, and that is a more satisfying measure than whether you made the cut.