
If Your Geranium Leaves Are Turning Yellow, Here Are 13 Reasons And The Simple Fix For Each
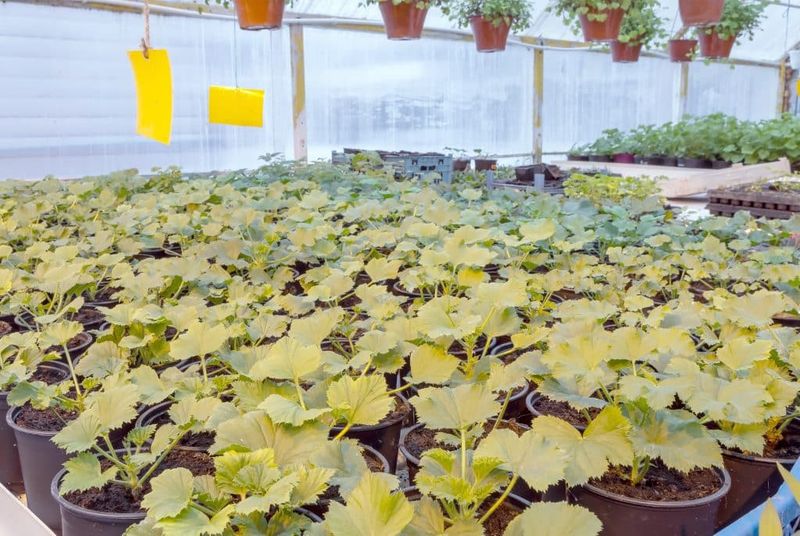
Spotting yellow leaves on your geraniums can send even experienced gardeners into a panic, but yellowing alone rarely tells the whole story. These popular container and garden plants, most of which are actually Pelargonium species rather than true cranesbill geraniums, can turn yellow for more than a dozen different reasons.
Knowing how to read the other clues alongside the color change is what separates a quick recovery from a wasted growing season.
Yellowing Is a Clue, Not a Diagnosis
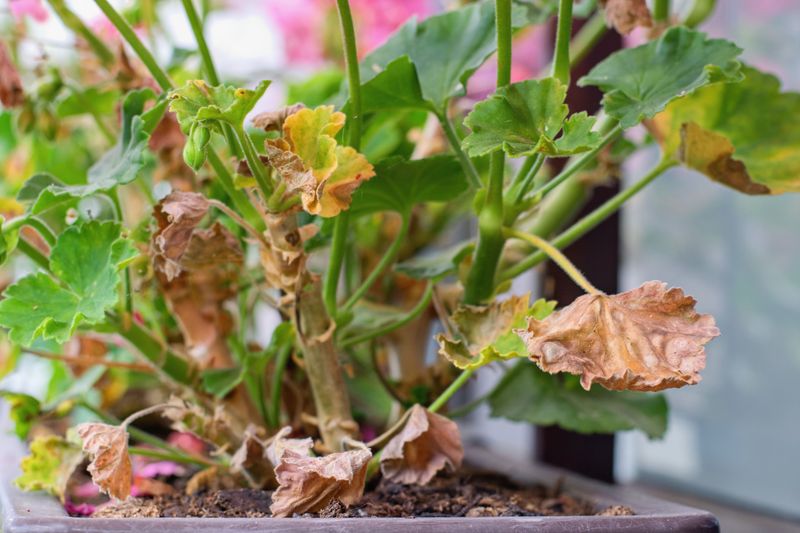
Before reaching for the watering can or the fertilizer bag, take a slow look at the whole plant. The plants most gardeners call geraniums are almost always Pelargoniums, the bedding and container varieties sold at every garden center, and this guide focuses specifically on those.
True cranesbill Geraniums are a different genus with somewhat different care needs, so the troubleshooting here applies to the Pelargonium side of the family tree.
Yellow leaves are what plant pathologists call a nonspecific symptom, meaning they point toward a problem without identifying it. University of Minnesota Extension’s geranium diagnostic guide lists water stress, nutrient problems, pests, disease, and environmental factors all as possible explanations for discolored leaves.
The number 13 in this article’s title is an editorial organizing tool, not a claim that biology has exactly 13 causes waiting to be counted.
Start by noticing which leaves are affected. Older leaves near the base yellowing first suggests something different than new growth at the tips turning pale.
Uniform all-over yellowing differs from interveinal yellowing, where veins stay green while tissue between them fades, or from spotted, stippled, or edged patterns. Also note whether the plant is wilting, whether you see tiny insects or webbing on leaf undersides, whether stems look dark or mushy, and whether there are blisters, rings, or distorted growth anywhere.
Those accompanying clues are what narrow the possibilities. UC IPM’s houseplant problem guide emphasizes checking soil moisture, drainage, root condition, and leaf surfaces together rather than treating any single symptom in isolation.
The sections that follow offer a safest next step for each possible cause, and a few of them will tell you honestly when a simple adjustment is not enough and testing, isolation, or disposal is the right call.
Start With the Roots and the Water
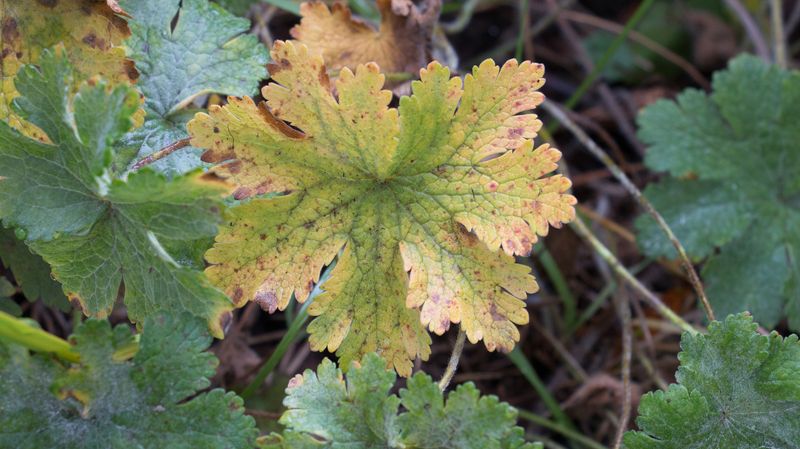
Water problems are among the most common reasons geranium leaves turn yellow, but the fix depends entirely on which direction the problem runs. Overwatering and underwatering can look surprisingly alike from the outside, which is why checking the soil before changing anything is the most important first move.
Push a finger an inch or two into the growing medium. If the soil feels wet or the pot feels heavy and water is sitting in the saucer beneath it, excess moisture is the likely culprit.
Minnesota Extension’s geranium growing guide notes that Pelargoniums tolerate somewhat dry conditions far better than persistently wet soil, and recommends containers with drainage holes and a mix that does not hold water for days at a time. Empty any standing water from saucers after every watering, and let the top one to two inches of soil dry before watering again.
That guideline works well for many outdoor containers, but adjust it based on pot size, weather, wind, and whether the plant is indoors or out.
If roots are brown, soft, or falling apart when you slide the plant out of the pot, root rot may already be underway. Withholding water alone cannot reverse advanced root disease.
UC IPM’s houseplant care resource makes clear that once roots are severely compromised, recovery is uncertain and some plants will not come back regardless of care changes.
Underwatering presents its own risks. Hanging baskets and small containers dry out faster than garden beds, especially in hot or windy weather.
If the soil is bone dry and pulling away from the pot edges, water thoroughly and allow full drainage. Avoid promising yourself that a severely wilted plant will bounce back completely, because root damage from prolonged drought can be permanent.
A third possibility is compacted, root-bound, or exhausted container mix. Container media loses structure and nutrients over time.
Minnesota Extension’s geranium wilt diagnostic points to poor root health from compacted soil or pot-bound growth as a contributor to yellowing and decline. If roots are circling the bottom or bursting out of drainage holes and the mix looks spent, repot into fresh, well-drained potting mix in a container one size up, with drainage holes, and monitor the plant’s response over the next few weeks.
Light and Temperature Can Change the Leaves
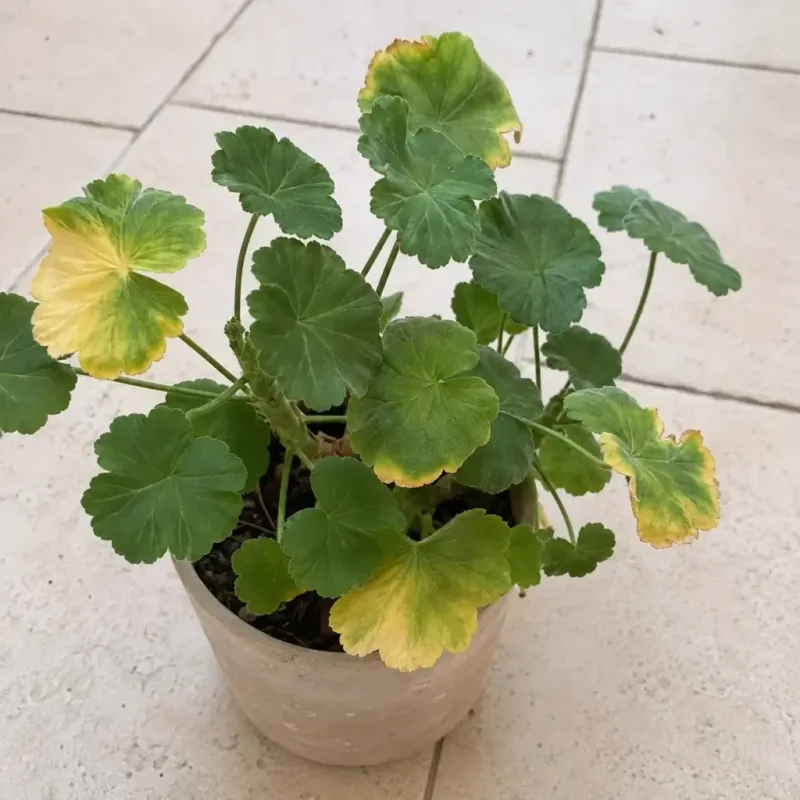
Pelargoniums are sun-loving plants, and when they do not get enough of it, the foliage often responds by turning a pale yellow-green. Stems stretch toward any available light source and become leggy and weak.
Minnesota Extension recommends full sun outdoors, with at least eight hours of direct light daily for strong flowering performance. If your plant lives in a dim corner or near a window that only gets a few hours of weak light, gradually moving it to a brighter spot is the safest next step.
Gradual is the key word. A geranium that has adapted to lower light can suffer leaf scorch or bleaching if moved abruptly into intense direct sun.
Shift it to a brighter location over the course of a week or two, letting it adjust at each stage. The goal is more light, not a sudden shock in the opposite direction.
Excessive heat tells a different story. UC IPM’s geranium resource notes that plants may benefit from some afternoon shade during very hot weather.
High temperatures combined with dry soil can push a geranium into general stress and yellowing that looks similar to low-light symptoms but has a different fix. During heat waves, protect plants from the harshest afternoon sun and keep soil moisture consistent without keeping roots waterlogged.
Cold is just as damaging. Geraniums are frost-sensitive, and even a cold draft indoors can stress foliage.
UC IPM’s houseplant guide identifies cold exposure as a contributor to leaf yellowing and general decline. Keep indoor plants away from drafty windows, air conditioning vents, and exterior doors in cooler months, and move outdoor plants inside before temperatures threaten frost.
Moving a geranium abruptly from outdoors to indoors in fall is a specific situation worth flagging. Minnesota Extension’s guide on bringing houseplants indoors identifies this transition as a trigger for yellow leaves, wilting, and leaf drop.
Acclimate the plant gradually, inspect it carefully for hitchhiking pests before it comes inside, and give it the brightest available indoor spot. Old damaged leaves that yellowed during the transition are unlikely to recover their color, so judge the plant’s health by what grows next rather than whether those leaves green up again.
Feed the Plant Only After Testing the Basics
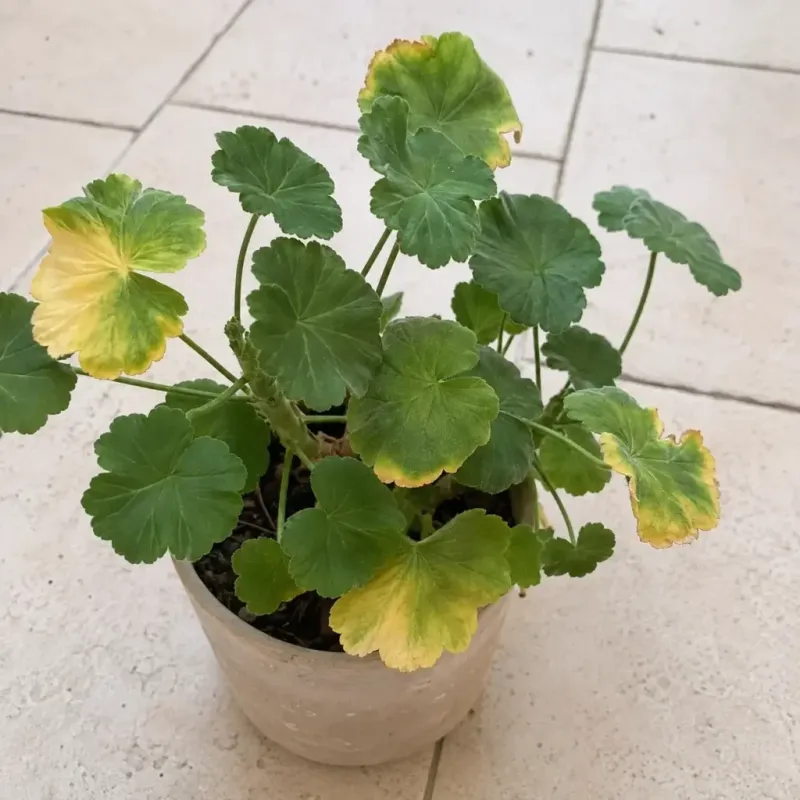
Nutrient problems are a real possibility when geranium leaves turn yellow, but fertilizer is not the right first move unless water, light, and roots have already been checked and ruled out. Applying fertilizer to a plant with damaged or waterlogged roots can make stress worse, not better, and excess fertilizer salts are a cause of yellowing in their own right.
Leaf age and pattern offer diagnostic clues worth noting. Older leaves near the base turning a pale yellow-green can suggest that the plant is running low on nitrogen or other mobile nutrients.
UC IPM’s houseplant problem resource points out that similar symptoms can result from poor roots, inadequate light, or overwatering, so the pattern alone is not proof. Newer leaves showing yellowing between the veins while the veins themselves stay green may point toward a micronutrient availability problem tied to soil pH, but again, that is a clue, not a confirmed diagnosis.
When a nutrient or pH problem seems likely, testing is a more reliable next step than guessing. Penn State Extension’s plant health diagnosis guide recommends soil or growing-medium testing before adding amendments.
For garden beds, a cooperative extension soil test can identify pH and nutrient levels. For containers, the growing medium may simply be depleted after a full season of use.
If the plant is actively growing and other causes have been ruled out, a balanced water-soluble fertilizer applied at half strength during the growing season is a reasonable starting point for containers. Minnesota Extension supports this approach for Pelargoniums in pots.
For pH-related micronutrient problems, Oklahoma State Extension’s soil acidification guide and Penn State’s irrigation water testing resource both caution against adding iron, sulfur, or other amendments without confirming actual pH and nutrient status first.
Overfertilizing deserves its own mention. Excess fertilizer or soluble salt buildup can damage roots and produce leaf-edge browning, yellowing, and general decline that looks like deficiency.
If salt accumulation is suspected in a well-drained container, flushing with clean water may help, but avoid saturating a plant that is already struggling with root problems or poor drainage.
Inspect the Leaf Undersides for Pests and Edema
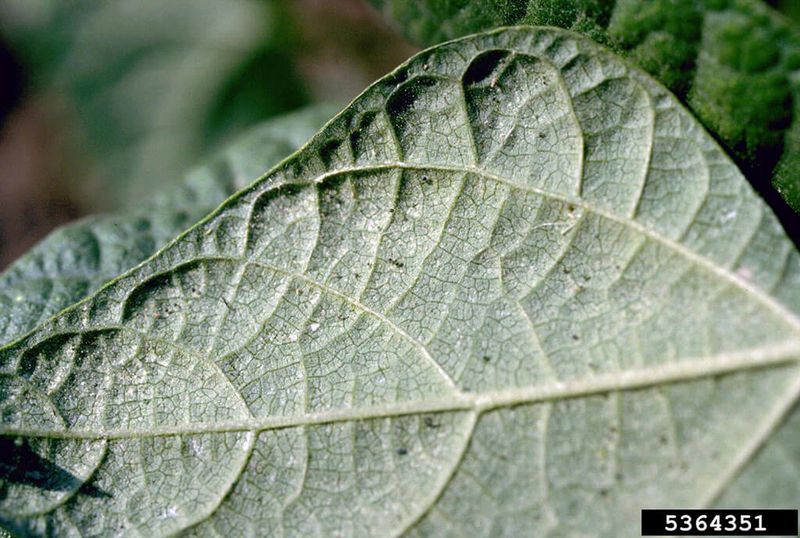
Flipping the leaf over is one of the most useful diagnostic moves a gardener can make. Many of the pests and physiological problems that cause yellowing leave their most obvious evidence on the underside of foliage, not the top.
Spider mites are a common culprit in dry or warm conditions. UC IPM’s spider mite guide describes their damage as fine stippling, a speckled bronze or yellowish discoloration, sometimes accompanied by fine webbing on leaf undersides and at stem joints.
Other sap-feeding pests, including aphids, whiteflies, scale insects, mealybugs, and thrips, can also produce yellowing or general decline. UC IPM’s whitefly resource notes that heavy infestations cause leaves to yellow and drop prematurely.
Check growing tips and stems as well as leaf undersides, since different pests favor different parts of the plant.
When you find pests on a container plant, isolate it from other plants right away to prevent spread. Use a product specifically labeled for the pest and the plant.
Minnesota Extension’s indoor insect management guide warns against homemade dish-soap sprays because they can burn plant tissue. Choose a commercially formulated insecticidal soap instead, test it on a small area of the plant first, and follow the product label carefully.
EPA-registered insecticidal soap label guidance specifies that the product should not be applied to drought-stressed plants or during temperature extremes, and that small-area testing for sensitivity is recommended before full treatment.
Edema looks different from pest damage, though it also starts on leaf undersides. Penn State Extension’s edema of geranium resource describes it as a physiological disorder that begins with yellow spots and small translucent, watery blisters on the undersides of leaves, which later turn brown and corky.
It develops when roots absorb water faster than leaves can release it, often during cool, cloudy, humid weather with poor ventilation and consistently wet soil. Minnesota Extension’s leaf spots diagnostic also identifies edema as a geranium-specific concern.
Critically, edema does not spread from plant to plant, so it requires no isolation. The fix involves improving drainage, reducing watering frequency, increasing air circulation, watering in the morning so foliage dries during the day, and avoiding wetting leaves when possible.
Disease Leaves More Than Yellowing Behind
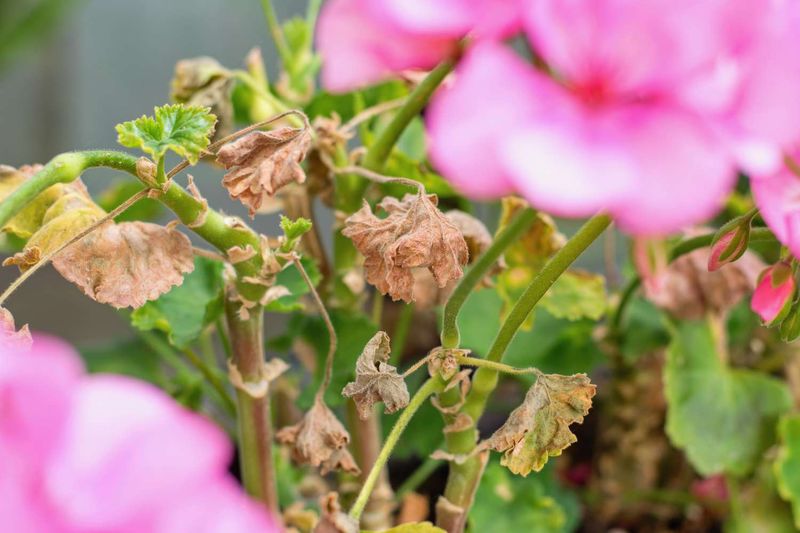
Disease is the possibility that calls for the most caution, because some geranium diseases cannot be corrected by adjusting care, and a few require disposal of the affected plant to protect others nearby. Yellowing alone is not enough to diagnose a disease.
The stronger evidence comes from what accompanies the yellow color.
Watch for water-soaked or V-shaped lesions on leaves, dark brown or black discoloration on stems, gray mold covering tissue, rust-colored pustules on the undersides of leaves, mottled or ring-patterned foliage, distorted or stunted new growth, or persistent wilting that does not improve after watering. Minnesota Extension’s discolored leaves diagnostic and its companion wilt guide both note that laboratory analysis may be needed for accurate identification of root rots, bacterial wilts, and viruses.
Penn State Extension’s geranium disease overview covers a range of fungal, bacterial, and viral problems that affect Pelargoniums, and makes clear that treatments vary widely by pathogen type. Fungicides can address some fungal diseases but do nothing for bacterial infections, viruses, physiological disorders like edema, or root damage from overwatering.
Applying a fungicide to a plant with bacterial blight or a virus will not help and may delay the decision to remove the plant.
Sanitation is the response that applies across most disease scenarios. Remove and dispose of clearly diseased leaves and stems in the trash, not the compost pile.
Keep foliage as dry as possible, water at the base of the plant rather than overhead, and disinfect pruning tools between cuts with a dilute bleach solution or rubbing alcohol. Penn State’s bacterial blight resource is explicit that symptomatic plants should not be used for cuttings, because propagating from infected stock spreads the disease.
Start with certified disease-free plants whenever possible. If a geranium shows severe or spreading disease symptoms that do not respond to sanitation, and especially if a vascular wilt or virus is suspected, discarding the plant and starting fresh with clean stock is often the safest path forward.
UC IPM’s commercial geranium pest management guidelines reinforce that some disease situations require a laboratory or diagnostic clinic confirmation before the correct response can be determined. If you are uncertain and the plant continues to decline, reaching out to your local cooperative extension plant clinic is a reasonable next step.
Match the Clues to the Safest Next Step
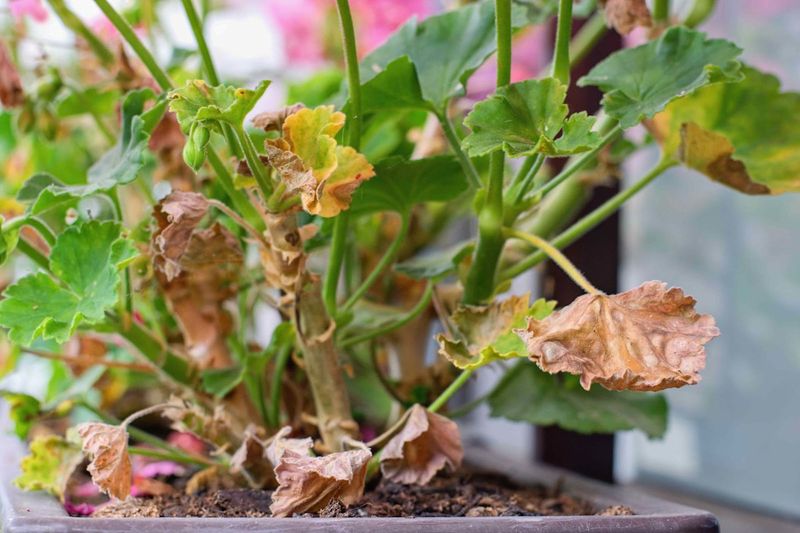
Working through the possibilities in a logical order keeps you from treating the wrong problem. Soil and drainage come first because they affect nearly every other condition on this list.
Press a finger into the growing medium, check that drainage holes are open, and look under the pot for standing water before doing anything else.
Once moisture and drainage are assessed, consider light and any recent changes to the plant’s environment. Has it been moved indoors recently?
Has there been a heat wave, a cold snap, or an unusual stretch of cloudy weather? UC IPM’s houseplant problem resource consistently returns to environmental conditions as a starting point for diagnosing yellowing and decline.
Next, look at which leaves are affected and how. Older leaves yellowing uniformly near the base fits a different set of causes than new growth turning pale between the veins.
Minnesota Extension’s discolored-leaf diagnostic uses this kind of pattern information to help narrow possibilities. After checking leaf age and pattern, slide the plant out of its pot if symptoms persist and inspect the roots.
Healthy roots are white or tan and firm. Brown, soft, or hollow roots change the urgency of the situation.
Flip a few leaves over and look at stems and growing tips for pests, webbing, blisters, or lesions. If pests are present, isolate the container.
If blisters appear without insects, consider edema and adjust watering and ventilation. If lesions, dark stems, pustules, mottling, or persistent wilt are present alongside yellowing, the plant may need a professional diagnosis rather than a home remedy.
Nutrition questions come after the physical inspection. Minnesota Extension’s wilt guide and its general geranium care page both support testing the growing medium before adding fertilizer or amendments.
The correct response to yellow leaves may be a single care adjustment, a series of gradual changes, a diagnostic soil test, pest isolation, or, in some cases, removing and disposing of the plant. There is no single treatment that covers every scenario.
Healthy New Growth Shows Whether Conditions Improved
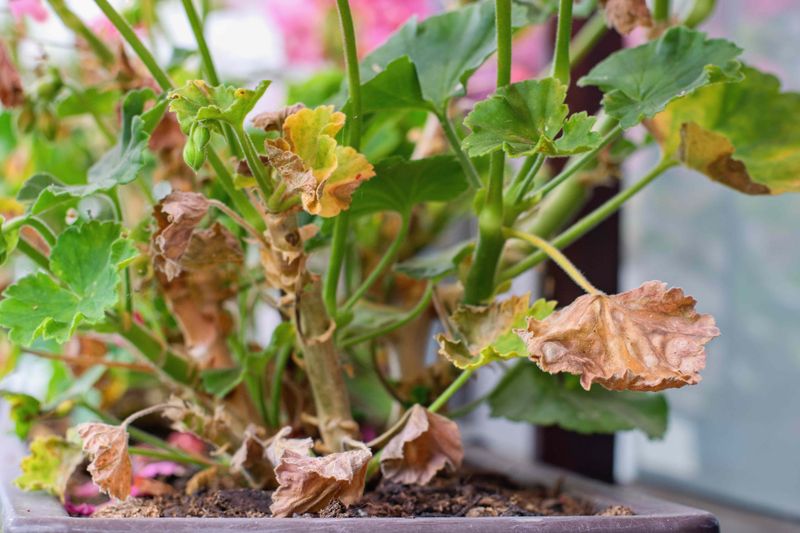
A few yellow leaves at the base of an otherwise sturdy geranium are not an emergency. Older leaves naturally age and drop, and a plant recovering from a corrected problem may shed some foliage before it stabilizes.
UC IPM’s houseplant guide acknowledges that older leaves yellowing and dropping can be a normal part of a plant’s cycle rather than a sign of serious trouble.
Do not expect damaged yellow leaves to turn green again once conditions improve. The more useful question is whether new growth coming in looks healthy, whether yellowing has stopped spreading, and whether stems and roots feel sound.
Minnesota Extension’s wilt diagnostic frames recovery in terms of stable conditions and healthy new tissue rather than the restoration of old damaged leaves.
If wilt persists after watering is corrected, if stems are darkening at the base, or if the plant continues to decline despite care changes, escalate the response. That may mean sending a sample to a cooperative extension plant diagnostic lab, especially when a vascular disease or virus is possible.
Penn State’s bacterial blight resource is clear that symptomatic plants should not be used for cuttings under any circumstances. Starting over with certified disease-free stock is sometimes the most practical choice.
Yellow leaves signal that something in the plant’s environment or health deserves a closer look. Treat them as the beginning of an investigation, not a verdict on the plant’s future.