
Your Yellowing Cucumber Leaves Are A Warning Sign – Here’s What They’re Telling You In Late Summer
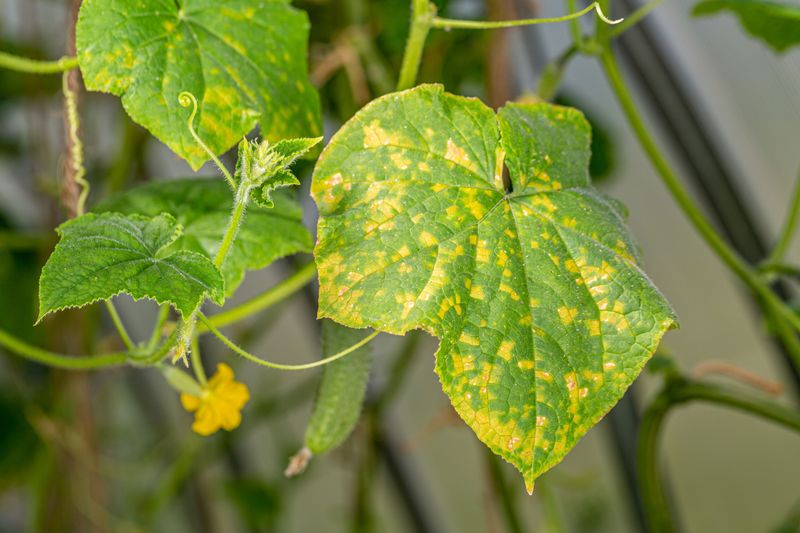
Walking out to your cucumber vines and spotting yellow leaves can make your stomach drop, especially when you’ve been nursing those plants all season. The good news is that a few yellow leaves, particularly older ones near the base, don’t automatically mean your plant is in serious trouble. Yellowing is more of a message than a verdict, and knowing how to read that message can save you from treating the wrong problem. The pages ahead walk you through a practical inspection process so you can figure out what your plant is actually trying to tell you.
A yellow leaf calls for inspection, not panic
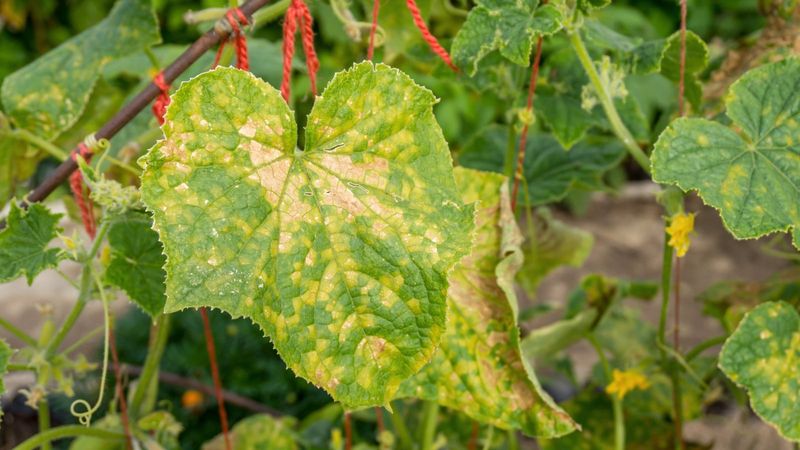
Spotting a yellow leaf on your cucumber vine is worth paying attention to, but one or two older leaves changing color near the base of the plant is not the same as a vine in crisis. Cucumber plants shed older foliage as they grow, and limited yellowing on the lowest, most mature leaves can be a normal part of that cycle. The plant may keep flowering and fruiting while a handful of older leaves fade.
Where the concern grows is when yellowing spreads quickly across multiple parts of the vine, climbs toward new growth, or arrives alongside other symptoms. Penn State Extension’s guidance on cucumber mosaic virus makes clear that visual symptoms alone cannot identify a single cause, because many different problems produce overlapping leaf changes. Nutrient stress, root problems, insects, mites, viruses, bacterial disease, fungal disease, weather stress, and chemical injury can all turn cucumber leaves yellow.
Rapid spread is one reason to investigate promptly. So is severe stippling, wilting during periods when soil moisture seems adequate, canopy loss, or yellowing that shows up on new growth rather than older leaves. Those patterns suggest something more active than the ordinary aging of lower foliage.
A useful frame for this whole process comes from Oregon State Extension’s vegetable troubleshooting guidance, which positions yellowing as a nonspecific signal that calls for a methodical look rather than an immediate fix. University of Minnesota’s cucumber growing guide echoes that approach, noting that correct diagnosis before treatment protects the plant and avoids wasted effort. Treat the yellow leaf as an invitation to look closer, not as proof that something has already gone seriously wrong.
Locate the yellowing and read its pattern
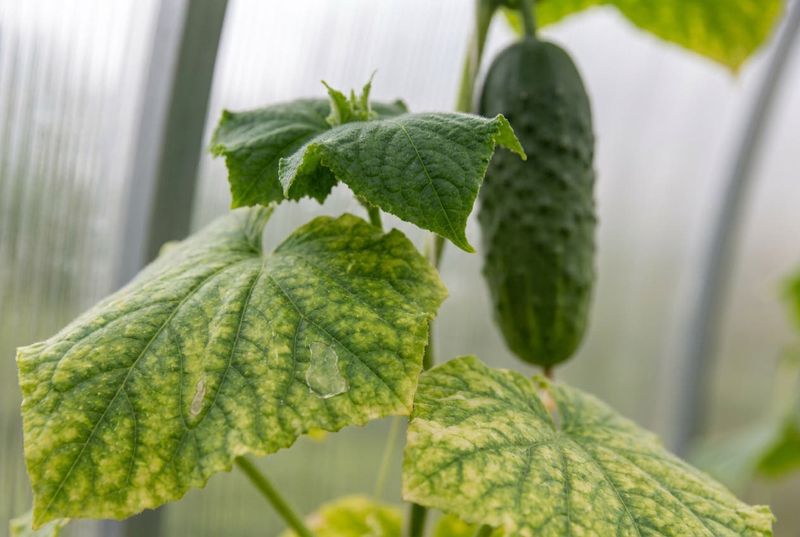
Before touching the soil or reaching for any product, spend two minutes reading the vine from bottom to top. Start at the base and notice which leaves are affected. Are they the oldest, lowest leaves on the plant, or is the yellowing appearing higher up on younger growth? That location alone narrows the list of likely causes considerably.
Older lower leaves that yellow evenly, without spots or visible texture changes, point in a different direction than younger leaves showing yellowing between their veins while the veins themselves stay green. The University of Georgia Extension’s plant nutrition guide explains that mobile nutrients like nitrogen move from older tissue to newer growth when the plant is running short, which is why deficiency patterns often show up first on mature foliage rather than the tips. That pattern has some diagnostic value, but it needs to be combined with other observations before drawing any conclusions.
Yellowing between green veins on new leaves is a different picture. That interveinal pattern can suggest a micronutrient or root-uptake issue, but University of Minnesota’s fertilizing guide cautions that visual diagnosis of nutrient problems is unreliable without soil, pH, and root information to back it up. Viral diseases, pH imbalances, and root damage can all produce similar-looking symptoms.
Next, look at the shape of the discoloration. Is the yellowing uniform across the leaf surface, or is it patchy and irregular? Are there angular edges where the yellow stops sharply at a leaf vein? Do you see fine pale dots, curling, or distortion in the leaf blade?
Oregon State Extension recommends noting every visible symptom before moving to the next step, because the pattern of damage often carries more information than the color change alone.
Even lower-leaf yellowing can suggest nitrogen stress
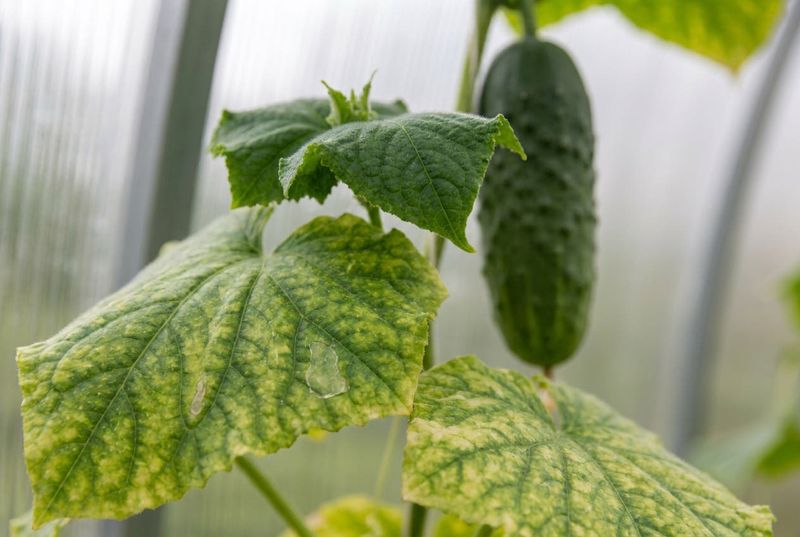
When yellowing spreads fairly evenly across the oldest, lowest leaves on the vine and the plant’s overall growth seems slow or stunted, nitrogen deficiency becomes a reasonable possibility to consider. Nitrogen is a mobile nutrient inside the plant, meaning the plant can relocate it from older tissue to support newer, actively growing parts when the supply from the soil runs low. UGA Extension’s plant nutrition publication describes this mobility as the reason nitrogen shortfalls tend to show up first in mature foliage rather than at the growing tips.
The pattern worth watching for is relatively even, pale yellowing that moves progressively up the plant over time, paired with smaller-than-normal leaves, slow vine extension, and reduced flowering. Utah State University Extension’s vegetable nutrient management guidance notes that even yellowing on mature leaves alongside reduced vigor is more consistent with nitrogen stress than with patterns caused by disease, pests, or other stresses.
That said, a visual match to this pattern does not confirm a nitrogen deficiency. Angular spots, fine pale stippling, webbing across leaf surfaces, distorted or curled leaves, or leaves that collapse suddenly redirect the inspection toward disease, mites, or another stress entirely. Those symptoms do not fit a simple nutrient shortage and should not be treated as one.
University of Minnesota’s fertilizing guide advises checking soil conditions and understanding what the plant actually needs before applying any amendment. Fertilizing without that information can worsen a nutrient imbalance, push growth the plant cannot support, or mask a different problem that still needs attention. Adding Epsom salt whenever leaves turn yellow is a common reflex, but magnesium deficiency is only one of many possible causes, and adding it blindly can create new soil chemistry problems rather than solving an existing one.
Inspect the underside for mildew and mites
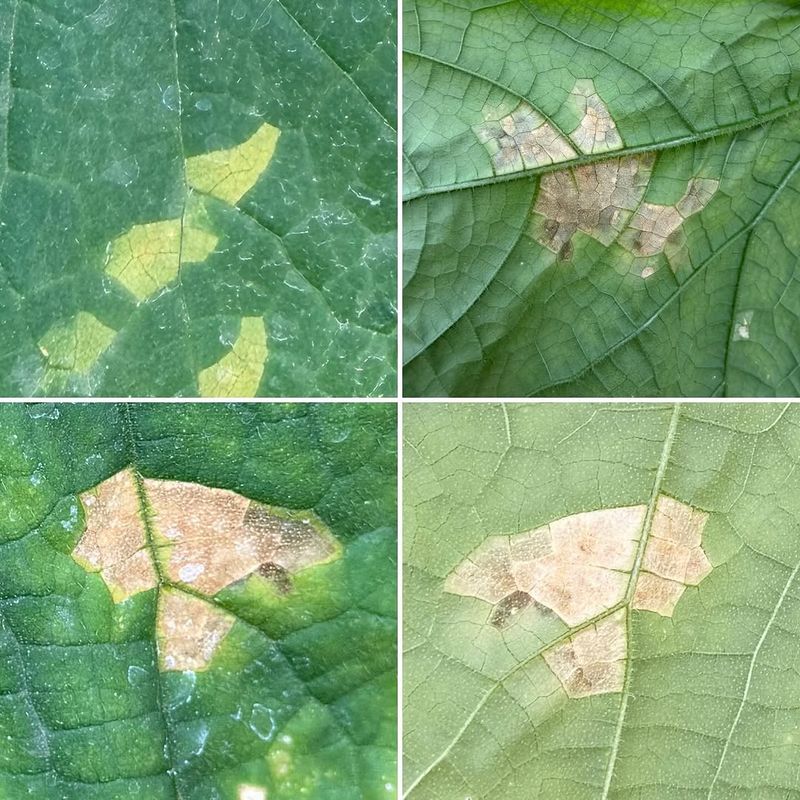
Flipping the leaf over changes the entire inspection. The upper surface of a cucumber leaf shows you color and texture, but the underside often holds the evidence that actually points toward a cause. Make a habit of turning several affected leaves before reaching any conclusion.
Angular yellow patches that stop sharply at the leaf veins are worth taking seriously. When those patches have gray, brown, or purple fuzzy growth underneath them, that combination is a strong indicator of cucurbit downy mildew. University of Minnesota Extension’s downy mildew resource describes the characteristic sporulation on the underside of angular lesions as one of the clearest field signs distinguishing this disease from other causes of leaf yellowing. Penn State Extension’s cucurbit downy mildew guidance emphasizes that the angular shape of the lesions, bounded by veins, is a distinguishing feature that sets downy mildew apart from nutrient problems, which tend to produce more diffuse color changes.
A completely different picture shows up when the underside is covered in fine pale dots, bronzing, or a dusty, speckled texture, especially if you can spot tiny moving specks, shed skins, or delicate webbing in the leaf axils or along the midrib. That combination points toward spider mites rather than any fungal disease. UC IPM’s spider mite guide for cucurbits explains that hot, dry conditions favor rapid mite population increases, making them a relevant possibility in late summer, particularly during stretches of low humidity and high temperatures.
Physical evidence matters here. Seasonal assumptions are not enough. A vine growing in a hot, dry stretch during August deserves a mite inspection, but the presence of hot weather alone does not prove mites are present. Look for the stippling, the webbing, and the tiny pests themselves before concluding anything.
University of Minnesota’s cucumber leaf diagnostic tool lists both mites and downy mildew among the more common causes of discolored cucumber leaves, reinforcing the value of an underside check before moving to any treatment decision.
Mottling, distortion, and surface lesions point elsewhere
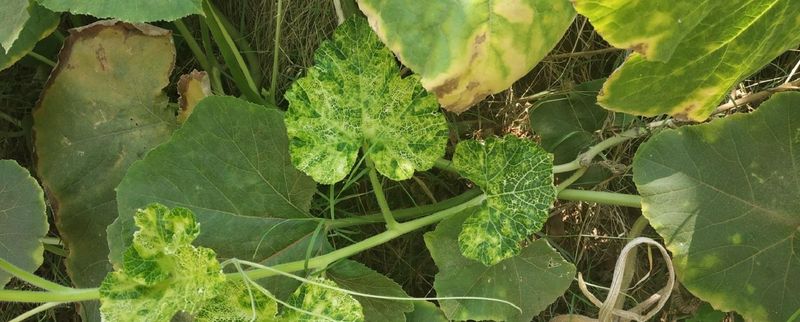
Some yellowing patterns do not fit the nitrogen or mite picture at all, and recognizing those differences can save a lot of guesswork. Yellow-and-green mottling, where the leaf surface looks patchwork or mosaic-like, combined with curling, puckering, or distorted leaf shape, raises the possibility of a viral infection. Misshapen or stunted fruit appearing alongside leaf symptoms adds weight to that concern.
Penn State Extension’s cucumber mosaic virus page states plainly that virus diseases cannot be diagnosed from symptoms alone. The mottled, distorted look can be caused by nutrient deficiencies, insect feeding damage, heat stress, herbicide drift, or other disorders that produce nearly identical visual results. A photograph and a submission to a local Extension plant clinic or diagnostic lab is the most reliable next step when viral symptoms are suspected, because no home inspection can confirm it.
University of Minnesota’s cucumber growing guide notes that aphids can transmit several viruses to cucurbits, so finding aphids on a vine with mottled, distorted leaves adds context, though it still does not confirm the specific cause.
Small, water-soaked spots that turn angular and develop yellow halos are a different pattern entirely. Those lesions suggest angular leaf spot, a bacterial disease that spreads readily through rain splash and overhead irrigation. UC IPM’s angular leaf spot resource describes the lesions as initially water-soaked before becoming more defined, often with a white, crusty residue on the underside after the lesion dries.
White, powdery growth on the upper leaf surface is yet another distinct pattern. That appearance points toward powdery mildew, which is a different disease from downy mildew despite sharing a name. University of Minnesota Extension’s powdery mildew guide explains that affected leaves may eventually yellow and die, but the powdery coating on the surface is the identifying feature, not the yellowing itself. Keeping these patterns visually distinct helps avoid treating the wrong problem.
Check roots and soil before adding amendments
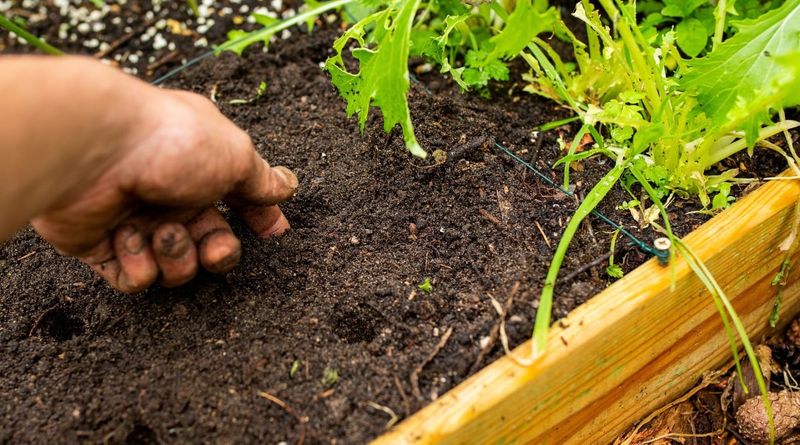
Foliage symptoms tell one part of the story, but the soil and roots tell another. Overwatering is one of the more common causes of yellowing that gets misread as a fertilizer problem. When roots sit in waterlogged soil for extended periods, they lose the ability to take up oxygen, and the plant responds by dropping or yellowing older leaves, which looks almost identical to the early signs of nitrogen stress. UC IPM’s plant problem diagnostic guidance identifies overwatering and poor drainage as common contributors to yellowing that can be mistaken for nutrient deficiency.
Poor drainage, compacted soil, and root disease can all restrict nutrient uptake even when the soil contains adequate nutrients. Adding fertilizer to a plant with damaged or waterlogged roots often does little good and can worsen an existing imbalance. Oregon State Extension’s vegetable troubleshooting resource recommends assessing moisture levels and soil conditions before applying any corrective amendment, because the same yellow leaves can result from both too much water and too little.
Check soil moisture a few inches below the surface rather than judging by the top layer alone. In containers, lift the pot or tilt it slightly to see whether drainage holes are clear. Gently examine exposed roots if possible; healthy cucumber roots are white or cream-colored, while brown, mushy, or slimy roots suggest rot from excess moisture or disease.
University of Minnesota’s fertilizing guide cautions that visible yellowing does not prove the plant needs nitrogen, magnesium, or iron. UC IPM’s cucurbit yellow stunting disorder page specifically notes that this viral disease can be confused with nutrient deficiency, underlining why soil and root assessment needs to come before any amendment decision.
Late summer changes the odds by region
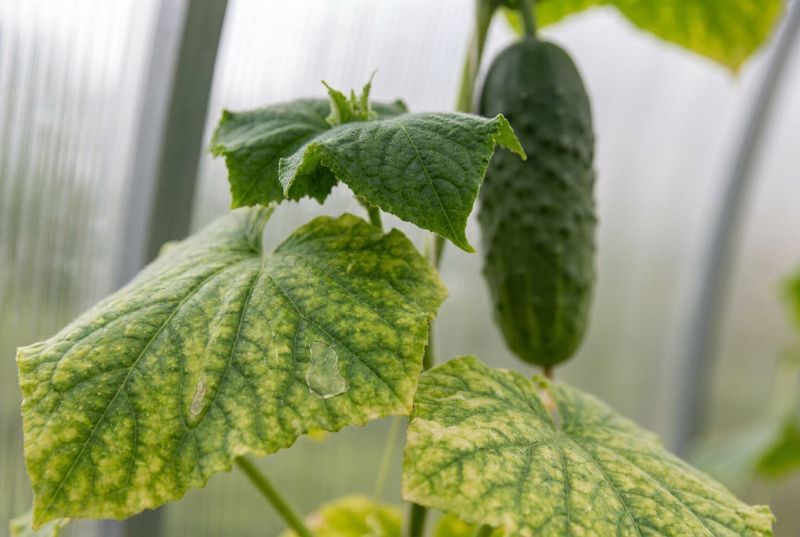
Timing matters when reading cucumber leaves, but late summer does not point to a single universal cause across the United States. The country covers too many climates, microclimates, and local disease pressure patterns for any one explanation to apply everywhere at once.
Hot, dry stretches in late summer can accelerate spider mite populations on cucurbits. University of Minnesota’s cucumber leaf diagnostic tool identifies mites as particularly common during hot, dry periods in late June and August, making the underside inspection described earlier especially worthwhile during heat waves. University of Minnesota’s powdery mildew guide notes that powdery mildew on cucurbits often becomes more visible in mid- to late summer as conditions favor the pathogen.
Downy mildew pressure is a different matter. Penn State Extension’s cucurbit downy mildew resource explains that downy mildew requires specific environmental conditions to spread and that its regional presence changes from year to year. Checking current state and local Extension alerts is the most reliable way to know whether downy mildew is active in your area this season, rather than assuming it is present based on calendar date alone.
For fast-moving symptoms, a yellow leaf that doubles in coverage within a few days, severe wilting, rapid canopy loss, suspected bacterial wilt, or anything that looks like it could be a virus, photographs and contact with a local Extension office or plant diagnostic clinic are more useful than guessing. University of Minnesota’s cucumber guide recommends Extension resources as a first stop for disease identification support, and most state Extension services offer online plant clinics that accept photos. Regional context always improves the accuracy of any diagnosis.
Protect the canopy while you investigate
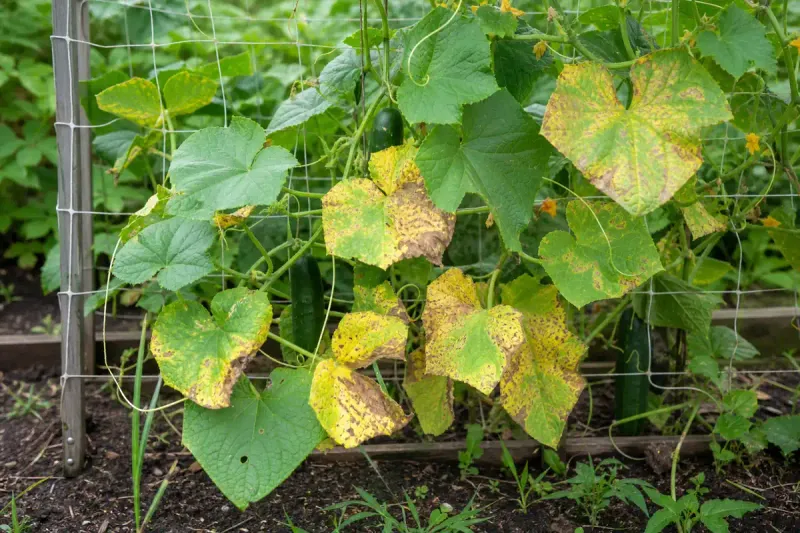
While you work through the inspection process, a few low-risk steps can protect the plant without requiring a diagnosis first. The goal is to reduce conditions that favor disease and pest spread while preserving as much photosynthetic canopy as possible.
Remove leaves that are dead, collapsing, or covered in severe disease symptoms or dense pest activity. UC IPM’s cucumber management resource recommends removing and disposing of heavily affected plant material rather than composting it, since composting diseased tissue can spread pathogens. Do not remove every yellow leaf automatically. A leaf that is still partly green and attached to the vine is still contributing to the plant’s energy supply, and stripping the canopy indiscriminately can slow the plant more than the yellowing itself.
Air movement through the canopy slows the spread of several fungal and bacterial diseases. Trellising vines off the ground, maintaining appropriate spacing between plants, and removing truly dead material all help leaves dry faster after rain or irrigation. UC IPM’s angular leaf spot guidance specifically recommends avoiding overhead irrigation and working among wet vines, both of which can splash bacterial pathogens from leaf to leaf.
Keep soil moisture consistent. Cucumbers need steady moisture but not waterlogged roots, so check soil depth before watering rather than following a fixed schedule. Scout the vine at least once a week, and increase that frequency to every two or three days if symptoms are spreading or if local disease pressure is elevated.
Resist the pull toward automatic pesticide applications. UC IPM’s spider mite quick tips caution that oils and soaps can injure plants under hot conditions or when applied to water-stressed vines. EPA label guidance and EPA’s pesticide label explainer both make clear that any pesticide used on an edible crop must be approved for that crop, applied at the labeled rate, observed for preharvest interval, and handled with the required protective equipment. Fungicides do not correct mite damage, viruses, or watering problems.
Treating before you know the cause wastes product and can harm the plant. A yellow leaf earns your attention by directing you toward the next question to ask, not by handing you the answer.