
If Your Fall Carrots Come Up Forked And Twisted Instead Of Long And Straight, Your Soil Is Steering Them Wrong
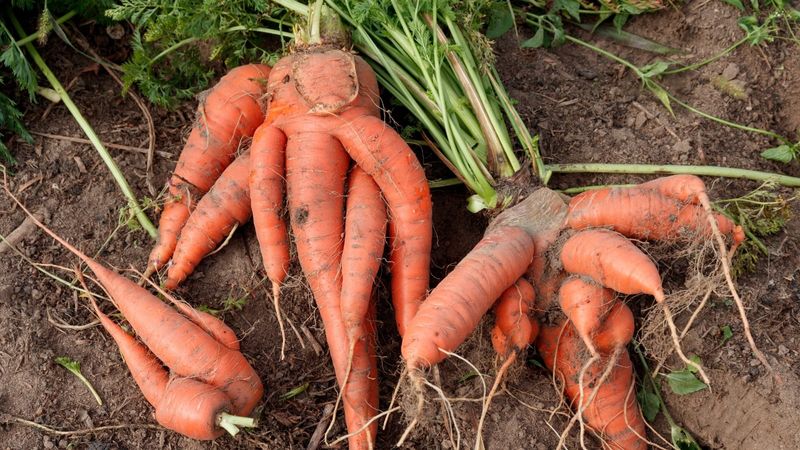
Pulling a tangled, forked carrot out of the ground after months of waiting is one of fall gardening’s most frustrating surprises. Most of the time, the culprit is not the seed packet but what was happening a few inches below the soil surface while that root was trying to grow. Understanding why carrots twist and branch gives you a real shot at fixing the bed before the next sowing. The good news is that most of these problems are correctable with a little diagnosis and some prep work before you plant.
A Forked Carrot Usually Reports on Its Root Zone
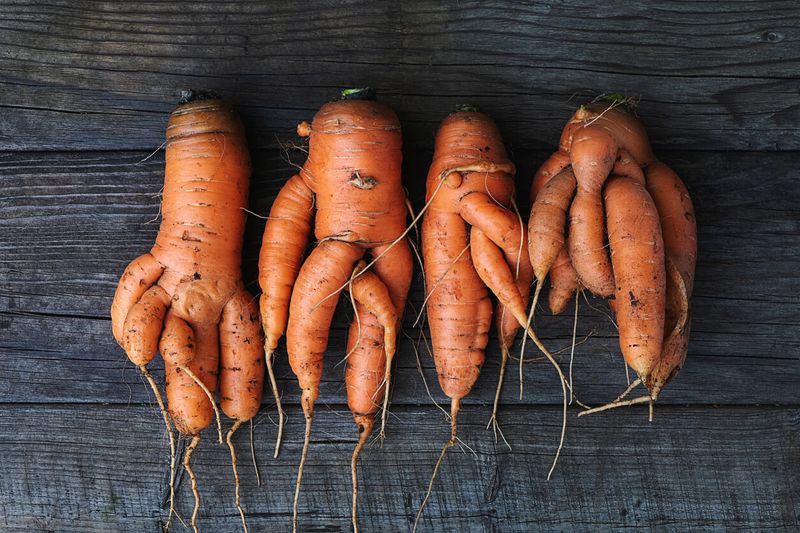
Pull a handful of misshapen carrots from the fall bed and you are looking at a record of what happened underground. A carrot’s taproot begins forming almost immediately after germination, and anything that blocks, injures, or redirects that growing tip can cause the root to branch, shorten, or coil on itself. Soil conditions are the most common explanation when a broad portion of the crop comes up deformed, but they are not the only one.
University of Minnesota Extension’s carrot root-forking diagnosis lists rocky or cloddy soil, compaction, and fresh manure among the leading causes of forked roots, while also pointing to nematodes and other root problems as possible explanations. UC IPM’s dense or rocky soil guidance reinforces that physical obstructions in the root zone are a well-recognized driver of forking. The pattern across your crop is the first and most useful clue you have.
When most plants in the bed come up with similar deformities, the bed itself is the more likely suspect. A single oddly shaped carrot in an otherwise straight row may have hit one stone or clod and branched around it. But when the majority of roots are stubby, forked, or twisted, that points toward something affecting the whole growing environment: compaction, a hardpan layer, excess nitrogen, uneven moisture, or a pest or disease working through the planting.
Minnesota Extension’s home garden carrot guide also notes that variety plays a role, since some types are naturally shorter or more blunt-tipped. Uniform deformity across many plants, though, is more suggestive of management or bed conditions than of seed genetics. Reading the pattern before making any changes keeps you from fixing the wrong thing.
The Taproot Needs a Clear, Strong-Enough Path Downward
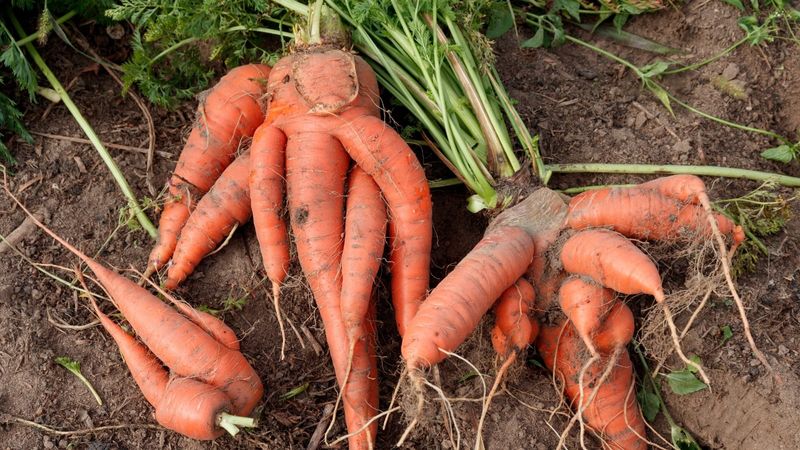
Carrots are not built to push through resistance the way some other roots are. The taproot tip is the engine of downward growth, and when it meets something it cannot penetrate or move, the root deflects. That deflection is what you see as a fork, a stub, or a corkscrew twist at harvest time. The mechanism is straightforward, but the sources of resistance vary quite a bit.
A single embedded stone is the most literal version of this problem. The growing tip contacts the stone, splits around it, and you end up with two or more prongs instead of one straight root. UC IPM’s rocky soil carrot page describes exactly this dynamic, noting that even small stones near the path of the taproot can redirect it. One stone, one forked carrot.
That is a localized problem, not a bed-wide one.
Compaction is a different matter. When the entire bed or a layer within it is dense enough to resist root penetration, many plants in the same area experience the same problem at roughly the same depth. Research published in the Journal of the American Society for Horticultural Science found that increasing soil strength reduced early carrot taproot growth, and field observations have linked compacted conditions with higher rates of forked roots across a planting. The distinction matters because removing one stone helps one plant, while addressing compaction helps the whole row.
UC IPM’s root dieback and forking resource also points out that injury to the root tip from cultivation, pests, or disease can produce branching and stubbing that looks similar to physical obstruction. A carrot cannot tell you whether it forked because of a rock, a hardpan layer, or a pest nipping the tip. Matching the symptom pattern to the likely cause is how you tell the difference before you start digging and amending.
Fresh Manure Can Distort the Crop Without Being a Mechanical Wedge
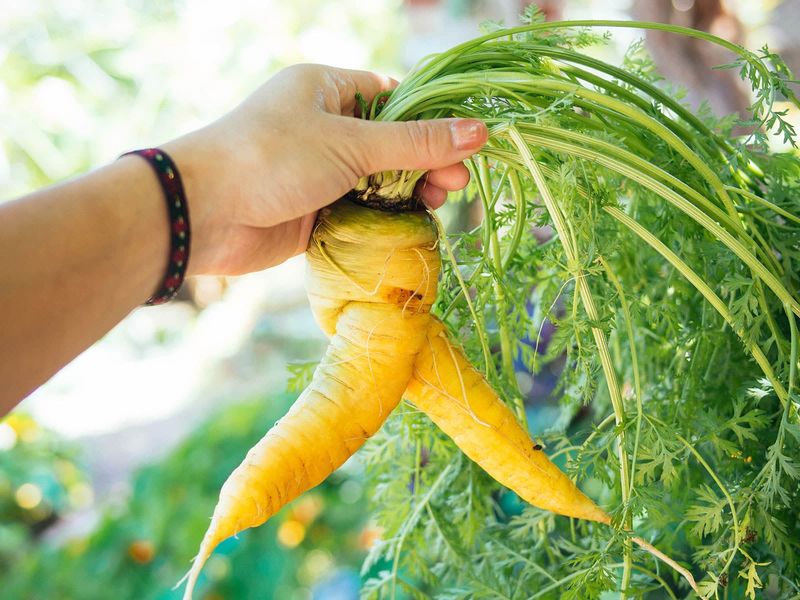
Many gardeners reach for a bag of manure or a wheelbarrow of barn waste before planting carrots, reasoning that richer soil means bigger roots. For carrots, that logic tends to backfire, and the reason has more to do with nitrogen than with any physical obstacle in the bed.
Minnesota Extension’s carrot and parsnip guide cautions against using fresh manure in carrot beds, noting that excess nitrogen promotes heavy top growth at the expense of the root and is associated with hairy, forked, or otherwise deformed carrots. Colorado State’s vegetable guide echoes that recommendation, advising gardeners to avoid applying fresh manure to carrot beds. The plant channels energy into foliage when nitrogen is abundant, and the root that forms can be small, branched, and covered in fine secondary roots rather than smooth and full-sized.
Oregon State’s PNW extension publication on carrots and Utah State’s root-crop soil and fertility guide both recommend basing fertilizer decisions on a soil test rather than adding amendments by assumption. Excess nitrogen is the more direct concern with fresh manure, and possible soil-structure effects may also play a contributing role, though that mechanism is less clearly established in the evidence.
The distinction between fresh and properly composted manure matters here. Well-composted material can improve soil structure and add organic matter without delivering a surge of readily available nitrogen. Fresh or incompletely composted manure is a different product. Penn State Extension’s manure guidance for home vegetable gardens explains the food-safety dimension: raw manure can carry pathogens, and because carrot roots contact soil directly, the risk is real.
USDA guidance on manures and composts establishes a 120-day interval between raw manure application and harvest for crops whose edible portions touch the soil. For a fall carrot planting, that interval makes raw manure impractical and unnecessary. Use properly composted material with a known treatment history, and let a soil test tell you whether you need it at all.
The Root Pattern Tells You When Soil Is Not the Whole Diagnosis
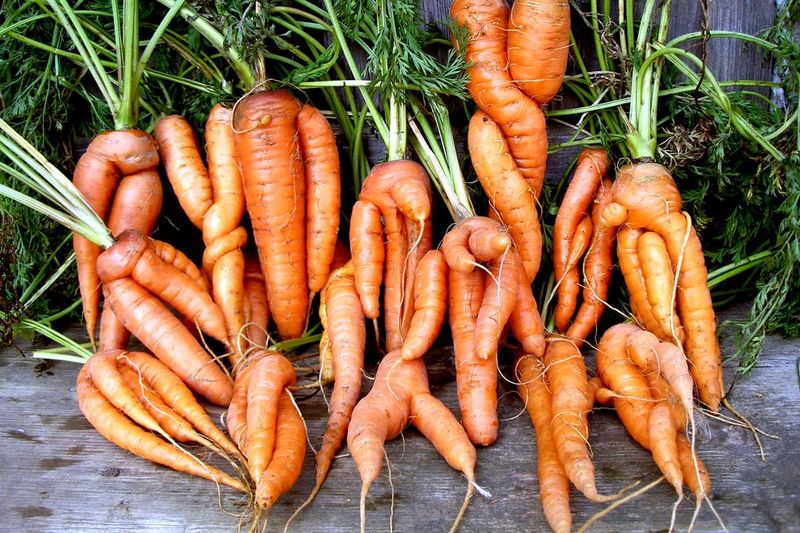
Before you break out a fork and start loosening the entire bed, spend a few minutes reading what the roots are actually showing you. Not every misshapen carrot points to compaction or rocky soil, and treating the wrong cause wastes time and can make things worse.
Forking that varies from plant to plant, with some roots fairly normal and others branched, often does suggest localized physical obstructions or uneven soil conditions. Uniform stubbing across the whole row, where nearly every root is short and blunt at the same depth, is more consistent with a hard layer or compacted zone at a specific point in the profile. Those two patterns call for different responses, even though the harvest looks similar.
A different set of symptoms warrants a different investigation entirely. Firm, beadlike galls or nubs on the root surface are the most recognizable sign of root-knot nematode damage. UC IPM’s nematode page for carrots describes how root-knot nematodes cause swellings and distortions that can look superficially like other root problems but have a distinctive texture and distribution. If you see that pattern, loosening the bed will not solve it.
Hairiness on its own is not a single diagnosis. Minnesota Extension’s hairy root diagnostic page lists excess nitrogen, overwatering, aster yellows, and root-knot nematodes among the causes of excessive fine root development. Leaf symptoms can help narrow it down: aster yellows produces yellowing, stunted, and distorted foliage along with hairy, bitter roots, while nematode-affected plants may show wilting during warm parts of the day even when soil moisture is adequate.
UC IPM’s root dieback resource and Minnesota Extension’s carrot guide both note that Pythium and related pathogens can cause root tip death and subsequent forking or stubbing, often in wet or poorly drained conditions. If the problem is disease or pests rather than soil structure, the correction belongs in that category. Soil or root testing may be needed to confirm a nematode or disease diagnosis, and pesticides or nematicides should not be applied without a specific identification and local guidance on appropriate treatment.
Prepare the Whole Bed Before You Sow the Fall Crop

The single most effective thing you can do for straight fall carrots happens before a single seed goes into the ground. Bed preparation is where you remove the physical obstacles and improve the soil structure that will either support or frustrate the taproot over the next several weeks of growth.
Utah State Extension’s soil and fertility guide for root crops emphasizes deep, loose, well-drained soil as the foundation for good carrot development. Work through the bed and pull out any rocks, woody debris, or large clods you find. Loosen the root zone to at least 12 inches where your site allows. Colorado State’s vegetable guide lists that approximate depth as a practical minimum for carrot beds.
Once you have loosened and cleared the bed, stay off it. Foot traffic compacts soil quickly, and a few passes across a freshly prepared bed can undo the work you just put in.
Organic matter can improve soil structure, drainage, and workability, but more is not automatically better. Penn State Extension’s compost application guidance advises basing additions on soil and compost nutrient tests rather than applying by assumption, and notes that excessive organic matter can create its own fertility imbalances. Work with what your soil actually needs, not with what seems like it should help.
For gardeners dealing with heavy clay or shallow topsoil, a raised bed or container filled with a well-structured growing mix is often the most practical path to the deep, loose root zone carrots need. UC Agriculture and Natural Resources’ carrot production guide identifies sandy loam as a preferred soil type, while noting that heavier soils can still produce good carrots when drainage and structure are adequate. Adding small amounts of sand to clay is not a reliable fix and can create a dense, concrete-like mixture. A soil test before any major amendment is the safest starting point, giving you a clear picture of what the bed actually needs rather than what you are guessing it might.
Direct Sowing, Even Moisture, and Thinning Protect the New Root
A well-prepared bed can still produce deformed carrots if the care practices after planting work against the young taproot. Three habits in particular make a real difference: sowing seeds directly in place, keeping moisture consistent, and thinning seedlings on time.
Oregon State Extension’s carrot publication is clear that carrots should be direct-sown rather than started indoors and transplanted. The taproot begins developing almost as soon as germination occurs, and transplanting even a small seedling risks bending, breaking, or misdirecting that early root. A carrot started in the wrong direction rarely corrects itself. Sow seeds where they will grow and let the root find its path downward from the start.
Moisture management during germination and early growth is one of the more underrated parts of carrot care. Utah State Extension’s carrot growing guide recommends keeping the seedbed evenly moist through germination, which can take one to three weeks depending on soil temperature. The goal is consistent moisture without saturation. Letting the surface crust over can block emerging seedlings and stress the young root; waterlogging the bed can favor Pythium and other root pathogens and is associated with hairy root development.
A light mulch over the seeded area helps hold surface moisture without sealing the soil.
Thinning is the step many gardeners skip because pulling out seedlings feels wasteful, but crowded carrots compete for space and rarely develop well. Minnesota Extension’s carrot guide and Colorado State’s raised bed spacing resource both support thinning to roughly 2 to 4 inches between plants, depending on variety and the root size you want. Crowding is more likely to produce undersized, poorly formed roots than a single isolated stone would. Thin when seedlings are about an inch tall, using scissors to snip rather than pulling, which disturbs neighboring roots.
Utah State’s root-crop guide also reinforces that late cultivation around growing carrots can injure the developing taproot and worsen deformity, so once the bed is planted and thinned, leave the root zone alone.
A Misshapen Harvest Still Gives You Useful Information
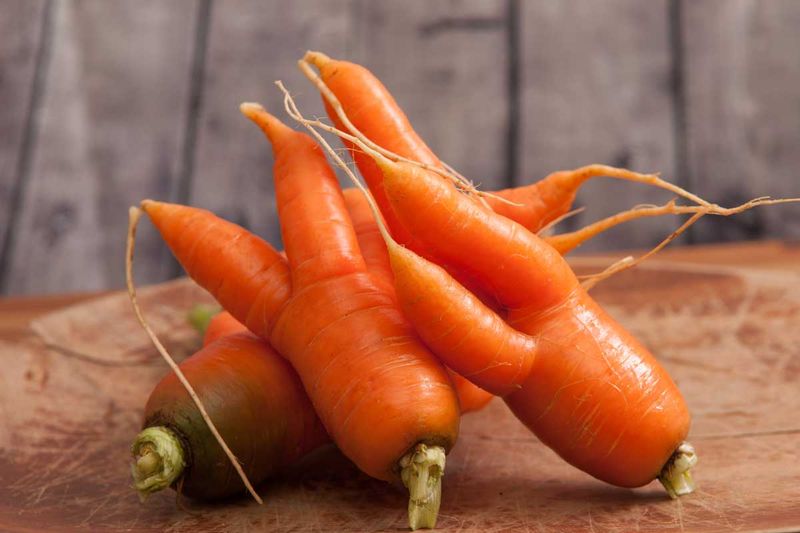
Crooked carrots are not wasted carrots. Shape is a quality issue, not a food-safety verdict, and most misshapen roots are perfectly usable once you know what to look for.
Penn State Extension’s root vegetable preservation guide recommends washing root vegetables thoroughly under running water and scrubbing them before eating or preserving. Trim away any damaged, soft, or discolored sections. Roots that are firm, free of rot, and free of disease-related decay are safe to eat regardless of their shape. Discard any carrot that shows signs of rot, sliminess, or decay, because those are spoilage signals that shape alone cannot predict.
Before you set the bed aside for winter, take a few minutes to record what you saw. Minnesota Extension’s carrot guide and Utah State’s root-crop soil guide together support a straightforward plan for the next planting: inspect the symptom pattern to identify the most likely cause, correct the bed before sowing by loosening it deeply and removing stones and debris, skip fresh manure, choose a short or rounded variety if the soil is shallow or heavy, direct-sow and thin on schedule, and keep moisture even through germination and early growth.
Every misshapen harvest is a map of what the root encountered on its way down. Read it, fix what you can, and the next crop will have a better chance of growing the way it was meant to.