
If Your Peace Lily Leaves Turn Black Instead Of The Usual Brown, Here’s The Root Habit Quietly Causing It
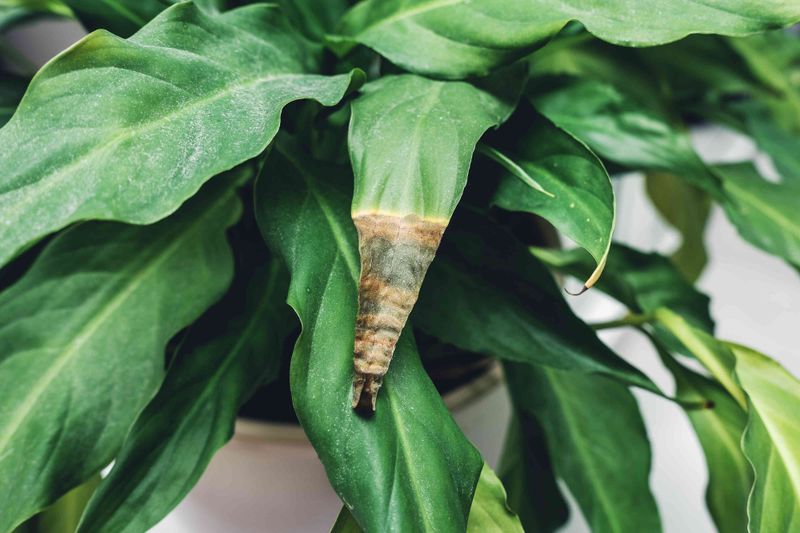
Seeing your peace lily’s leaves turn black can stop you in your tracks, especially when you’ve been trying your best to keep it healthy. Black leaf tissue feels more alarming than typical browning, but the color alone doesn’t tell you what went wrong or how serious the problem really is.
The good news is that a careful look at your plant’s roots, soil moisture, and recent care history can point you toward a real answer. This article walks you through a practical investigation so you can respond to what’s actually happening, not just react to the color.
Black leaves need context, not a verdict
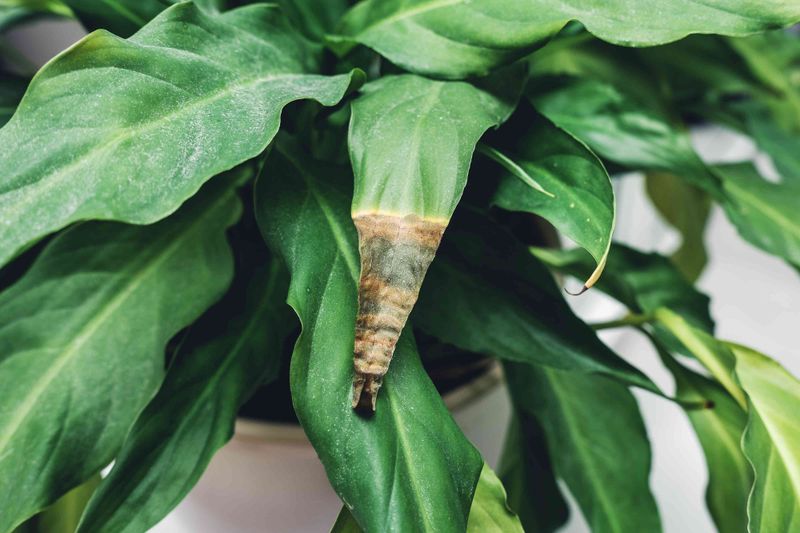
Leaf color tells part of the story, but not the whole thing. When a peace lily develops black tissue, whether at the tips, along the margins, in scattered blotches, or across an entire leaf, the color signals that something disrupted normal cell function.
What it does not do is identify the cause. Black edges can look almost identical whether they came from sitting in soggy soil, brushing against a cold window, absorbing too much fertilizer salt, or developing a fungal lesion.
The practical starting point is to resist treating color as a diagnosis. University of Florida extension guidance on diagnosing houseplants recommends examining the roots, moisture level, recent temperature exposure, fertilizer history, light conditions, and the pattern of the lesions before drawing any conclusions.
Each of those details can shift the likely explanation considerably.
A persistently wet root zone is the first practical possibility worth investigating, and this article will spend real time on it. Continuously saturated potting media can deprive roots of oxygen, damage them, and leave the plant unable to move water to its leaves even while the soil feels soaking wet.
That mechanism fits a recognizable pattern and is something a home grower can check and correct.
Other causes deserve attention when the pattern or history points toward them. UF/IFAS research on chilling injury in Spathiphyllum documents that cold exposure can blacken leaf tissue, particularly at tips and margins, and that mature leaves are especially vulnerable.
Salt or fertilizer injury, fluoride sensitivity, direct sun, underwatering, and leaf-spot disease can each produce black tissue under the right conditions.
Location matters too. Tip-first damage that spreads slowly inward reads differently from a sudden whole-leaf collapse or an irregular spot appearing in the middle of an otherwise healthy blade.
Soft, mushy tissue suggests something different from firm, dry blackening. Speed of spread, moisture in the pot, and what changed recently in the plant’s environment all add weight to one explanation or another.
The goal here is a diagnostic path, not a single guaranteed answer.
Persistently wet roots can damage the leaves
Roots need oxygen to function, and potting mix that stays waterlogged stops delivering it. When the air pockets in the growing medium fill with water and stay that way, the root cells begin to break down.
This is not about the plant’s tropical background or about a single generous watering. It is about conditions that remain stagnant and oxygen-poor for days or weeks at a stretch.
What makes this confusing for many growers is the wilting. A plant with a damaged root system may droop and develop black leaf edges even while its potting mix feels completely wet.
Iowa State University Extension guidance on diagnosing houseplant problems explains that wilting does not distinguish underwatering from overwatering, because roots that have been damaged by saturation can no longer move enough water to the foliage regardless of how wet the soil is. The plant looks thirsty while the medium is soaked, which often leads a concerned owner to water again and deepen the problem.
The connection between root damage and black leaf tissue runs through this water-transport failure. When roots can no longer supply the leaves consistently, the outermost or oldest cells are the first to lose function.
Edges and tips tend to go first, then larger sections of the blade if the root system continues to deteriorate. Blotches or collapse can follow as more of the root network shuts down.
Two specific habits drive persistent saturation most reliably. The first is watering again before the previous application has had a chance to move through and partially dry.
The second, and often overlooked, is a pot that sits in water it already drained. UF/IFAS care guidance for Spathiphyllum specifically flags a plant standing in collected drainage water as a source of the ongoing wet conditions that support root damage.
A decorative cachepot, a saucer that never gets emptied, or a sleeve that traps water at the bottom can all recreate waterlogged conditions even after the gardener has been careful about how much they pour in at the top.
None of this means that black leaves confirm root damage. It means that if the root zone has been staying wet, the mechanism connecting that habit to the leaf symptoms is real and worth checking before moving on to other explanations.
Inspect the pot and roots before watering
Before adding any more water, stop and look. The single most useful thing you can do when a peace lily shows black tissue is to hold off on watering and run through a quick inspection of the root zone.
Starting there prevents the common mistake of responding to a sick-looking plant by giving it more of whatever may have contributed to the problem.
Press a finger an inch or two into the potting mix. If it feels wet or soggy rather than barely moist, that is meaningful information.
A mix that has been consistently wet for an extended period is the environment where root damage develops, so finding it wet shifts the wet-root explanation from a possibility to a stronger candidate worth pursuing.
Next, check the physical setup. UF/IFAS Spathiphyllum care guidance highlights the importance of confirming that the inner pot has working drainage holes and that no water has pooled in a saucer, cachepot, or decorative sleeve beneath it.
Lift the pot out of any outer container and look underneath. Trapped drainage water can keep the root zone saturated long after you’ve stopped actively overwatering, so finding and emptying it is a concrete corrective step, not just a precaution.
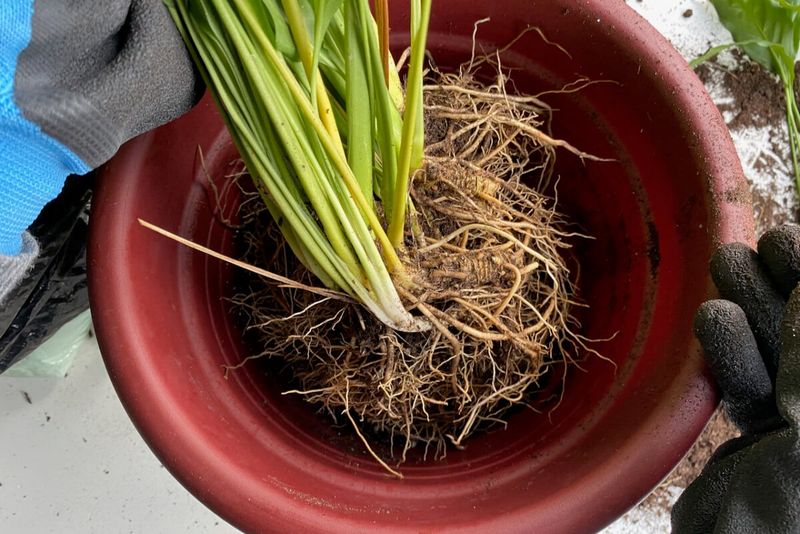
If the mix is wet and the drainage situation looks problematic, the next step is to check the roots directly. Gently slide the plant out of its pot.
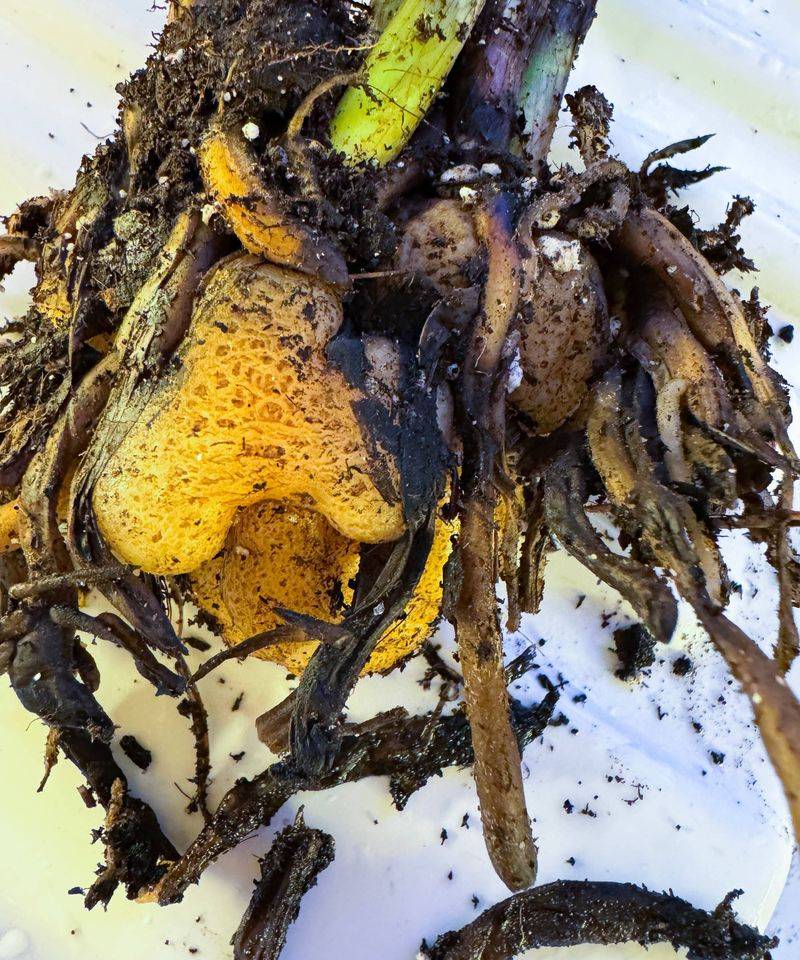
University of Florida’s houseplant diagnosis guidance describes healthy roots as firm and light-colored, while damaged or rotted roots are typically brown or black, soft, and may carry an unpleasant smell. You do not need laboratory confirmation to make this distinction.
Firm and pale means the roots are still functional. Soft, dark, and mushy means some degree of damage has already occurred.
What you find will sharpen or soften the wet-root hypothesis. Healthy, pale roots alongside a soggy mix suggest the saturation is recent and the plant may respond well to drainage corrections.
Soft, darkened roots with black leaf tissue together make a much stronger case that oxygen-depleted conditions have been ongoing long enough to cause real damage. University of Connecticut Extension’s ailing houseplant guidance notes that these findings support a corrective response, but they do not replace attention to other symptoms.
If the roots look fine and the mix is dry, the wet-root explanation becomes much less likely, and the search should shift toward cold exposure, salt buildup, or other possibilities covered later in this article.
Restore drainage and balanced moisture
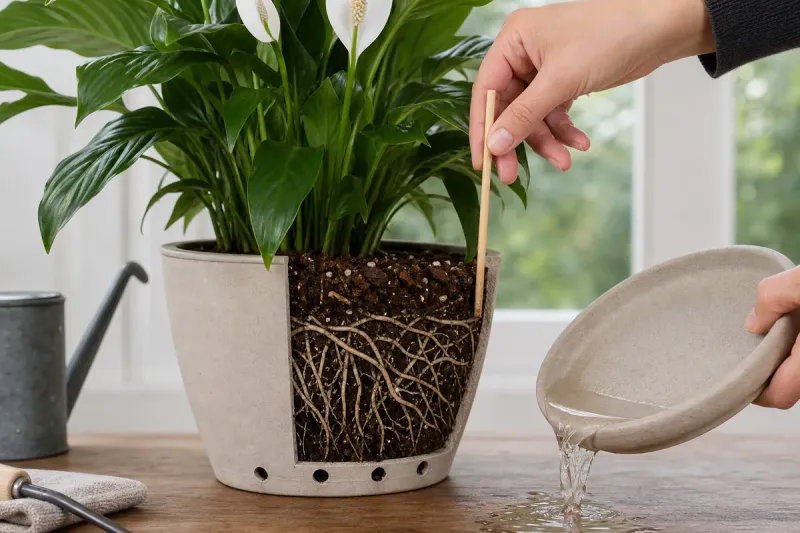
Once you have confirmed that the root zone has been staying too wet, the first practical correction is to stop the ongoing saturation. Empty any water sitting in the saucer, cachepot, or outer sleeve right away.
If the pot has been resting in collected drainage for any length of time, that standing water has been wicking back up into the mix and keeping the roots in the low-oxygen environment that drives the damage. Removing it is immediate and costs nothing.
Check that the inner pot has functional drainage holes. A pot without them, or with holes that have become clogged with compacted roots or debris, will hold water regardless of how carefully you water.
If drainage is blocked or absent, that structural problem needs to be fixed before adjusting any other part of your watering routine.
The watering habit itself matters more than any single application. NC State Extension’s peace lily profile is consistent with the broader guidance from extension sources: water thoroughly when the potting mix has become somewhat dry, then allow the excess to drain completely before the pot goes back into any outer container.
Do not water on a fixed weekly schedule without checking the mix first. Soil dries at different rates depending on pot size, season, humidity, and how much root mass is present, so a calendar-based routine will sometimes be too frequent and sometimes not frequent enough.
Peace lilies do prefer more consistent moisture than drought-tolerant plants like succulents or snake plants. Letting the mix go bone-dry for extended stretches is not the goal.
UF/IFAS guidance for Spathiphyllum frames the target as keeping the plant moist without leaving it continuously soggy, which is a meaningful distinction. The aim is to avoid both extremes: never waterlogged, never parched for long.
A practical checkpoint is to lift the pot after watering and again a few days later. A noticeably lighter pot signals that moisture has moved through and the mix is approaching the point where watering again makes sense.
That physical cue is more reliable than counting days. Correcting drainage and building a check-first watering habit removes the conditions that allow persistent saturation to develop, which is the underlying problem the leaf symptoms were pointing toward.
Reset damaged roots carefully
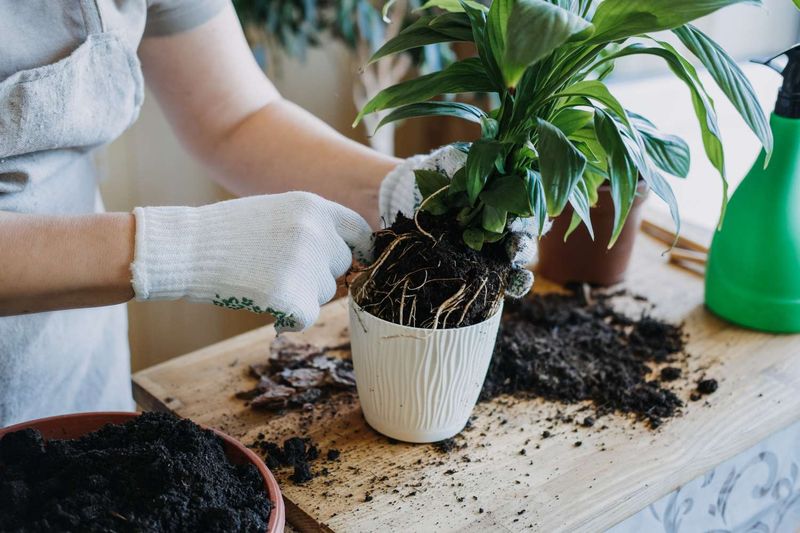
When root inspection reveals soft, brown, or black tissue, trimming and repotting give the plant a better environment to work from going forward. The process is straightforward, but a few specific choices make a real difference in whether it helps or creates new problems.
Start by removing the plant from its pot and shaking away as much of the old, saturated mix as you can without tearing healthy roots. Use clean scissors or pruning shears and cut away any roots that are soft, dark, or mushy.
Firm, light-colored roots should stay. University of Connecticut Extension’s guidance on ailing houseplants supports removing diseased or dead root tissue and repotting into fresh, well-drained mix as a corrective step, while also being clear that severely affected plants may not be recoverable.
That qualification matters: trimming and repotting improve conditions, but they do not undo damage that has already occurred throughout the plant’s vascular system.
Choose a clean container sized for the roots that remain after trimming, not for the plant’s original root ball. UF/IFAS Spathiphyllum care guidance and broader extension recommendations both caution against repotting into a pot that is disproportionately large.
A container much bigger than the remaining root system holds far more potting mix than the roots can draw moisture from, which means the outer portions of the mix stay wet for extended periods and recreate the same saturated conditions you are trying to correct. A snug, appropriately sized pot with fresh mix dries more evenly and gives recovering roots a better start.
On the foliage side, remove leaves that are fully black, mushy, or collapsed. UC IPM’s houseplant problem guidance supports removing dead or diseased tissue for sanitation and appearance.
Leaves that are partly green and still firm can stay for now, because they may still contribute some energy while the plant adjusts. Do not interpret leaf removal as a cure.
Cutting off damaged foliage improves the plant’s appearance and reduces the risk of disease spreading from dead tissue, but it does not fix the root zone, correct drainage, or guarantee that remaining leaves will stay healthy. The underlying conditions are what need to change, and the foliage cleanup is a supporting step, not the main event.
Protect recovery from cold, salts, and excess fertilizer
After correcting drainage and root conditions, reducing additional stress gives the plant the best chance to stabilize. Placement is a good place to start.
Peace lilies prefer warm, stable temperatures and indirect light, and they are more sensitive to environmental swings than many common houseplants.
Keep the plant away from cold windows, exterior walls in winter, air-conditioning vents, and drafty doorways. UF/IFAS research on chilling injury in Spathiphyllum documents that cold temperatures can damage leaf tissue, often beginning at tips and margins and progressing inward, and that the injury can turn tissue black.
Even brief exposure to a cold draft or a chilly windowpane on a winter night can produce damage that looks similar to what wet roots cause, which is part of why placement history matters when you are trying to identify what went wrong. Moving the plant to a consistently warm spot with bright, indirect light removes one significant stressor from the recovery period.
Fertilizer deserves restraint during recovery and as a general habit with peace lilies. NC State Extension notes that peace lilies are sensitive to soluble-salt buildup, and fertilizer applied too frequently or at too high a concentration can injure roots and burn leaf tips, producing browning or blackening that looks like a watering problem.
Skip fertilizer entirely while the plant is recovering from root damage, and when you resume, use a diluted application rather than the full recommended rate.
Water quality can also contribute to tip injury over time. Softened water carries elevated sodium, and some municipal water sources have fluoride levels that peace lilies find irritating.
Illinois Extension guidance on peace lily black leaves identifies fluoride and salt accumulation as possible contributors to tip damage. If tip blackening persists after drainage and temperature issues are corrected, watering thoroughly and allowing full drainage each time can help flush accumulated salts from the mix.
Switching to filtered or distilled water is worth considering when water quality fits the history of the problem.
Match the blackening pattern to other possible causes
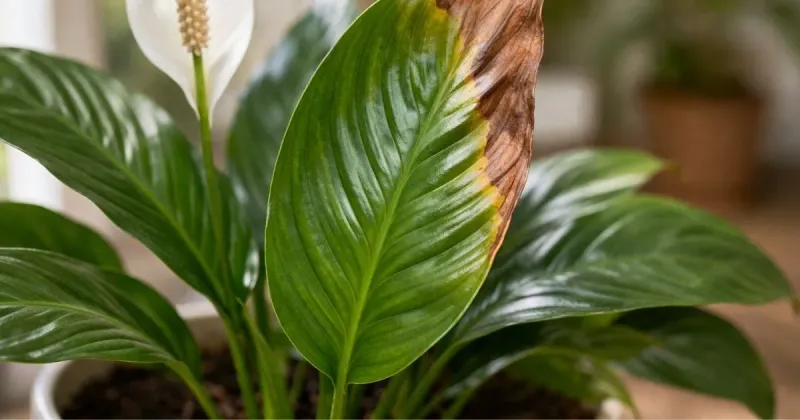
Wet roots explain a lot of black-leaf cases, but locking onto that explanation before checking the pattern can send you down the wrong path. A few simple observations about where the damage starts, how fast it moves, and what the tissue feels like can separate the wet-root scenario from several other causes that produce similar-looking results.
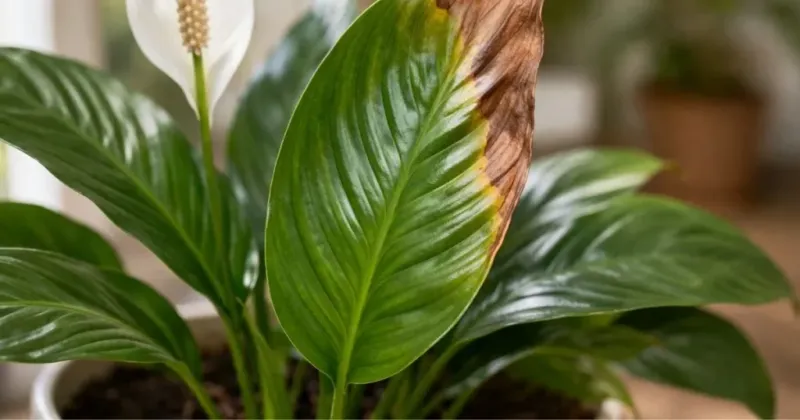
Tip- or margin-first blackening that develops slowly is the most common presentation, and it fits several causes equally well. Cold exposure, salt accumulation, fluoride sensitivity, underwatering, and direct sun can all begin at the leaf tips and work inward.
NC State Extension’s peace lily profile lists these as distinct possibilities that share similar visible symptoms, which is why moisture level, recent temperature history, fertilizer use, water source, and light exposure all need to be part of the evaluation rather than just the leaf color.
Rapid whole-leaf blackening that follows a cold event, such as a night near a single-pane window in winter or a move to an unheated space, points more directly toward chilling injury. UF/IFAS documentation of chilling injury in Spathiphyllum notes that mature leaves are particularly vulnerable and that the damage can progress quickly after the exposure.
If the timing lines up with a temperature event, that history matters more than any single symptom.
Irregular dark spots appearing in the middle of otherwise healthy leaf blades fit a different set of explanations. That pattern is more consistent with leaf-spot disease, edema, or localized physical injury than with a straightforward watering mistake.
Illinois Extension discussions of peace lily foliar problems include cases where irregular dark lesions prompted investigation of disease rather than root conditions.
Phytophthora foliar blight has been documented on Spathiphyllum, producing expanding dark brown-to-black lesions under high-moisture conditions. UMass Amherst’s Spathiphyllum Phytophthora documentation describes this as a documented disease affecting the species, but the presence of dark spots alone does not establish an infectious diagnosis.
Disease becomes a more serious consideration when spots expand rapidly, show water-soaked margins, affect multiple plants in close proximity, or persist after drainage and environment corrections are made. Improving sanitation, removing affected tissue, and correcting moisture conditions come before any chemical treatment.
Any pesticide application must be labeled for the specific use and applied exactly as directed.
Running through pattern, spread, texture, moisture history, temperature exposure, and fertilizer use together gives a much clearer picture than leaf color alone, and it keeps the response proportionate to what is actually happening.
Investigate first, then adjust the care routine
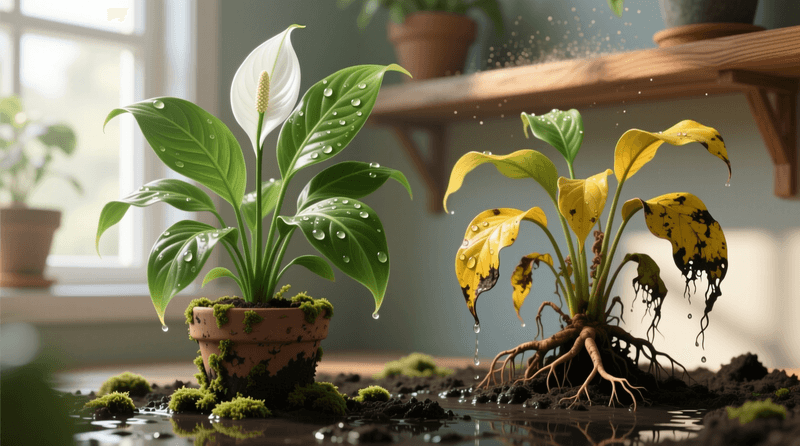
The clearest action plan starts with a pause. Before watering again, check the potting mix moisture, look for standing water in any outer container, and inspect the roots if the mix has been consistently wet.
Those three steps take less than ten minutes and tell you far more than the leaf color does on its own.
If the root zone has been staying saturated, correct the drainage, trim any damaged roots, and repot into a clean, appropriately sized container with fresh mix. UF/IFAS Spathiphyllum care guidance and University of Florida’s houseplant diagnosis resource both support this sequence as a practical corrective response.
Going forward, check the mix before each watering rather than following a fixed schedule, and empty any collected drainage water promptly after each watering session.
Existing black tissue is unlikely to recover its color or function, and there is no way to predict how a plant with significant root damage will respond to corrective care. Some plants stabilize and push out new healthy growth; others are too far along to recover.
Monitor new leaves as the clearest indicator of whether conditions have improved enough for the plant to move forward.
Black leaves call for investigation, not an automatic verdict. The habit of checking before acting, rather than reacting to color, is the most useful thing you can take from this article into your ongoing care routine.