
The Old-School Mulch Trick That Beats Fancy Watering Systems In Summer Heat
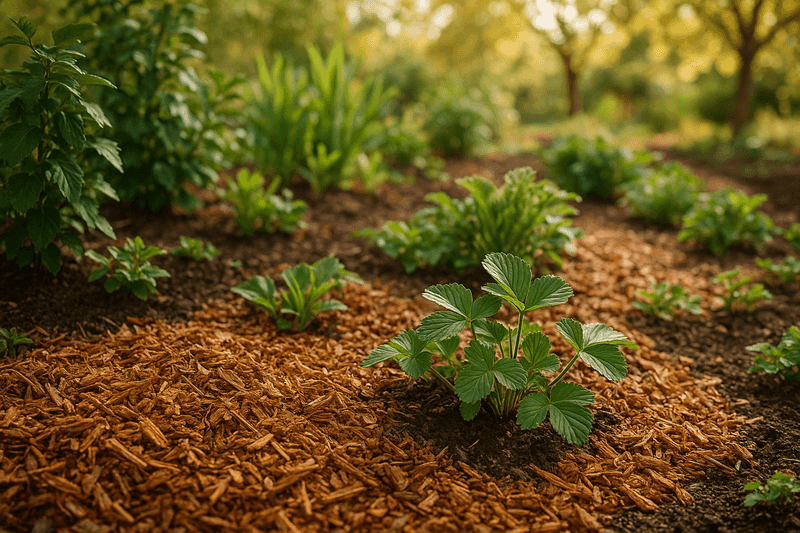
Every summer, backyard gardeners watch their soil dry out fast between waterings, and the usual response is to water more often. But adding a layer of mulch around your plants can slow that drying cycle down considerably, making each watering count for longer.
Mulch is one of the simplest tools you have for keeping your garden steadier through the heat, and knowing how to use it correctly makes all the difference.
Mulch protects the soil surface—it does not replace irrigation
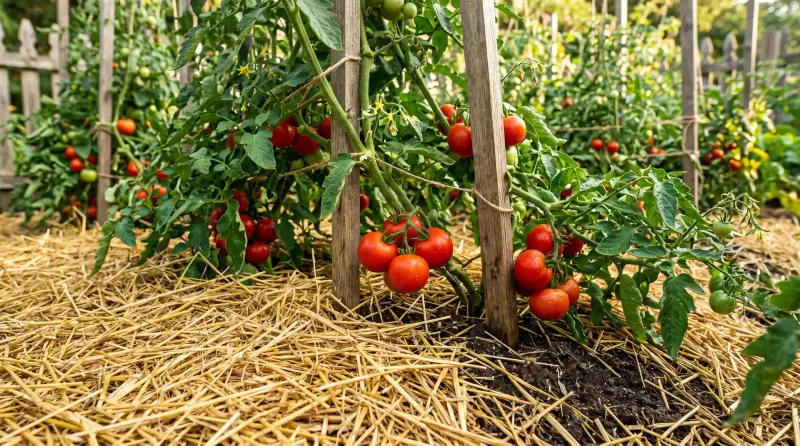
Picture your tomato bed on a 95-degree afternoon. The bare soil between plants bakes in direct sun, and moisture escapes from the surface faster than your last watering can replenish it.
Lay down a few inches of mulch, and you put a physical barrier between that hot air and the soil beneath, slowing evaporation and keeping root-zone temperatures more stable.
That is the core job mulch does: it reduces surface evaporation, moderates soil temperature, and suppresses weeds that would otherwise compete with your plants for whatever water is there. University of Minnesota Extension research on mulching for soil health confirms all three of those functions, and they all point toward the same practical outcome – your soil stays moist longer after each watering.
What mulch cannot do is deliver water to the root zone. That job still belongs to your hose, soaker hose, or drip line.
A well-designed drip system operates at roughly 90 to 95 percent application efficiency according to Washington State University Extension guidance on drip irrigation, because it puts water directly at the root zone with minimal wind drift or overspray. Mulch and drip address different losses entirely.
Mulch reduces what evaporates off the soil surface. Drip reduces what never reaches the soil at all.
Used together, they give your plants the most consistent moisture supply possible. Thinking of mulch as a replacement for irrigation will leave your plants short on water during heat waves, drought, or any stretch when the soil dries faster than usual.
Think of it instead as an upgrade to whatever watering routine you already have.
Prepare a moist, weed-free bed
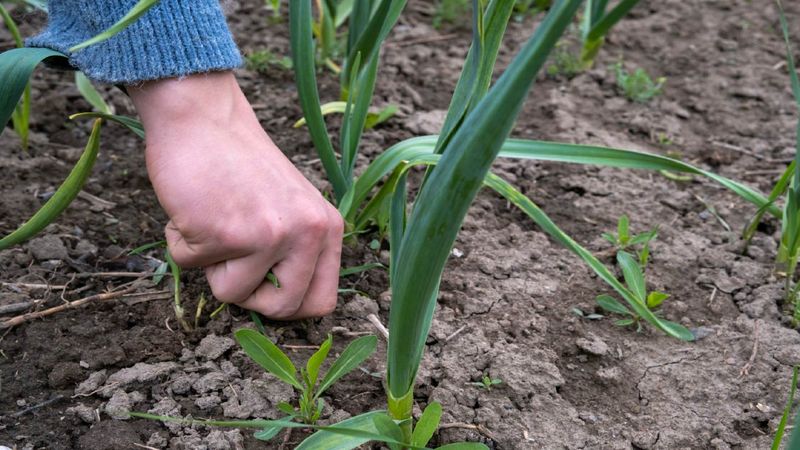
Before you open a single bag of mulch, spend a few minutes on preparation. The condition of your soil and the presence of weeds underneath will determine whether the mulch actually conserves moisture or just covers up a problem.
Start by checking the soil. Push a finger or a trowel about two inches down.
If it feels dry, water the bed thoroughly and let the water soak in before you mulch. The USDA NRCS Conservation Practice Standard for Mulching specifically advises ensuring soil is moist before mulching shallow-rooted crops, because once a thick layer goes down, dry soil beneath it can be difficult to rewet.
Mulch conserves moisture that is already present – it cannot manufacture water that was never there.
Next, remove the weeds. Pull or dig out any established plants, roots and all, paying particular attention to perennial weeds like bindweed or thistle.
A shallow or incomplete mulch layer will not stop a determined perennial weed from growing right through it, and any weed that survives will keep competing with your plants for the moisture you are trying to save. UMN Extension notes that weeds growing through mulch continue drawing water from the root zone just as they would in bare soil.
Clear away any debris, dead leaves, or old spent mulch that has compacted into a mat. Compacted material can impede the fresh layer from sitting evenly and can also block water from moving down to the roots.
A clean, moist, weed-free surface gives the new mulch the best possible conditions to do its job from the first day you spread it.
Spread an even two- to four-inch layer
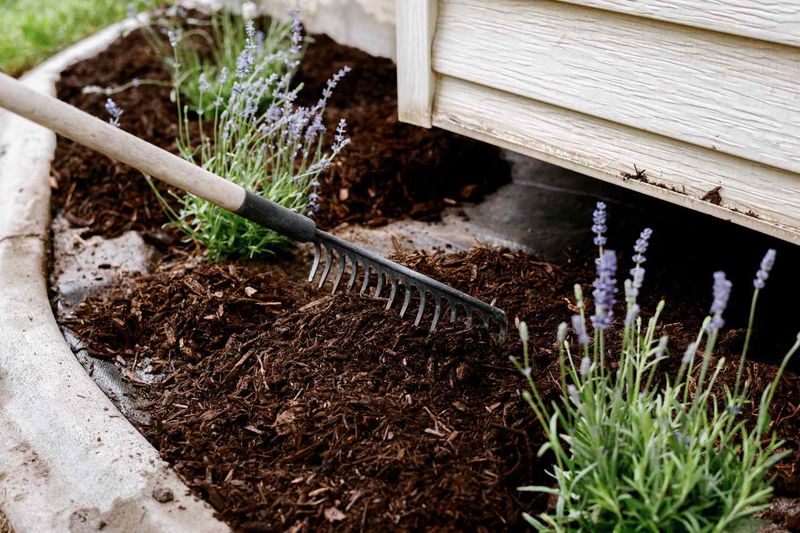
Two to four inches is the practical working range for organic mulch in most backyard beds. That depth is enough to meaningfully slow evaporation and moderate soil temperature without creating the problems that come with going deeper.
Penn State Extension’s survey of mulch options warns that layers deeper than three to four inches can restrict oxygen movement and water infiltration to the root zone. Fine or tightly packed materials make this worse – a thick mat of compacted mulch can actually shed rainfall and irrigation rather than letting it pass through.
Stay within that two-to-four-inch window and you get the moisture benefits without cutting off air and water exchange.
Apply the mulch evenly across the bed rather than mounding it anywhere. Rake it out so the surface is roughly level, then step back and check that no area is significantly thinner or thicker than the rest.
Thin spots will dry out faster and let weeds through; thick spots may block water and reduce oxygen to shallow roots.
Keeping mulch away from plant stems and crowns is not optional. Leave several inches of bare soil around the base of every garden plant.
For trees, Colorado State University Extension’s mulching guidance recommends at least six inches of clearance from the trunk. Mulch piled against bark or stems traps moisture against plant tissue, which can encourage rot, create hiding spots for insects and rodents, and cause bark problems over time.
A mulch volcano – that cone of material piled high against a tree trunk – is one of the most common and damaging mistakes in home landscapes. Spread the mulch outward in a wide, flat ring instead.
For a single garden bed, work from the outer edges inward, pull material back from every stem as you go, and confirm the gap is clear before you move on.
Match the mulch to the planting bed
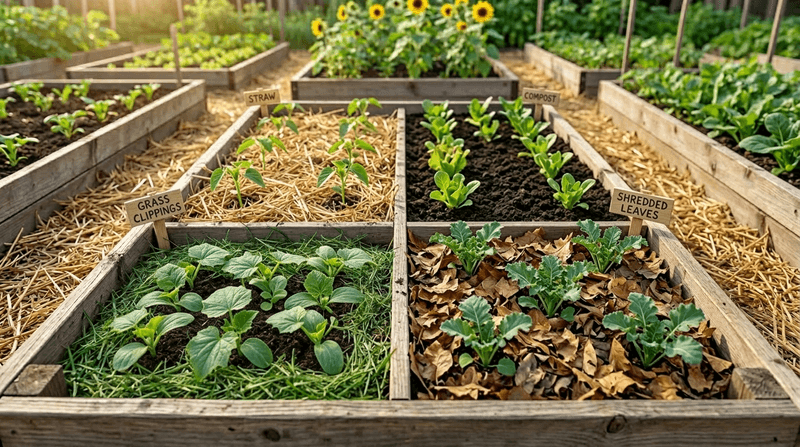
Mulch is not one uniform product. Wood chips, shredded bark, straw, grass clippings, compost, leaves, and landscape fabric all behave differently when it comes to water infiltration, soil temperature, decomposition rate, and weed suppression.
Choosing the right material for each bed makes a real difference in how well it works through the summer.
For shrubs, trees, and established perennial beds, coarse wood chips or shredded bark are a solid choice. They allow water to pass through reasonably well, break down slowly, and moderate soil temperature effectively.
UMN Extension’s mulching guidance recommends these coarser materials for woody and perennial plantings. One note from CSU Extension: shredded bark can transmit water less readily than wood chips in some conditions, so if you notice water beading on the surface rather than soaking in, switch to a coarser material or water more slowly.
Around vegetables, seed-free straw is widely recommended. It is lightweight, easy to tuck around plant bases, and breaks down over the season to add a little organic matter.
Avoid hay, which typically contains seeds that will sprout into weeds in your vegetable bed.
Grass clippings can work as a thin supplemental layer, but only if they are dry and applied no more than an inch deep. Wet clippings mat together quickly, forming a surface that sheds water instead of letting it through.
More critically, clippings from a lawn recently treated with a broadleaf herbicide can injure or kill garden plants. Penn State Extension’s herbicide guidance cautions that some residues persist long enough to cause plant damage when clippings are used as mulch.
One concern that sometimes stops gardeners from using wood chips is nitrogen. Oregon State University Extension’s wood chip mulch guidance clarifies that nitrogen competition is mainly a risk when fine woody material is mixed directly into the soil.
Coarse chips left on the surface around established plants are far less likely to cause a meaningful nitrogen problem. Keep the chips on top, not dug in, and your plants should be fine.
Make mulch and irrigation work together
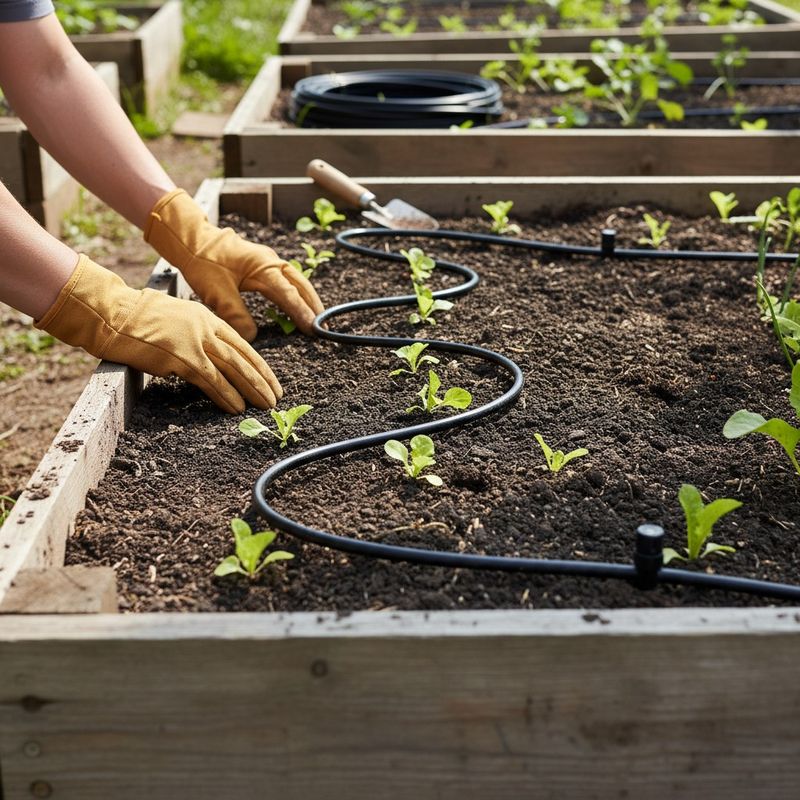
Mulch and irrigation solve different parts of the same problem. Your irrigation system – whether it is a hose, a soaker line, or a drip system – delivers water to the root zone.
Mulch slows how quickly that water escapes back into the air through surface evaporation. Running both together gives your plants a steadier supply than either one alone.
If you have a drip system, WSU Extension’s drip irrigation guide notes that drip laterals can be covered with mulch without losing effectiveness. Placing the line beneath or within the mulch layer protects the tubing from UV degradation and heat, and keeps the emitters delivering water directly into moist soil.
After you install or adjust the line, run it for a full cycle and then pull back a small section of mulch to confirm that water is actually reaching the root zone and not just pooling at the surface.
For gardeners using a hose or soaker line, the same principle applies. Water at soil level rather than overhead whenever possible.
Overhead watering wets foliage, which can encourage fungal issues, and a significant portion evaporates before it ever reaches the ground on a hot, windy afternoon.
Timing matters too. UMN Extension’s summer heat gardening guidance recommends morning watering because it reduces evaporation loss and gives foliage time to dry before evening.
Morning is also when soil temperatures are coolest, so water soaks in more efficiently before the day heats up.
One habit worth building is checking soil moisture before you water rather than following a fixed schedule. Push a finger or a wooden dowel about two inches into the soil near the root zone.
If it comes out with moist soil clinging to it, the plants are probably fine. If it comes out dry and clean, water thoroughly.
Leaf appearance alone is not a reliable guide – plants can wilt on hot afternoons even when soil moisture is adequate, because leaves lose water faster than roots can supply it in extreme heat. Mulch helps buffer that cycle, but it does not eliminate it.
Use tomatoes to stabilize summer moisture
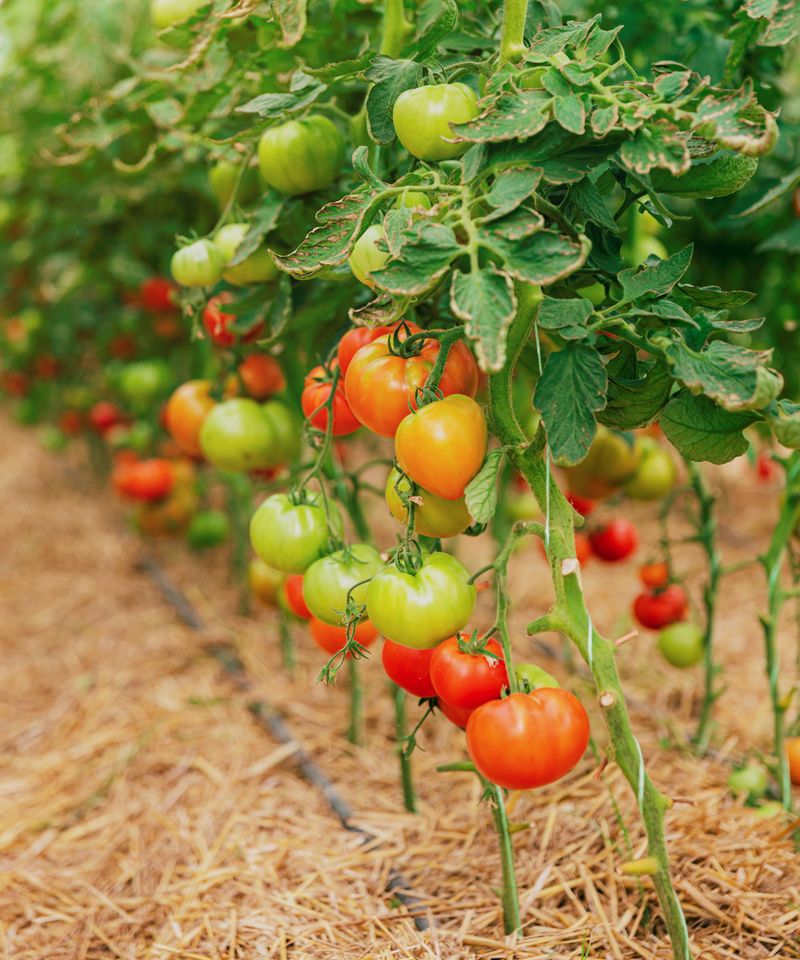
Tomatoes are one of the clearest examples of why consistent soil moisture matters in summer. They are heavy feeders and thirsty plants, and they respond poorly to the boom-and-bust cycle of soil that dries out completely between waterings and then gets soaked all at once.
Penn State Extension’s tomato growing guide recommends two to three inches of seed-free straw or bark chips around tomato plants and advises checking soil moisture at about two inches deep to guide watering decisions. That finger-test habit matters more than any fixed schedule, because tomato water needs shift with temperature, plant size, and fruit load.
A small plant on a cool cloudy day needs far less water than a heavily fruiting plant during a heat wave.
Keeping moisture more even through the season can lower the risk of two common tomato frustrations: blossom-end rot and fruit cracking. Both are associated with fluctuating moisture levels during fruit development.
Mulch helps buffer those fluctuations by slowing the drying cycle between waterings, so the root zone does not swing from wet to bone-dry as dramatically.
That said, mulch is not a cure for every tomato problem. Penn State Extension’s heat stress and tomato guidance explains that blossom drop during high heat is a separate issue driven by temperature extremes, not moisture alone.
When daytime temperatures stay above 95 degrees or nights stay above 75 degrees, tomato flowers can drop regardless of how consistent your soil moisture is. Fungal diseases, bacterial problems, and pest damage are also not solved by mulch.
Think of it as one tool that addresses one specific variable – moisture stability – rather than a broad fix for whatever your tomato plants are struggling with this season.
Prevent mulch from creating new stress
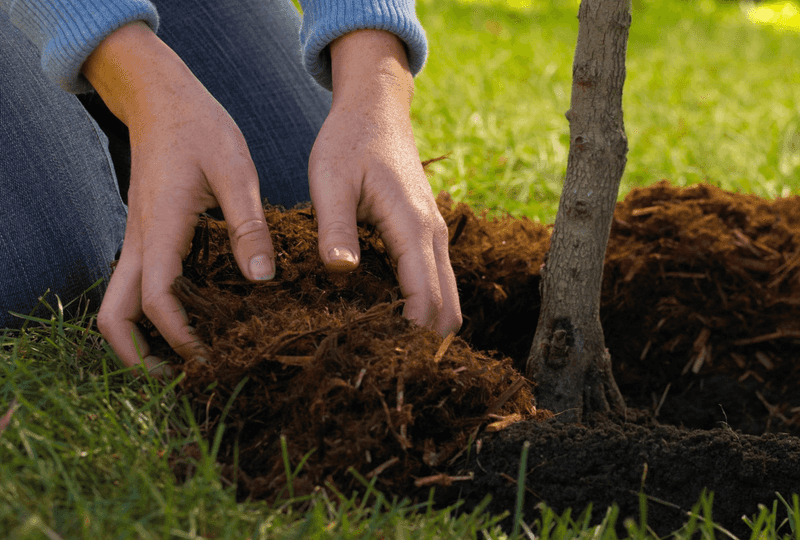
Applied correctly, mulch is a straightforward tool. Applied carelessly, it can create the exact stress it is supposed to prevent.
A few specific mistakes account for most of the problems gardeners run into.
Piling mulch against stems, crowns, or trunks is the most common error. CSU Extension’s mulching resource is direct about the consequence: mulch touching bark retains moisture against plant tissue, which can promote rot, attract insects and rodents, and damage the cambium layer under the bark over time.
Keep that gap clear every season, not just when you first apply it.
Going too deep is the other frequent problem. Layers beyond four inches – especially with fine or tightly packed materials – can reduce oxygen in the root zone and block water from moving down to the roots.
Penn State Extension specifically flags that layers deeper than three to four inches can restrict both oxygen and water movement. More mulch is not better mulch.
Applying mulch over dry soil is another setup for failure. If the bed is already dry, the mulch will lock in that dry condition and make it harder to rewet the soil from above.
Always water first, confirm the soil is moist at root depth, and then spread the mulch.
For grass clippings, the herbicide risk is real enough to take seriously in any edible bed. Use clippings only from untreated lawns, and apply them in thin layers so they do not mat.
Unknown recycled mulch sources warrant similar caution around vegetables – Penn State Extension notes that some dyed mulch may come from recycled pallets or construction wood whose prior treatment is impossible to verify.
On the nitrogen question, Oregon State University Extension makes a useful distinction: nitrogen competition is mainly a problem when fine woody material gets mixed into the soil. Surface-applied coarse chips around established plants are much less likely to cause measurable nitrogen loss.
Keep chips on top and out of the planting holes.
Finally, do not expect mulch to diagnose or fix plant diseases. Illinois Extension’s clematis guidance notes that clematis wilt is a fungal disease – not a moisture problem – and mulch will not cure it.
The same logic applies to tomato fungal issues, bacterial diseases, and most pest damage. If a plant is declining and the soil moisture is adequate, look past the mulch for the real cause.
Treat mulch as a watering upgrade, not a watering substitute
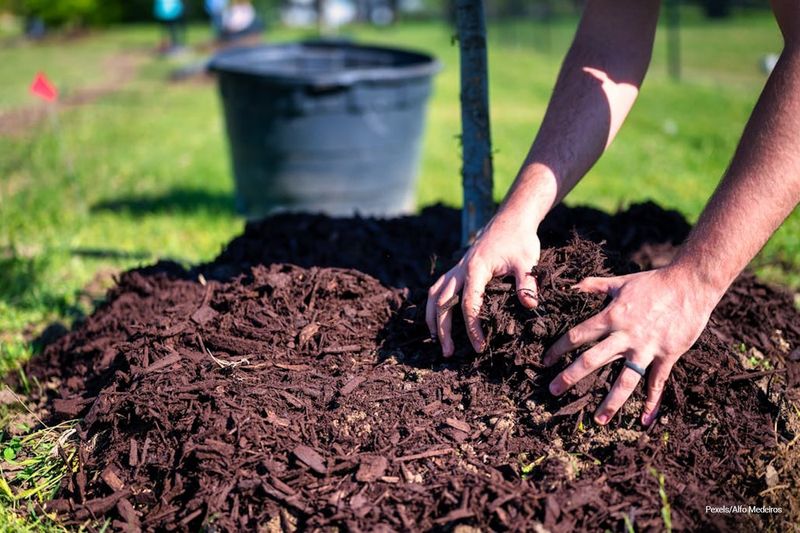
Here is the practical checklist: water the bed until the soil is moist two to three inches down, pull every established weed, choose a material suited to the bed (coarse wood chips or bark for shrubs and perennials, seed-free straw for vegetables), spread it two to four inches deep, and pull it back from every stem and trunk before you walk away. Then check the soil again in a few days before you water, rather than watering on a fixed schedule.
UMN Extension and UMN’s summer heat gardening guidance both support this approach: mulch makes watering more consistent and can reduce how often you need to water, but it does not eliminate the need. During prolonged heat, drought, or windy stretches, the soil will still dry out and plants will still need water.
Containers, sandy soils, newly planted crops, and anything still getting established may need daily attention regardless of how well the mulch is doing its job.
Used well, mulch is one of the most cost-effective steps a backyard gardener can take – not because it replaces irrigation, but because it makes every gallon you apply work harder and last longer.