
The One Thing North Carolina Gladiolus Corms Need Before The First Frost Or Next Summer’s Show Never Comes
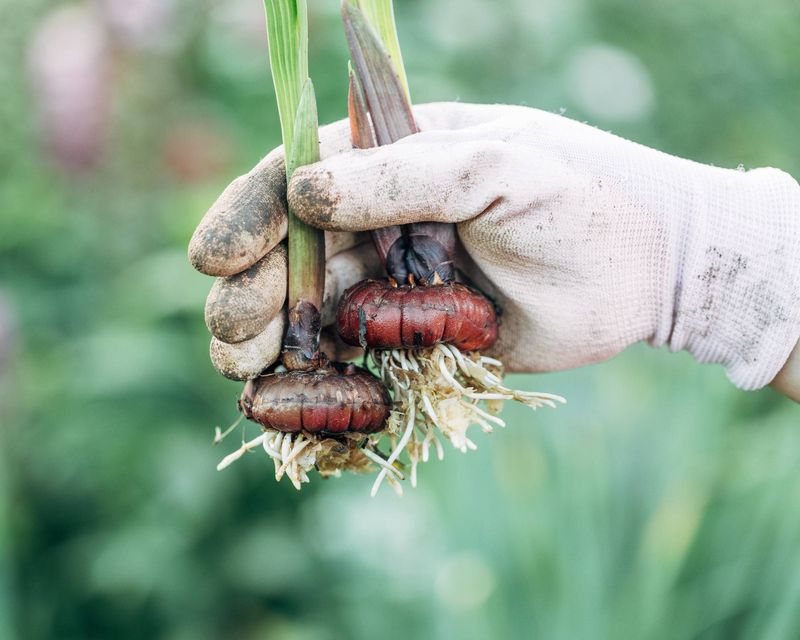
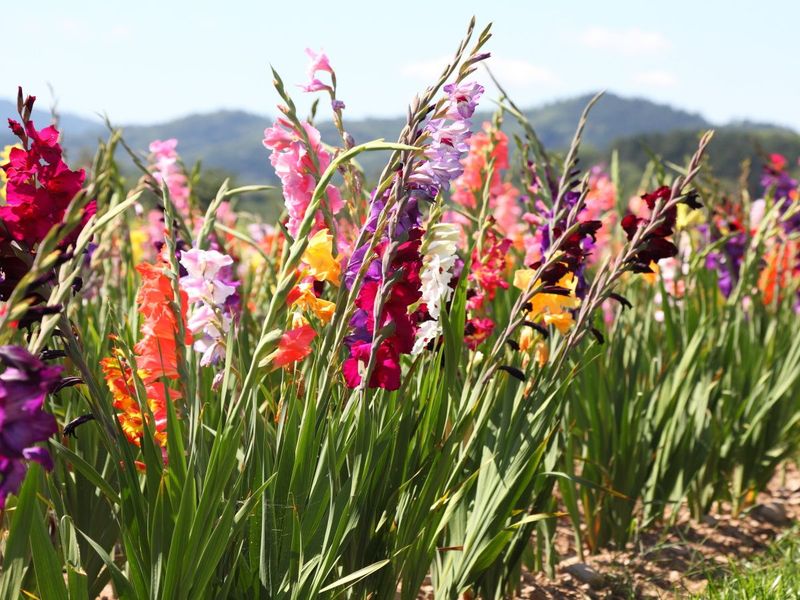
Gladiolus put on one of the boldest flower shows in any North Carolina yard, but those big corms hiding underground need some attention before winter sets in. The good news is that the deadline is less rigid than you might think, and missing the first frost does not automatically mean your summer display is gone.
What matters most is knowing when and how to lift, cure, and store common garden gladiolus corms so they come back healthy and strong. Get the steps right this fall, and next July’s spikes will prove it was worth the effort.
The title’s deadline is too strict—but the winter risk is real
Garden gladiolus are often sold alongside tulips and daffodils at the nursery, but they are a fundamentally different kind of plant. Tulips and daffodils grow from true bulbs and are generally cold-hardy enough to stay in the ground through a North Carolina winter.
Gladiolus grow from corms, which are solid, starchy storage organs wrapped in a papery husk, and most popular large-flowered garden hybrids are considered tender, meaning they did not evolve to survive hard freezes in cold, wet soil.
That distinction matters because a lot of gardening advice treats the first fall frost as a hard deadline: dig before it hits or lose next summer’s flowers. That framing overstates the case.
NC Cooperative Extension guidance on overwintering tender bulbs describes gladiolus as tender and notes that corms left outdoors face a low survival rate in winter conditions, but “low survival rate” is not the same as “certain failure.” A corm that stays in the ground through a mild, dry winter in a well-drained bed may survive and bloom again. The risk, though, is real and worth taking seriously.
Leaving common tender hybrids in cold or wet winter soil raises the chances of freezing damage, fungal rot, and weaker flower spikes the following summer. The NC State Extension Gardener Handbook groups gladiolus among tender bulbs that are normally dug after frost, stored through winter, and replanted in spring.
That is the standard practice for a reason. The goal of this article is to walk you through that process with accurate timing, safe handling, and storage conditions that give healthy corms the best possible shot at blooming next year.
One more clarification before the details: the word “bulb” gets used loosely in everyday gardening talk, and you will see it here too when the context is informal. Technically, gladiolus grow from corms.
Knowing that helps you understand why the storage and handling advice differs slightly from what you read about tulips or hyacinths.
Use foliage maturity and the forecast to choose digging day
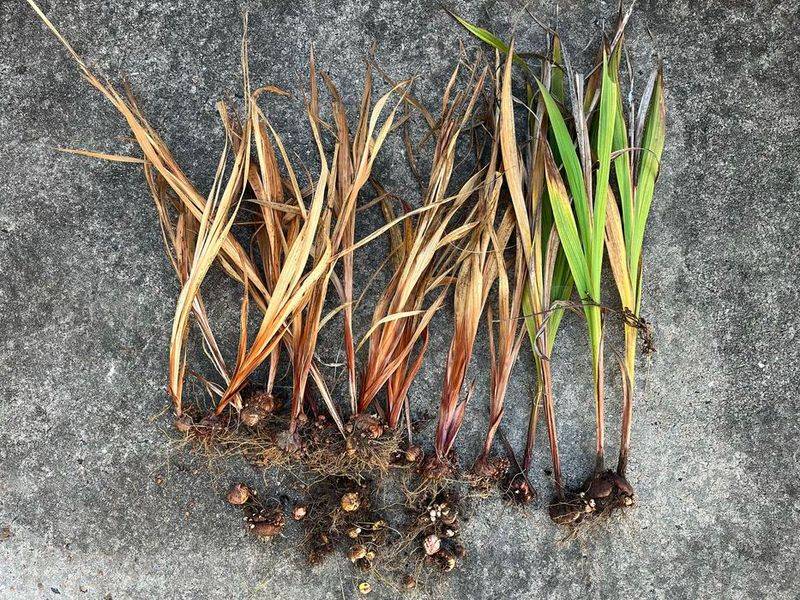
Timing the dig correctly is one of the most important decisions in the whole overwintering process, and it starts with watching the leaves, not the calendar. After gladiolus finish flowering, the foliage keeps working.
Those long, sword-shaped leaves are still moving energy downward into the corm, building up the food reserves that will power next summer’s roots and spikes. Cutting healthy green leaves immediately after the flowers fade short-circuits that process and sends a weaker corm into storage.
Purdue Extension’s guidance on gladiolus storage states that corms should be allowed to mature as fully as possible before digging. The practical signal is straightforward: wait until the leaves naturally yellow and die back, or until a frost kills the foliage.
Once the leaves are dead, the corm has done most of its work, and the clock shifts. NC Cooperative Extension adds that delaying removal after frost can increase rotting, so prompt action after foliage dies is the sensible move.
Here is where the forecast enters the decision. Not every cold night carries the same risk.
The National Weather Service draws clear distinctions: a frost event near 36 degrees Fahrenheit can damage tender foliage but may not freeze soil deeply; a freeze at 32 degrees or below is more damaging; a hard freeze at 28 degrees or below poses serious risk to corms near the soil surface. NWS frost and freeze maps for North Carolina show how widely those thresholds vary by elevation and region across the state.
A single statewide digging date makes no sense when a mountain garden near Boone can see a hard freeze weeks before a garden near Wilmington sees its first light frost.
The practical rule: let the foliage mature and use frost damage as your normal trigger. If a severe freeze is forecast before the foliage has fully yellowed, or if the soil has turned persistently wet, go ahead and dig early.
Protecting the collection from a hard freeze or rot is worth bending the timing rule. A 36-degree overnight forecast alone, without forecast ice or sustained wet conditions, is not an automatic signal to grab the fork.
Lift the clump gently and prepare it for curing
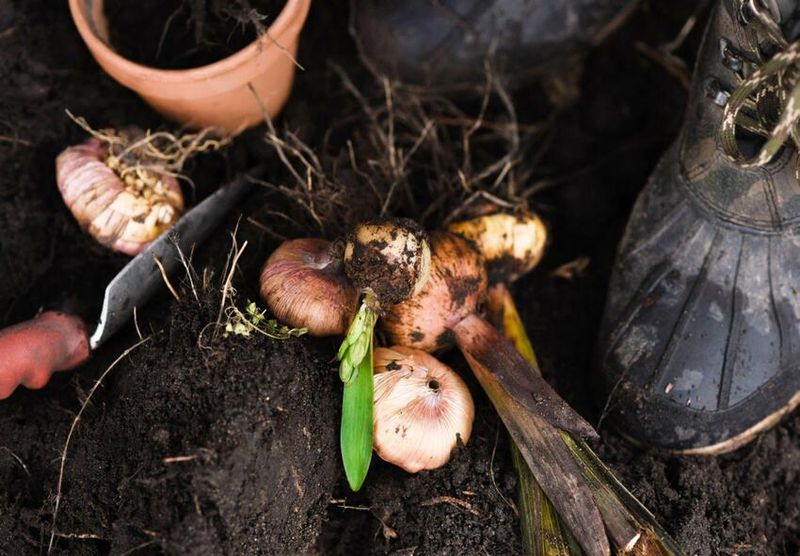
Digging gladiolus corms is not difficult, but a few careless moves with a spade can cause damage that follows the corm all the way into storage and shows up as rot months later. Wounds, cuts, and skinned patches on the corm’s surface create easy entry points for the fungi and bacteria that cause storage losses.
Taking an extra minute to dig carefully is genuinely worth it.
Start by pushing a garden fork or spade into the soil several inches away from the base of the stem, not right up against it. Work around the clump, loosening the soil on multiple sides before you try to pry the corm upward.
NC Cooperative Extension’s overwintering guide recommends this careful approach to avoid cutting or bruising the corms during extraction. Once the soil around the clump is loose, lift it gently rather than pulling the stem, which can snap the top off and leave the corm partially exposed.
After the clump is out of the ground, shake away the loose soil. You do not need to scrub or wash every corm clean.
Extension guidance varies on washing: some sources recommend it, while NC State cautions against washing clinging soil from several tender bulb types. Removing loose soil is sufficient and keeps handling simple.
Purdue Extension’s corm handling guidance also notes that cut, bruised, or skinned areas invite pathogens, so the gentler the process, the better.
Once the soil is off, trim the remaining foliage down to roughly one to two inches above the top of the corm. University of Illinois Extension guidance on storing summer-blooming bulbs supports trimming the tops short at this stage.
Do not remove the papery husk that wraps the corm; that outer layer offers some protection during curing and storage. Set the trimmed clumps aside in a shaded, airy spot while you finish the bed, and move them indoors to cure as soon as the day’s digging is done.
Cure the corms before moving them into winter storage
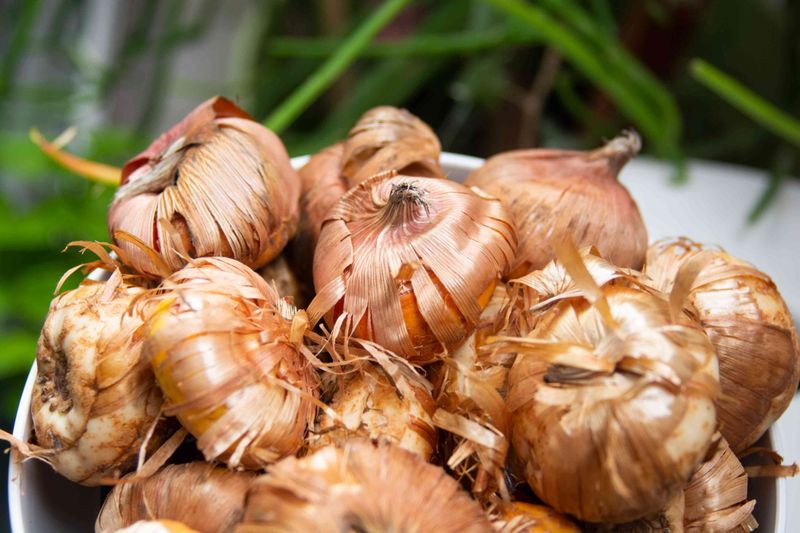
Freshly dug corms still carry moisture from the soil and from the cut tissues at their tops. Moving them straight into a cool basement or closet before that moisture escapes sets up exactly the kind of damp, still environment where fungal rot takes hold.
Curing solves that problem by drying and toughening the corm’s outer surfaces before the temperature drops in storage.
The process is straightforward. Spread the corms in a single layer, not piled on top of each other, in a warm, dry location with good air circulation and no direct sun.
Purdue Extension recommends curing gladiolus corms at approximately 80 to 85 degrees Fahrenheit for two to three weeks before moving them into cooler storage. A warm room, a heated garage in mild fall weather, or a covered porch that stays genuinely warm are all reasonable options as long as the temperature stays in that range and air moves freely around the corms.
Temperature swings during curing are worth avoiding. When warm corms move into a significantly cooler space and back again, condensation can form on their surfaces.
That surface moisture is a welcome mat for the molds and bacteria that cause storage rot. NC Cooperative Extension’s tender bulb guidance also recommends a warm, dry, well-ventilated curing environment, reinforcing the value of steady conditions over the curing period.
One detail that trips up some gardeners: curing conditions and storage conditions are not the same thing. The warm, dry environment that dries the corms after digging is a temporary step, not where the corms spend the whole winter.
After the two-to-three-week cure, the corms move to a cooler location that stays frost-free. University of Illinois Extension’s storage overview notes the same two-phase approach, distinguishing the initial drying period from the longer cool-storage phase.
Keep that distinction clear, and the transition from fall curing to winter storage goes smoothly.
Sort the corms and save useful cormels
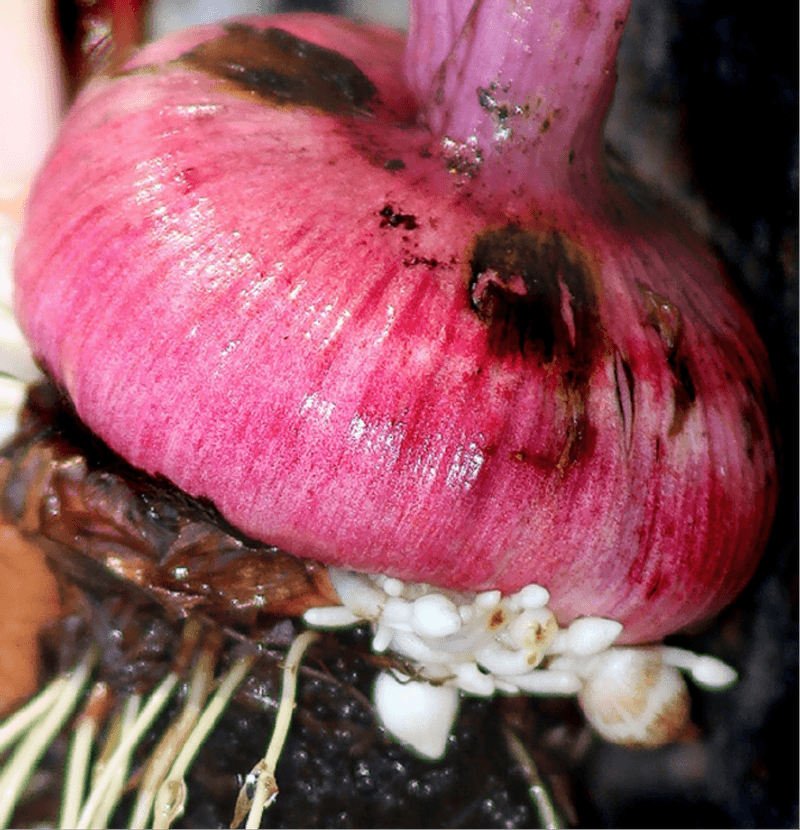
After curing, you have a window to look closely at every corm before it goes into storage. This inspection step is one of the most practical things you can do for next summer’s display, because a rotting or diseased corm stored alongside healthy ones can spread the problem through the whole collection before spring arrives.
Handle each corm and look for soft spots, sunken areas, dark or water-soaked discoloration, visible mold, or a foul smell. Any corm showing those signs goes in the trash, not the storage bag.
Purdue Extension’s gladiolus guidance is direct on this point: discard soft, discolored, visibly diseased, badly damaged, or rotting corms rather than hoping they recover in storage. Keeping compromised material with healthy stock is how losses multiply.
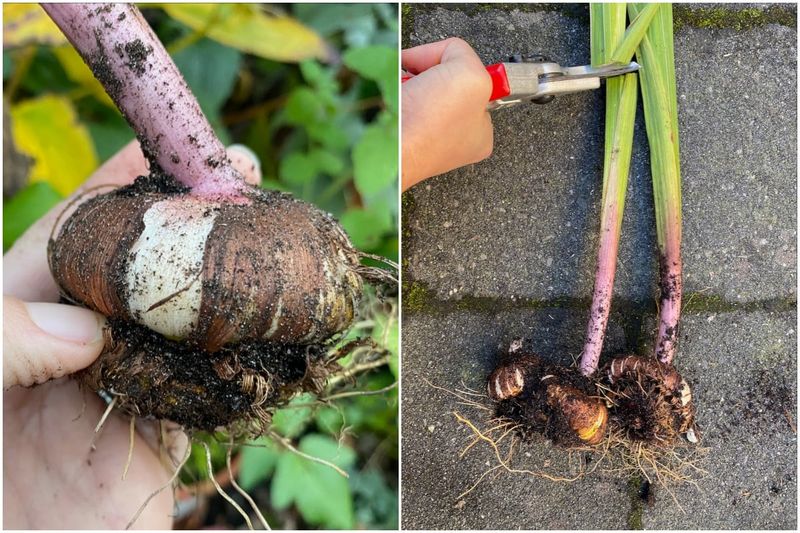
Next, look at the base of each new corm. You will likely find the old, shriveled mother corm still attached underneath the plump new replacement corm that formed this season.
Twist or snap off that old corm and discard it. It has spent its energy and will not produce a flower spike.
The firm, new replacement corm above it is what you want to keep.
Around the base of the clump, you may also find cormels, which are small, hard, pea-sized offsets. University of Illinois Extension’s bulb guide and University of Missouri Extension’s gladiolus publication both note that cormels are a legitimate way to propagate gladiolus, but they commonly need two to three growing seasons to reach flowering size.
Saving them is worthwhile if you are patient, but they will not add to next summer’s display. Store them separately from the full-size corms, label them clearly, and plant them out in spring with realistic expectations about when they will bloom.
Store common garden gladiolus cool, dry, and breathable
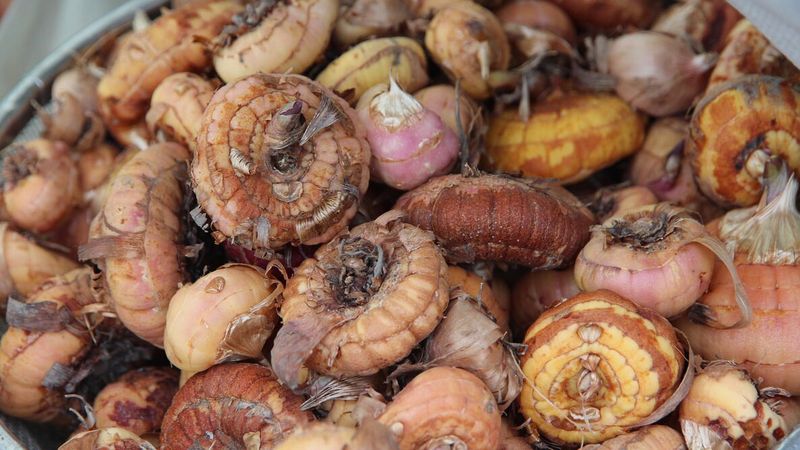
Once the corms are cured, inspected, and sorted, the winter storage setup determines whether they arrive at spring planting in good condition or as a bag of mush. Three conditions matter most: the right temperature range, low humidity, and steady air movement around every corm.
For common large-flowered garden gladiolus, multiple extension programs converge on roughly 35 to 45 degrees Fahrenheit as the target storage temperature. Purdue Extension recommends 35 to 40 degrees Fahrenheit for stored gladiolus corms, and University of Missouri Extension’s gladiolus guide gives a range of 35 to 45 degrees Fahrenheit.
University of Georgia Cooperative Extension also recommends 35 to 40 degrees Fahrenheit for stored gladiolus. These are practical targets for common hybrids, not universal rules for every gladiolus species or cultivar.
The container choice matters as much as the temperature. Mesh bags, onion sacks, open paper bags, or shallow trays that allow air to circulate freely are all good options.
Sealed plastic bags and airtight containers trap moisture and raise rot risk significantly. NC State Extension’s plant toolbox entry for gladiolus and NC Cooperative Extension’s overwintering guidance both support breathable storage over sealed containers.
Do not pack corms so tightly that air cannot move between them.
Labeling before storage saves real frustration in spring. North Dakota State University Extension’s gladiolus column recommends labeling stored corms by cultivar or flower color so you can plan and place them intentionally when replanting.
A simple tag or a marker on the bag takes thirty seconds and prevents a spring guessing game.
Check the stored corms every few weeks through winter. Pull out any that have turned soft or show signs of rot, because one deteriorating corm can affect its neighbors.
As for storage location: an unheated garage can work in milder parts of North Carolina, but only if it genuinely stays above freezing through the coldest nights. A garage that dips below 32 degrees Fahrenheit, an exposed porch, or any space that freezes is not suitable.
A cool basement, an insulated crawl space, or a refrigerator set to the right temperature range are more reliable options in colder parts of the state.
Adjust the decision for region, cultivar, and drainage
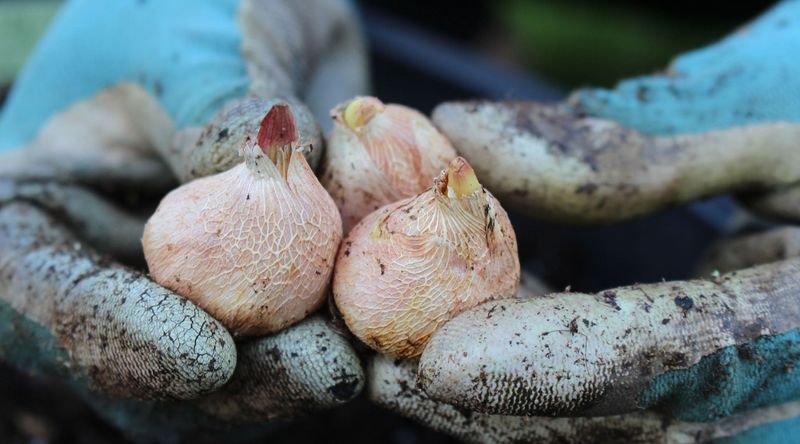
North Carolina stretches from sea level to over 6,000 feet, and that range means a single statewide digging schedule makes no practical sense. The timing and urgency of corm lifting depends heavily on where your garden sits, what you are growing, and how your soil drains through the wet months.
The western mountains around Boone, Asheville, and the High Country see the coldest winters in the state, with hard freezes arriving earlier and lasting longer than in the Piedmont or along the coast. The NC State Extension Gardener Handbook notes that the western mountains are generally colder than the Piedmont and coastal regions and that tender bulbs may survive in warm climates but are not reliable through severe freezing.
Mountain gardeners growing common tender hybrids should treat lifting and overwintering as close to mandatory as any garden practice gets. Leaving corms in mountain soil through a typical winter carries a high risk of freezing or rotting.
Piedmont gardeners face a middle ground. Winters in the Triad, Triangle, and Charlotte areas are milder than the mountains but still cold enough to damage or kill common gladiolus corms left in poorly drained soil.
Acting after foliage dies back and before the ground freezes is the sensible approach.
Along the Coastal Plain and near the coast, winters are gentler, and some gardeners have had corms survive in particularly well-drained, sheltered beds. That possibility is real, but it should not be mistaken for a reliable strategy for common large-flowered hybrids.
Wet winter soil along the coast raises rot risk even when temperatures stay above freezing. If drainage is excellent and winters are mild, the odds improve, but the corms are still not reliably hardy.
Cultivar choice also shifts the calculation. Most popular garden gladiolus are tender, but some types are more persistent.
The RHS growing guide for gladioli identifies Gladiolus communis subsp. byzantinus as a hardier type that may remain in the ground in favorable locations, unlike the common large-flowered hybrids that are typically lifted each year. If you are growing byzantinus in a well-drained spot in a mild part of North Carolina, leaving it in place may work.
For common hybrids anywhere in the state, lifting remains the lower-risk choice.
Whenever you store corms through winter, plan to replant after the danger of spring frost has passed. NC Cooperative Extension and University of Illinois Extension both point to after the last frost date as the appropriate planting time, which again varies by region across North Carolina.
Give next summer’s flowers a better chance
Pulling this all together comes down to a short sequence of decisions. Watch the foliage after flowering finishes.
When it yellows naturally or frost kills it, dig the corms promptly. If a hard freeze is bearing down before the leaves have matured, or if the soil has turned persistently wet, go ahead and dig early rather than waiting for the textbook trigger.
Lift carefully, shake off loose soil, trim the tops short, and move the corms inside the same day.
Cure them warm and dry for two to three weeks, then inspect every corm and discard anything soft, discolored, or diseased. Separate the new replacement corm from the spent mother corm beneath it.
Store the survivors in a breathable container at roughly 35 to 45 degrees Fahrenheit, frost-free and with good air movement. NC Cooperative Extension and Purdue Extension both back this approach as the standard practice for common tender gladiolus corms.
Check on them through winter and remove any that rot.
Following these steps improves the odds of a strong summer display, but it does not guarantee flowers from every corm. Badly diseased, frozen, or damaged corms will not recover in storage, which is exactly why the inspection and discard step matters.
The first frost is not an absolute deadline, and missing it does not doom next summer’s garden. What actually protects next year’s show is giving healthy corms a clean, properly conditioned place to wait out the winter.